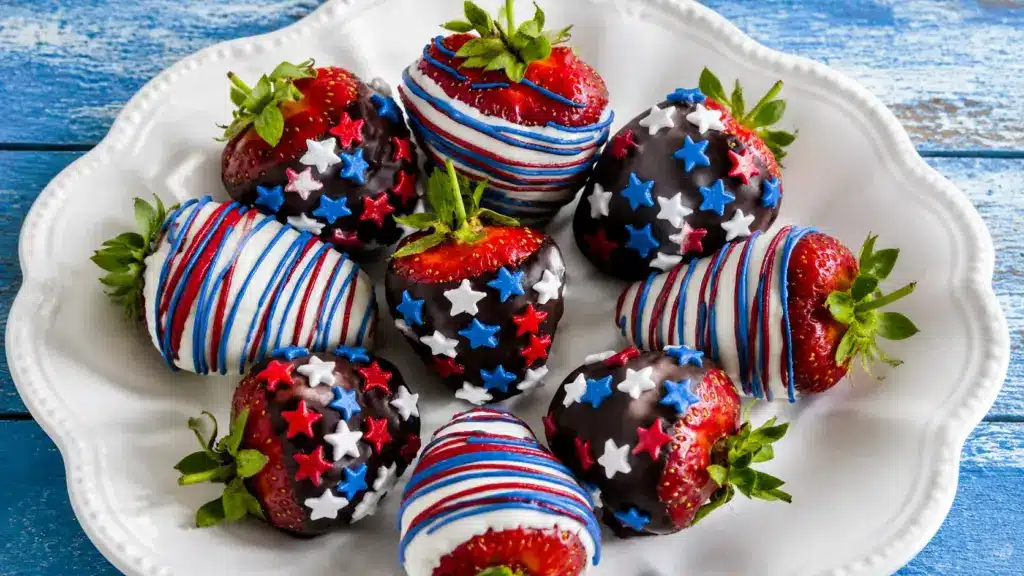

Bright red strawberries, creamy white layers, and deep blue berries instantly define summer party tables, yet most red, white, and blue desserts repeat the same cakes, trifles, and cheesecake bars without showing what actually holds up during real gatherings.
Many desserts look good in photos but fall short in terms of structure, timing, and ease of serving.
Below, I’ve put together red, white, and blue desserts along with blue desserts, focusing on practical, crowd-friendly options that actually work in real party settings.
The aim is to move beyond just visual appeal and highlight recipes that hold up during busy gatherings.
Each idea is selected with real-party experience in mind, focusing on stability, simple preparation, and clean presentation so desserts stay consistent from kitchen prep to the serving table without falling apart.
Red, White, and Blue Desserts For Summer Tables
Red, white, and blue desserts are a simple way to add color and energy to summer parties, holiday tables, and outdoor gatherings. This blog brings together simple dessert ideas that prioritize real-world use over just visual appeal.
Instead of complicated baking methods, it highlights practical formats such as no-bake cups, layered jars, frozen treats, and quick-assembly recipes that are easier for groups to manage.
Each idea is chosen to maintain the structure, simplify serving, and reduce stress during preparation.
The focus remains on desserts that can be made ahead, handled in bulk, and served without sacrificing texture or presentation in warm weather or at busy events.
Easy Red, White, and Blue Dessert Ideas
Red, white, and blue desserts are a staple at summer parties, especially when easy, crowd-friendly options are needed. The focus stays on structure, timing, and serving ease so you can choose desserts that hold up well, whether the event is indoors or outdoors, without last-minute stress or texture issues during serving.
1. Red White Blue Berry Trifle

Serving size: 8–10 servings | Cook time: 20 minutes | Calories: ~280 per serving
This layered trifle is one of the most common red, white, and blue desserts because it works for large groups and holds structure well when assembled correctly. The key is to balance moisture so the cake does not turn soggy while still absorbing flavor from the cream and fruit layers. It is best served chilled in a glass bowl to show the layers.
Ingredients:
Angel food cake, whipped cream, vanilla pudding, strawberries, blueberries
Steps:
- Prepare base ingredients and bowl: Take a large clear glass trifle bowl so the red, white, and blue layers are visible.
- Create the first cake layer: Add an even layer of cake cubes at the bottom of the bowl.
- Add cream and fruit layers: Spread a layer of vanilla pudding or whipped cream evenly over the cake.
- Repeat layering process: Continue building layers in the same order: cake, cream/pudding, and berries until the bowl is nearly full.
- Finish and chill properly: Top with a final layer of whipped cream and decorate with fresh strawberries and blueberries.
Tip: Always cool pudding fully before layering to avoid breakdown.
2. Strawberry Shortcake Cups

Serving size: 6–8 servings | Cook time: 15 minutes | Calories: ~250 per serving
Shortcake cups are layered red, white, and blue desserts that combine cake, cream, and fruit for a balanced texture. They are best served fresh, but can be pre-assembled shortly before events. The structure depends on firm cake pieces to prevent the layers from collapsing.
Ingredients:
Shortcake, whipped cream, strawberries, blueberries
Steps:
- Prepare base ingredients and bowl: Take a large clear glass trifle bowl so the red, white, and blue layers are visible.
- Create the base layer: Add an even layer of shortcake pieces at the bottom of the bowl. Press lightly so the base is stable and holds the next layers without shifting.
- Add cream and berries: Spoon a layer of whipped cream over the shortcake and spread evenly.
- Repeat layering process: Continue layering in the same order, shortcake, cream, and berries, until the bowl is filled.
- Chill before serving: Finish with a final cream layer and top with fresh berries. Cover and refrigerate for 1–2 hours so the dessert sets and the flavors blend.
Tip: Use firm cake to prevent sogginess.
3. Red, White, Blue Ice Pops
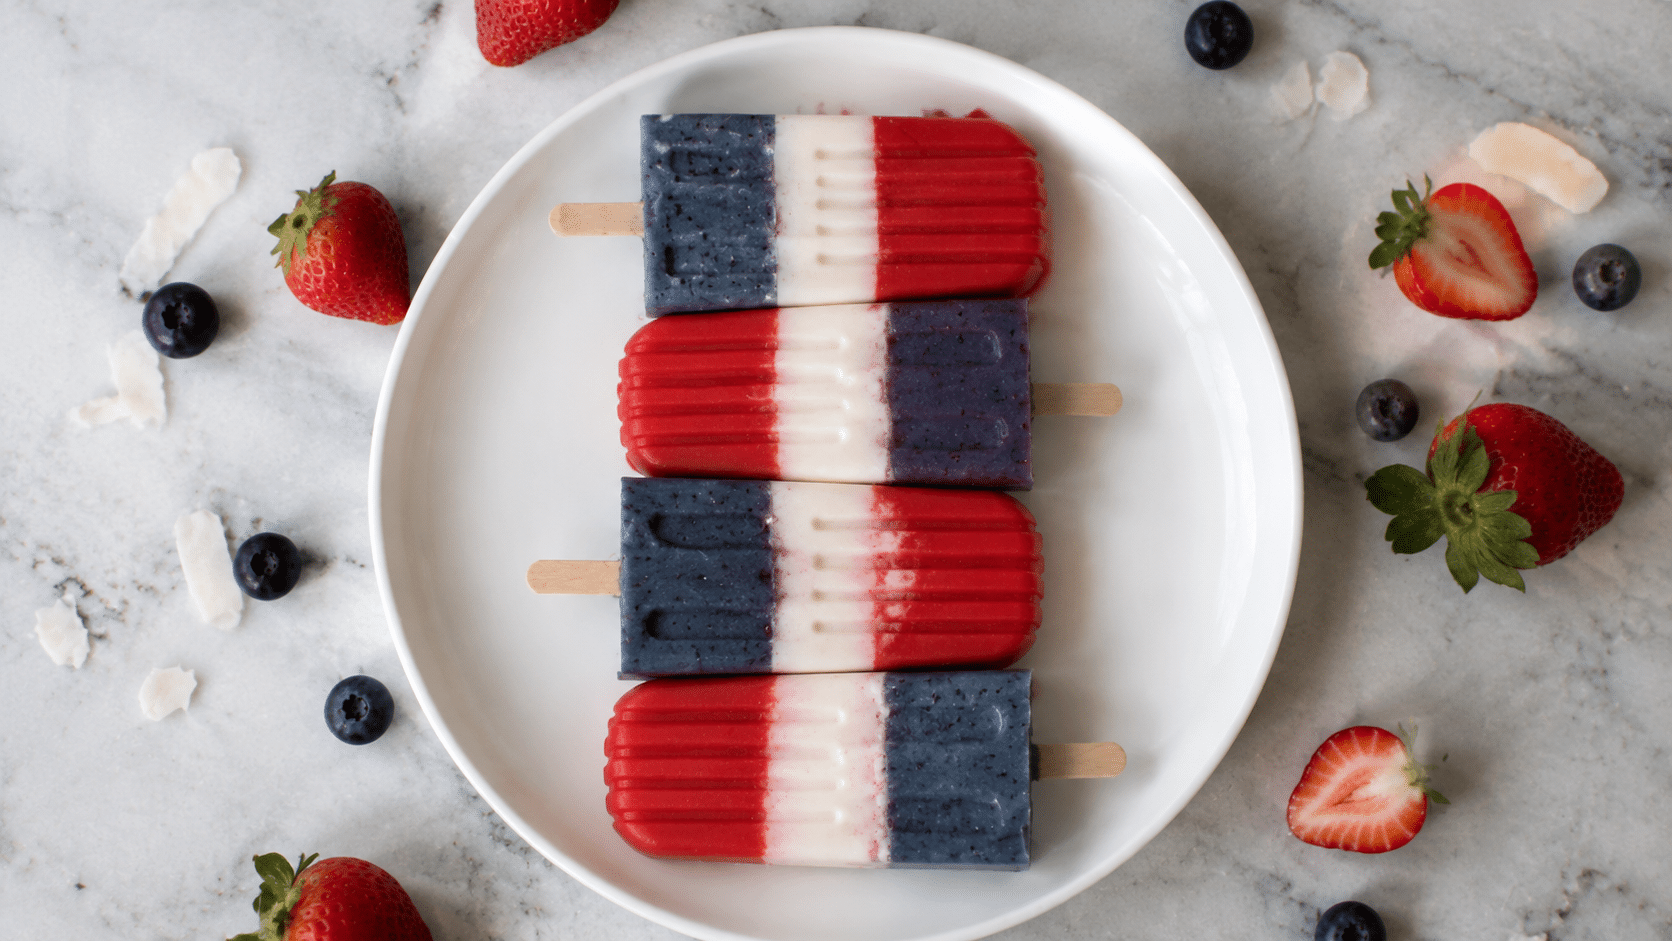
Serving size: 6 pops | Cook time: 10 minutes + freezing time | Calories: ~120 per pop
These ice pops are simple frozen red, white, and blue desserts that work well for summer because they hold their shape and can be made in bulk ahead of time. The main focus is on controlling freezing stages so layers do not mix. Yogurt helps balance sweetness, while fruit purees add natural color and a visual separation.
Ingredients:
Strawberry puree, blueberry puree, yogurt
Steps:
- Prepare molds and base layer: Select clean popsicle molds and pour strawberry puree evenly into each mold.
- Freeze first layer: Place the molds in the freezer and let the strawberry layer set until it becomes slightly firm but not completely solid.
- Add yogurt layer: Slowly pour the yogurt over the semi-frozen strawberry layer.
- Add blueberry layer: Gently add blueberry puree on top of the yogurt layer, filling each mold evenly while maintaining separation between colors.
- Final freeze: Place the molds back in the freezer and freeze until completely solid, typically 4–6 hours or overnight for best results.
Tip: Freeze each layer slightly before adding the next.
4. Patriotic Cheesecake Bars

Serving size: 9–12 bars | Cook time: 45 minutes + cooling | Calories: ~320 per bar
Cheesecake bars are popular red, white, and blue desserts because they slice cleanly and are easier to serve than traditional cakes. The texture depends on baking time and the cooling process, which ensures the bars stay firm. Adding berries after cooling keeps the color fresh and prevents moisture from breaking the cheesecake layer.
Ingredients:
Cream cheese, sugar, eggs, graham crust, strawberries, blueberries
Steps:
- Prepare crust base: Take a baking tray and line it with parchment paper.
- Mix cheesecake filling: In a mixing bowl, beat cream cheese, sugar, and vanilla extract until smooth and creamy.
- Add eggs or fold cream: If baking, add eggs one at a time and mix gently.
- Bake or chill: Spread the mixture evenly over the crust. Bake until the center is just set, or refrigerate the dough until firm and stable if making a no-bake version.
- Cool and decorate: Allow the dessert to cool completely, then top with fresh strawberries and blueberries.
Tip: Chill overnight for clean slicing.
5. Red, White, Blue Parfaits

Serving size: 4–6 servings| Cook time: 10 minutes | Calories: ~220 per serving
Parfaits are quick red, white, and blue desserts that work well for single servings and party setups. They rely on layering textures rather than baking, making them ideal for quick preparation. Thick yogurt or cream is important to prevent watery separation, especially when fruit juices begin to release after assembly.
Ingredients:
Yogurt, whipped cream, strawberries, blueberries, granola
Steps:
- Prepare serving glasses and base layer: Take clear dessert glasses or jars and add a layer of granola at the bottom.
- Add yogurt layer: Spoon an even layer of thick yogurt over the granola.
- Add berry layer: Add a mix of sliced strawberries and blueberries over the yogurt layer, distributing them evenly for balanced flavor and color.
- Add whipped cream layer: Spoon a layer of whipped cream on top of the berries and smooth it lightly to create a clean, even finish.
- Repeat layering if needed: Continue the same order: granola, yogurt, berries, and cream until the glass is filled. Finish with berries on top for presentation.
Tip: Use thick yogurt for better stability.
6. Berry Flag Sheet Cake

Serving size: 12–16 servings | Cook time: 35–40 minutes + cooling | Calories: ~300 per slice
This sheet cake is a classic red, white, and blue dessert often used for gatherings because it serves large groups easily. The decoration is what creates the flag effect, but structure matters just as much. Fully cooling the cake is important before frosting to prevent melting and sliding toppings.
Ingredients:
Vanilla cake, frosting, strawberries, blueberries
Steps:
- Prepare the cake base: Bake the sheet cake in a rectangular pan until fully cooked.
- Add frosting layer: Spread a smooth, even layer of frosting across the entire surface of the cooled cake.
- Create blueberry section: Place blueberries in one corner of the cake to form a neat rectangular block.
- Add strawberry stripes: Arrange sliced strawberries in even rows across the remaining cake surface to create a striped pattern.
- Chill before serving: Refrigerate the decorated cake for at least 1–2 hours so the frosting sets and the design holds its shape when sliced.
Tip: Pat berries dry before placing.
7. Red, White, Blue Jello Cups

Serving size: 6–8 cups | Cook time: 20 minutes + setting time| Calories: ~180 per cup
Jello cups are layered red, white, and blue desserts that depend heavily on the timing between layers. Each layer must be set before adding the next; otherwise, colors will blend. They are best served in clear cups so the separation is visible and visually appealing for party presentation.
Ingredients:
Strawberry Jello, vanilla pudding, blueberry gelatin
Steps:
- Prepare the cake base: Bake the sheet cake in a rectangular pan until fully cooked.
- Add frosting layer: Spread a smooth, even layer of frosting across the entire surface of the cooled cake.
- Create blueberry section: Place blueberries in one corner of the cake to form a neat rectangular block.
- Add strawberry stripes: Arrange sliced strawberries in even rows across the remaining cake surface to create a striped pattern.
- Chill before serving: Refrigerate the decorated cake for at least 1–2 hours so the frosting sets and the design holds its shape when sliced.
Tip: Do not rush the setting time between layers.
8. Berry Ice Cream Sundae Cups

Serving size: 4 servings | Cook time: 10 minutes | Calories: ~350 per serving
These sundae cups are simple frozen red, white, and blue desserts that work best when served immediately. The structure depends on temperature control, since ice cream melts quickly once layered. Pre-chilling serving glasses helps slow melting and keeps the presentation intact during serving.
Ingredients:
Vanilla ice cream, strawberries, blueberries, whipped cream
Steps:
- Prepare the first layer: Start by preparing the strawberry layer in a clear glass cup or dessert dish.
- Set the strawberry layer: Place the cups in the refrigerator and let the strawberry layer fully set.
- Add the pudding layer: Once set, gently spoon the vanilla pudding layer over the strawberry base.
- Add the blueberry layer: Carefully add the blueberry layer on top of the pudding, spreading it evenly while keeping the layers clearly separated.
- Chill until firm: Refrigerate the dessert again until all layers are fully firm and stable, ideally for 2–3 hours before serving.
Tip: Chill glasses before assembling.
9. Red, White, and Blue Cake Pops

Serving size: 10–12 pops | Cook time: 40 minutes | Calories: ~180 per pop
Cake pops are portable red, white, and blue desserts that are ideal for parties. The mixture must be firm enough to hold shape but soft enough to bite easily. Freezing before coating helps maintain structure and prevents cracking in chocolate shells during dipping.
Ingredients:
Cake crumbs, cream cheese, candy coating, food coloring
Steps:
- Prepare cake mixture: Take the baked cake and crumble it into fine, even crumbs in a large mixing bowl so it is easy to bind.
- Add binding cream: Mix the cake crumbs with cream cheese until the mixture becomes soft, smooth, and easy to shape without falling apart.
- Shape the cake balls: Roll the mixture into small, even-sized balls using your hands and place them on a tray for uniform shape and size.
- Insert sticks and set: Insert lollipop sticks into each cake ball and place them in the freezer so they firm up and hold structure before coating.
- Dip and finish coating: Dip each chilled cake pop into melted candy coating, ensuring full coverage, then let them set until the outer shell becomes firm.
Tip: Freeze before dipping for a smooth coating.
10. Berry Yogurt Bark

Serving size: 6–8 pieces | Cook time: 10 minutes + freezing | Calories: ~150 per piece
Yogurt bark is one of the easiest frozen red, white, and blue desserts because it requires no baking and minimal preparation. The key is to spread the yogurt evenly so it freezes into a consistent sheet. Adding fruit and oats provides texture and visual contrast once broken into pieces.
Ingredients:
Greek yogurt, honey, strawberries, blueberries, oats
Steps:
- Prepare yogurt base: In a mixing bowl, combine Greek yogurt with honey and stir until smooth and evenly mixed.
- Spread mixture on tray: Line a baking tray with parchment paper, then spread the yogurt mixture into a thin, even layer with a spatula.
- Add toppings evenly: Sprinkle strawberries, blueberries, and oats over the yogurt layer, gently pressing them to ensure they stick to the surface.
- Freeze until set: Place the tray in the freezer and freeze until completely solid, usually 3–4 hours or overnight for best results.
- Break and serve: Once fully frozen, remove from the tray and break into irregular pieces for easy serving.
Tip: For a healthier spin on the same theme, try oatmeal and banana bars topped with strawberries, blueberries, and a swirl of Greek yogurt, finished with a few berries and chocolate chips.
11. Red, White, and Blue Cupcakes

Serving size: 12 cupcakes | Cook time: 25 minutes | Calories: ~240 per cupcake
Cupcakes are versatile red, white, and blue desserts that can be customized with a variety of colors and toppings. The frosting plays a major role in structure and presentation. Adding berries on top should be done just before serving to maintain freshness and prevent moisture breakdown.
Ingredients:
Cupcake mix, frosting, strawberries, blueberries
Steps:
- Bake cupcakes properly: Prepare cupcake batter and bake in a preheated oven until evenly risen and fully cooked.
- Cool completely: Transfer cupcakes to a wire rack and allow them to cool completely before decorating so the frosting does not melt or slide off.
- Frost evenly: Use a piping bag or spatula to add a smooth, even layer of frosting on each cupcake, ensuring a clean and consistent finish.
- Add berry topping: Place fresh strawberries and blueberries on top of the frosting, pressing gently so they stay in place without sinking.
- Chill slightly before serving: Refrigerate the decorated cupcakes for a short time to help the frosting set and keep the toppings stable during serving.
Tip: For a lighter take on the same batter, swapping it for an apple cinnamon and oat base keeps the red, white, and blue theme intact while trimming down the sugar.
12. Patriotic Dirt Cups

Serving size: 6 servings | Cook time: 15 minutes | Calories: ~260 per serving
Dirt cups are layered red, white, and blue desserts that rely on the texture contrast between pudding, cream, and cookie crumbs. They are easy to assemble in cups and work well for kids and large parties. Keeping cookies slightly crunchy improves structure and prevents a soggy texture.
Ingredients:
Chocolate pudding, crushed cookies, whipped cream, berries
Steps:
- Prepare cookie base layer: Take a clear serving cup or glass and add a layer of crushed cookie crumbs at the bottom.
- Add pudding layer: Spoon a smooth layer of pudding over the cookie crumbs, spreading evenly so it fully covers the base without mixing into it.
- Add whipped cream layer: Add a layer of whipped cream on top of the pudding and smooth it gently to create a clean, even surface.
- Add berry topping: Place fresh strawberries and blueberries over the whipped cream, arranging them evenly for balanced color and flavor.
- Chill before serving: Refrigerate the dessert for 2–3 hours so all layers set properly and the structure holds during serving.
Tip: Keep cookies slightly coarse
13. No-Bake Cheesecake Cups

Serving size: 6–8 cups | Cook time: 20 minutes + chilling | Calories: ~300 per cup
No-bake red, white, and blue cheesecake cups are quick party desserts that require no oven time and hold their shape well when prepared correctly. They work best when layered in clear cups so the colors stay visible and clean.
Ingredients:
Cream cheese, whipped cream, sugar, vanilla extract, graham cracker crumbs, strawberries, blueberries
Steps:
- Prepare the cream cheese mixture: Beat the cream cheese in a bowl until smooth, then add the sugar and vanilla extract, mixing until fully combined and creamy.
- Add whipped cream: Gently fold it into the mixture to keep it light, fluffy, and smooth.
- Prepare base layer in cups: Add a layer of graham cracker crumbs at the bottom of each serving cup to create a stable base.
- Assemble layers: Spoon the cream mixture over the crumbs and top with fresh strawberries and blueberries for color and flavor balance.
- Chill and set: Refrigerate for 4–6 hours so the dessert firms up properly and holds its layered structure when served.
Tip: Always chill overnight for a firmer structure and cleaner layers during serving
14. Dessert Jars With Berry Layers

Serving size: 4–6 jars | Cook time: 20 minutes | Calories: ~320 per jar
Dessert jars are ideal red, white, and blue desserts for parties because they keep layers intact and prevent mixing. They also work well for make-ahead preparation and easy serving.
Ingredients:
Graham crumbs, cream cheese, whipped cream, sugar, strawberries, blueberries, vanilla extract
Steps:
- Prepare base layer: Add a layer of graham cracker crumbs at the bottom of the jar to create a stable foundation.
- Make cream mixture: Mix cream cheese with sugar and vanilla extract until smooth, creamy, and well combined.
- Start layering: Add a layer of the cream mixture over the crumbs, spreading it evenly for a clean, even layer.
- Add fruit layer: Place strawberries and blueberries over the cream, distributing them evenly for balanced flavor and color.
- Repeat and finish: Repeat the layering process until the jar is filled, finishing with cream and berries on top, then chill for at least 4 hours.
Tip: Use thick cream layers to prevent fruit juices from seeping into the base
How to Choose the Right Dessert Format for Any Party
Choosing the right dessert format depends on serving conditions, timing, and the amount of handling the dessert will require. Different party setups require different structures, so picking the right type helps maintain taste, texture, and presentation from preparation to serving.
- Outdoor Heat Stability: Frozen or heat-stable desserts work best for outdoor events where temperature can affect texture and structure.
- Indoor Flexibility: Creamy layered desserts perform better indoors, where temperature control helps maintain consistency.
- Large Group Serving: Bar-style desserts are ideal because they allow quick slicing and reduce serving time during busy gatherings.
- Time Constraints: No-bake cups and jars reduce preparation effort and can be made ahead without losing structure or freshness.
- Visual Presentation: Layered desserts in clear glasses highlight color separation and work well for themed setups.
- Moisture Control: Fruit-heavy desserts require careful balancing to avoid sogginess and maintain structural integrity.
- Ease of Transport: Individual servings, such as cups and jars, travel better and reduce mess at outdoor events or picnics.
Understanding these factors helps match the dessert format to the event type, ensuring better stability, easier serving, and a more consistent presentation throughout the gathering.
Core Dessert Formats And Common Mistakes
Even simple desserts can fall apart if a few small details are overlooked. Knowing what tends to go wrong, and how to fix it, helps you get stable, party-ready results without redoing the same recipe over and over.
| Mistake | How to Fix It |
| Skipping clear cups for layered desserts | Use transparent cups so each layer stays visible and the presentation looks clean |
| Choosing the wrong format for outdoor events | Pick frozen or heat-stable desserts that hold their shape in warm conditions |
| Not portioning desserts for large groups | Use bar-style desserts that slice cleanly and serve easily without mess |
| Using overly wet fruit | Pat fruit dry or lightly dust it with sugar or cornstarch before adding it |
| Storing soft cake layers too long | Assemble closer to serving time or refrigerate to help layers hold their shape |
| Mixing too many colors | Stick to two or three complementary colors for a clearer, more defined look |
Small adjustments like these make a real difference in how a dessert holds up and looks by the time it’s served, keeping the final result clean, stable, and ready for any occasion.
Frequently Asked Questions
What is the easiest red, white, and blue dessert for parties?
No-bake desserts like cheesecake cups or berry jars are the easiest because they require minimal prep, can be made ahead, and hold their structure well during serving without needing oven time.
How do I stop layered desserts from getting soggy?
The key is controlling moisture. Use thicker cream layers, avoid overly juicy fruit, and chill each layer before assembly to prevent liquids from seeping into the base.
Why do my trifle desserts collapse at parties?
Trifles usually fail due to weak sponge texture or excess moisture. If the cake is too soft or the fruit is too wet, the layers break down and lose structure during serving.
Desserting It Up
Red, white, and blue desserts deliver the best results when planning goes beyond visuals and focuses on structure, timing, and practical serving methods.
Blue desserts, although often understated, add important contrast that completes the overall presentation when balanced well with red and white elements.
From my experience, the most successful party setups are the ones where desserts stay stable even after sitting out for a while, without turning messy or losing their structure.
If you’re planning a summer gathering, try focusing on formats that can be made ahead and served easily to avoid last-minute stress and keep everything consistent from kitchen to table. Drop a comment below and let me know which one is your favorite.