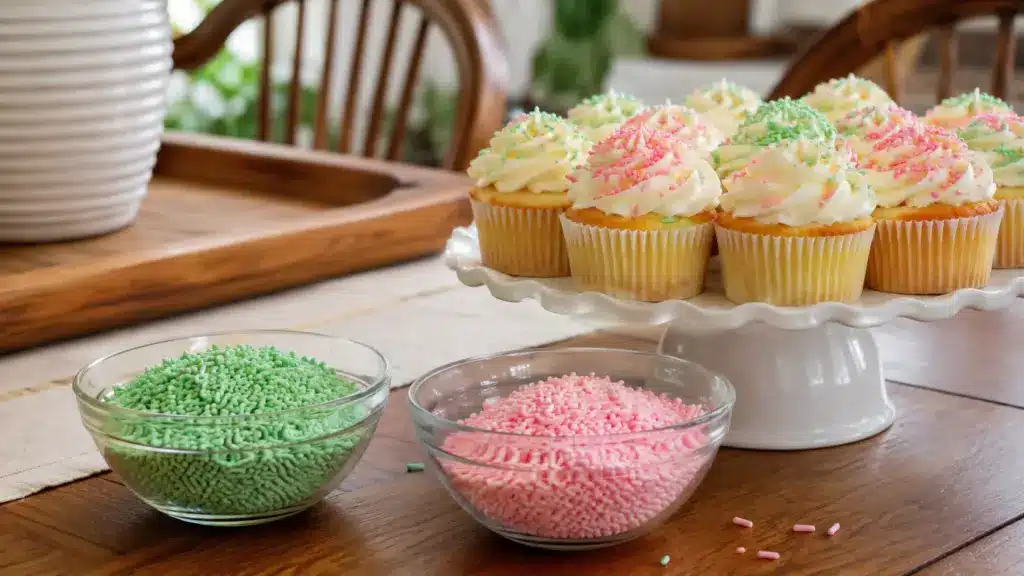

Homemade sprinkles are easier than they look, and they give you full control over flavor, color, and ingredients. This recipe shows you how to make classic sprinkles with a simple sugar icing, plus a vegan version made without eggs or dairy.
You pipe the icing into thin lines, dots, or tiny shapes, let it dry until firm, then cut it into small pieces for decorating. The key is to keep the icing thick enough to hold its shape and let it dry fully before cutting.
Use them on cupcakes, cookies, cakes, ice cream, donuts, brownies, baked apple oat cups, or any sweet treat that needs color. Here is an easy-to-make recipe for natural sprinkles.
What You Need
This base recipe makes one color. To make a multi-color batch, multiply the recipe and divide the icing into separate bowls before adding color. Everything here is simple, and most of it is already in the pantry.
- 1 1/2 cups powdered sugar, sifted
- 1 to 2 tablespoons of aquafaba or water
- 1 teaspoon light corn syrup, maple syrup, or agave, optional
- 1/4 teaspoon vanilla extract
- Pinch of salt, optional
- Food coloring
Powdered sugar gives the sprinkles their structure. The finer it is sifted, the smoother the piped lines will be. Aquafaba, the drained liquid from a can of chickpeas, works as a binder in place of egg whites and gives the icing a slightly better hold than plain water, though water works too
The syrup is optional but helps the icing stay flexible and less likely to crack while piping, which matters most when working with thin lines. Vanilla adds flavor. Salt is a small touch that keeps the sweetness from being flat.
How to Make Homemade Sprinkles: Step by Step
The key is to read the icing at each stage and adjust before you commit to piping. Think of the target consistency as thick toothpaste, something that holds its shape when you lift the spoon but still moves smoothly through a piping tip.
Step 1: Sift the Sugar and Mix the Icing

Sift powdered sugar into a clean bowl, then add vanilla, a pinch of salt, and one tablespoon of aquafaba or water. Stir until smooth and thick, adding more liquid only a few drops at a time. The icing should look like thick glue, heavy enough to hold a line but not so stiff that it tears when piped. If using syrup, stir it in at this stage before moving on.
Step 2: Divide and Color

Spoon the icing into small bowls, one per color, and add your coloring slowly. Natural powder colors thicken the icing as you add them; gel colors thin it. Adjust each bowl back to the right pipeable consistency before filling the bag. A reliable test: drop a spoonful back into the bowl, and the icing should hold a soft ribbon for a few seconds before settling.
Step 3: Fill Your Piping Bag and Pipe Shapes

Spoon each color into a piping bag fitted with a small round tip, size 1 or 2. A zip-top bag with a tiny snipped corner works just as well. Line a baking sheet with parchment paper and pipe long straight lines for jimmies, tiny dots for nonpareils, or custom shapes like hearts and stars. Pipe one test line first to catch any consistency issues before committing to the full sheet.
Step 4: Dry Completely

Leave the piped sprinkles uncovered at room temperature for 12 to 24 hours . Thicker shapes may need the full 24 hours or a little longer. The test is simple: a properly dried sprinkle snaps cleanly when bent. If it flexes or feels soft in the center, it needs more time. Humid kitchens always need extra drying, so resist judging readiness by how they look from the top.
Step 5: Cut, Rest, and Serve

Use a bench scraper or sharp knife to cut dried lines into small rods. Let the cut pieces rest for another 30 minutes if the edges feel soft at the center. Once they snap cleanly and feel completely firm all the way through, they are ready to scatter over frosted cupcakes, cookies, cakes, ice cream, or any dessert waiting on the table.
Once the sprinkles are cut and fully firm, they are ready to use right away or stored in a labeled airtight jar for the next baking day.
Here is a quick and easy tutorial on making vegan homemade sprinkles :
What Are Vegan Sprinkles?
Sprinkles look simple, but not every store-bought option is suitable for vegan baking. Some commercial sprinkles and decorative toppings may contain confectioner’s glaze, beeswax, dairy-derived ingredients, or other additives that are not suitable for a vegan diet.
Confectioner’s glaze is one ingredient to watch for because it is made from shellac, a resin secreted by lac insects, and is often used to give candies and decorations a shiny finish.
Beeswax can also appear as a glazing agent. Dairy-derived ingredients may show up in some flavored or specialty sprinkle blends. Gelatin is less common in standard sprinkles, but it can appear in some specialty decorations, molded toppers, or dessert decorations.
That is why checking the label matters, especially when baking for vegan guests. It is also worth noting that the FDA revoked authorization for FD&C Red No. 3 in food and ingested drugs in January 2025, with food manufacturers required to comply by January 15, 2027.
That has made many bakers more interested in natural color options for homemade sprinkles. For homemade vegan sprinkles, keep the base simple: powdered sugar, aquafaba or water, optional maple syrup or agave, vanilla, salt, and vegan food coloring or plant-based color powders.
Vegan Sprinkles Natural Color Options
The vegan version uses the same base recipe above. The key difference is the source of color. Not every gel food coloring brand is vegan, so check the label carefully or use natural color powders, which are a reliable plant-based option:
| Color | Natural Option | Notes |
| Pink | Beet powder, raspberry powder | Strong pigment, mild fruit flavor |
| Yellow | Turmeric | Use sparingly, flavor comes through easily |
| Green | Matcha, spinach powder | Matcha adds an earthy note |
| Blue | Blue spirulina, butterfly pea powder | Spirulina gives the clearest blue |
| Purple | Blueberry powder, butterfly pea, plus acid | Shade shifts with the pH of the icing |
| Brown | Cocoa powder | Best for chocolate-flavored sprinkles |
| Orange | Annatto, carrot powder, turmeric, plus beet | Softer shade than gel, warm and pretty |
Start with 1/4 teaspoon of any powder and build gradually. Natural pigments are affected by light, heat, and pH, so the colors will always be softer than gel. That is completely normal.
Recipe Variations Worth Knowing
The base recipe accommodates a few common dietary needs and timing constraints without requiring any complicated changes. These four swaps all follow the same core method and deliver equally good results every time:
| Variation | How to Do It | Best For |
| Without corn syrup | Use aquafaba only. Add maple syrup or agave in 1/4-tsp increments only if the lines crack while piping. | Corn syrup-free and vegan households |
| With meringue powder | Replace aquafaba with meringue powder mixed per package directions. Dries firm and pipes consistently. | Classic royal icing texture, non-vegan batches |
| Without food coloring | Use cocoa for chocolate, cinnamon or espresso powder for warm tones, or keep them white and vanilla-flavored. | Dye-free baking, flavor-forward sprinkles |
| Quick same-day version | Add food coloring to coarse sanding sugar in a bag, shake to coat, spread on parchment, and dry for 1 to 2 hours. | Last-minute decorating with no drying wait |
Pick the swap that fits your kitchen and dietary needs. The piping, drying, and cutting steps stay exactly the same regardless of which variation you choose, so nothing new to relearn.
What to Use Instead of Sprinkles

Not every kitchen has sprinkles on hand, and sometimes a substitute fits the dessert better anyway. Each option below works as a topping in its own right, not just a backup plan.
- Colored sanding sugar: The closest substitute. Gives sparkle and color to dishes like oatmeal banana bars without any piping.
- Crushed freeze-dried fruit: Strawberry, raspberry, or mango powder adds color and real fruit flavor.
- Mini chocolate chips: Great on cookies, ice cream, and no-bake bars.
- Finely chopped pistachios or almonds: Add natural color and a satisfying crunch.
- Shredded coconut: Lightly dyed with food coloring for a festive topping on cakes and donuts.
- Cookie crumbs: Crushed Oreos or graham crackers for a textured, flavor-forward finish.
- Cocoa nibs: A less sweet, slightly bitter topping that works well on darker or richer desserts.
Most of these are already sitting in the pantry. Pick whatever matches the flavor of the dessert, and the result will feel just as intentional as any sprinkle batch.
How to Store Them
The most important storage rule is also the simplest: do not store them until they are completely dry. Any moisture left in the sprinkles will cause clumping and stickiness in the jar that no storage trick can fix after the fact.
- Store in an airtight glass jar with a secure lid
- Keep in a cool, dry, dark spot away from the stove or any heat source
- Skip the refrigerator unless your kitchen is very hot or humid, as condensation can make it sticky
- For large batches, add a small food-safe desiccant packet to absorb ambient moisture
- Label every jar with the date and the color source so you know what is inside at a glance
Fully dried homemade sprinkles last well for 3 to 6 months when stored correctly. Discard any batch that smells off, clumps in the jar, shows signs of moisture, or develops anything that looks like mold. A fresh batch is always the better option over a questionable jar.
What to Pair Sprinkles With

Homemade sprinkles are at their best as a topping added after baking, not baked into the batter. Here is where they work well and where to use a little more caution.
Best Uses as a Topping: Press sprinkles onto freshly set frosting on cupcakes and layer cakes for the cleanest finish with the least color bleeding. Scatter over cookies right after the icing sets. On donuts, press them into the glaze while it is still wet so they actually stick.
For ice cream, cake pops, chocolate bark, and no-bake bars, no heat is involved, so they hold their color and shape perfectly every time.
Using Them Inside Cake Batter: Inside batter is trickier. Homemade sprinkles are pure sugar and lack the stabilizers that commercial bake-stable sprinkles use, so they can soften, bleed, or partially dissolve in the oven. Jimmy-style rod sprinkles hold up better than tiny dots in batter.
Homemade Sprinkles vs. Store-Bought: An Honest Comparison
Homemade sprinkles let you control every ingredient, color, and flavor, avoiding additives in many commercial options. They offer creativity and customization that store-bought versions can’t match:
| Feature | Homemade | Store-Bought |
| Ingredients | Fully controlled, natural options | May contain glaze, gelatin, beeswax, and synthetic dyes |
| Color & Shape | Any color, shape, or theme | Limited to pre-made colors/shapes |
| Time | Requires preparation | Ready to use instantly |
| Baking Performance | May vary in batter | Consistently stable in baking |
Homemade sprinkles are cleaner, more flexible, and more personal. Store-bought saves time and guarantees bake stability but offers little control or customization for special needs or themes.
Frequently Asked Questions
Can I use regular sugar instead of powdered sugar?
Regular granulated sugar does not work well for piped homemade sprinkles because the crystals are too coarse. The icing can turn grainy, clog the piping tip, and dry with a rough texture. Powdered sugar is better because it dissolves smoothly and helps create thin, clean lines.
Why do homemade sprinkles look more matte than store-bought sprinkles?
Store-bought sprinkles often have glazing agents or coatings that give them a shiny finish. Homemade sprinkles usually dry with a softer, more matte look because they are made from simple icing. If you want more shine, use them on wet glaze, melted chocolate, or fresh frosting rather than trying to coat the sprinkles themselves.
Can I mail homemade sprinkles or pack them as a gift?
Yes, but only once they are completely dry and firm. Pack them in a small airtight jar or food-safe bag, then place that inside a sturdy box so the pieces do not crush. Avoid mailing them during very hot or humid weather because moisture can make them sticky.
Can I make homemade sprinkles without cornstarch?
Most store-bought powdered sugar contains a small amount of starch to prevent clumping. If you need a corn-free option, look for powdered sugar made with tapioca starch or another corn-free anti-caking ingredient. Do not swap in regular sugar, because the texture will not pipe or dry the same way.
The Bottom Line
Homemade sprinkles give you something a store shelf never quite can: the exact color, the exact shape, and the complete ingredient list.
My favorite part of making them is the color stage, picking a natural powder and watching it turn a simple white icing into something that actually matches the dessert you had in mind.
If you are making a beet-pink and matcha-green holiday batch or a bold rainbow birthday mix, the steps are the same, and the result is always more satisfying than reaching for a plastic tube.
Start with one color, get the consistency right, and the rest follows naturally. Drop a comment below and let me know how yours turned out.