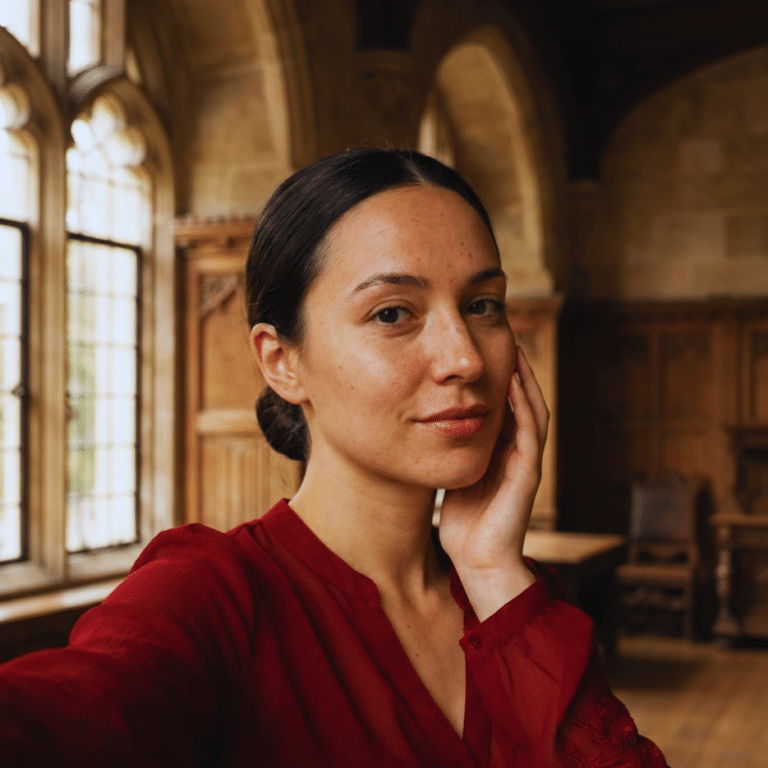
If your makeup keeps turning patchy or heavy instead of soft and blended, the problem is usually in your layering and blending technique.
Soft glam makeup looks focus on creating a smooth, natural glow while enhancing your facial features in a balanced, subtle way. I’ve had moments where my makeup looked fine in parts but didn’t come together as a full look, and that’s exactly what this guide fixes for you.
You’ll learn simple steps, must-have products, and blending techniques that actually make a difference. By the end, you’ll know how to create soft glam that looks polished, natural, and easy to repeat for everyday wear or special occasions without confusion or overthinking.
What Is Soft Glam Makeup?
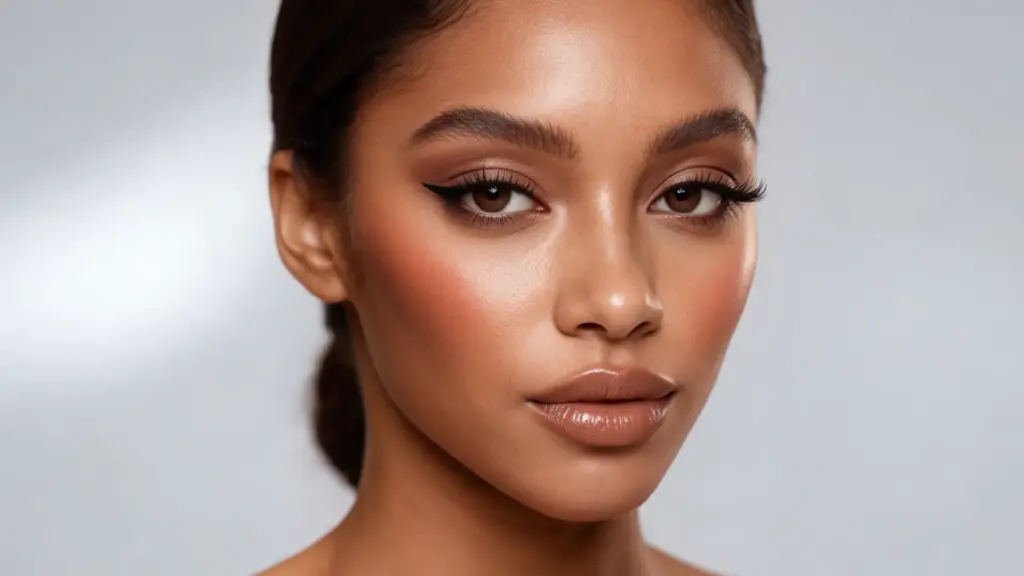
Soft glam makeup is a balanced beauty style that sits between natural makeup and full glam looks. It focuses on enhancing features with soft tones, blended edges, and lightweight layers rather than heavy coverage or sharp definition.
The goal is a polished appearance while skin texture stays visible and natural. Soft glam skips bold colors, harsh contour lines, and intense highlighting. It relies on neutral shades like beige, brown, peach, and soft pink to gradually build dimension.
Natural soft glam makeup is especially popular for daily wear because it feels effortless yet refined. It works across all skin types and age groups, and it’s versatile enough for weddings, work, and casual outings. I keep my own kit built almost entirely around this technique because of that range.
Key Products For A Natural Soft Glam Makeup Look
You don’t need a large or complicated kit for this. A small selection of products, used in soft, lightweight layers, does all the work.
- Base products: lightweight foundation, concealer, setting powder
- Eye products: neutral palette, brown liner, mascara
- Lip products: nude lipstick, gloss
- Cheek products: cream blush, soft peach tones
- Finishing products: bronzer, setting spray
Each category plays a specific role in keeping the finish cohesive and fresh throughout the day.
Step-By-Step Soft Glam Makeup Tutorial
Soft glam is built through layering, blending, and controlled product application rather than heavy coverage. Each step below builds on the last, and I’ve written them with enough detail that you can follow along even if this is your first time doing a full face.
Step 1: Skin Prep And Hydration

- Start with clean, dry skin so moisturizer and primer sit smoothly on the face. Apply a pea-sized amount of moisturizer with your fingertips, pressing gently rather than rubbing harshly.
- Focus on dry areas like the cheeks, the sides of the nose, and the under-eyes to prevent flaky makeup. Wait 1 to 2 minutes until the moisturizer is absorbed and the skin feels hydrated.
- Apply a thin layer of primer over the face and eyelids with fingers or a brush. Let the primer create a smooth base so makeup grips better and lasts longer.
Step 2: Brow Preparation And Shaping

- Comb brow hairs upward and slightly outward with a clean spoolie to reveal natural shape. Use the spoolie to spot gaps, uneven areas, and stray hairs before adding product.
- Apply a light coat of brow gel in the same upward direction for soft hold. Fill sparse areas with a brow pencil using short, hair-like strokes instead of lines.
- Add detail to very thin areas with a fine-tipped brow pen for natural-looking fullness. Apply a small amount of concealer along the brow edges to sharpen the shape. Blend the concealer lightly so the brows look clean but not overly harsh.
Step 3: Eye Base And Concealer Layering

- Dot concealer under each eye in an upside-down triangle to brighten the area naturally. Apply concealer near the inner corners and outer edges where shadows usually appear. Choose a shade one tone lighter than your skin for a soft lifted effect.
- Blend with light tapping motions using your ring finger or a damp sponge. Avoid dragging the under-eye skin, since it can lead to creasing later.
- Press translucent powder over the under-eye area using a soft fluffy brush. Lightly set the eyelids with powder to create a smooth base for eyeshadow. Keep the powder layer thin so the eye area stays clean, soft, and matte.
| Flawless Tip: You’ll apply concealer twice, once here and again after foundation in Step 7. Use a small amount to avoid cakey makeup, patting it in with your finger on spots that need it. If your under-eye looks smooth after Step 3, skip the powder in Step 8. |
Step 4: Soft Glam Eyeshadow Application

- Load a fluffy blending brush with a neutral transition shade, then tap off excess product. Sweep the shade through your crease using small back-and-forth circular motions. Choose a shade close to your skin tone with a slight warm finish.
- Use the transition shade to soften the area between the lid and brow bone. Apply a slightly deeper brown shade to the outer corner with a smaller brush. Keep the darker shade low and close to the lash line for natural depth.
- Avoid dragging the brown shade too high toward the brow bone area. Pat a lighter, shimmer-free shade across the center of the lid for brightness. Blend the edges where each shade meets so no harsh lines remain.
Step 5: Eyeliner, Mascara, And Lash Definition

- Use a felt-tip liner to draw a thin line close to your upper lash line. Start from the inner corner and slightly thicken the line toward the outer corner. Keep the wing short and low for a soft, minimal makeup look.
- Avoid a sharp, lifted cat-eye shape, since it can look too dramatic. Curl your lashes before mascara if you usually use an eyelash curler. Apply one or two coats of waterproof mascara from root to tip.
- Wiggle the mascara wand at the base to add lift and lash separation. Trim false lashes first so the band fits your natural eye shape properly.
- Glue the lash band close to your natural lash line for a seamless finish. Blend the lash seam with a little eyeliner so the band looks hidden.
Step 6: Apply Foundation

- Dot foundation across your forehead, cheeks, nose, and chin before blending outward. Use a stippling brush or a damp beauty sponge with gentle bouncing motions.
- Avoid wiping or dragging foundation, since it can create streaks and uneven coverage. Start with a lightweight base formula instead of coating the whole face heavily. Add extra product only where more coverage is needed, such as redness or the nose area.
- Blend carefully around the jawline, hairline, and sides of the nose. Check edges in daylight to make sure no visible foundation lines remain. Keep the base natural so real skin texture still shows through softly.
Step 7: Brighten With Concealer

- Apply a small amount of concealer under the eyes after foundation has evened the skin. Choose a shade slightly lighter than your foundation for a lifted, awake look.
- Dot concealer in the inner corners where darkness usually appears most visible. Apply concealer in an upside-down triangle shape to brighten the under-eye area.
- Blend with light tapping motions so the coverage stays smooth and intact. Avoid rubbing the concealer, since it can move product and reduce coverage. Use this second pass to judge how much extra brightness your base needs.
Step 8: Set Under-Eye And Base

- Press translucent setting powder under the eyes first using a damp sponge. Use pressing motions instead of swiping to keep concealer smooth and locked in.
- Set the under-eye area lightly to prevent creasing into fine lines later. Dust powder only over oily areas like the T-zone, chin, and forehead. Use less powder than expected to avoid a cakey or flat finish.
- Skip powder on areas that already look smooth, balanced, and naturally matte. Keep the powder layer thin so the double concealer method stays fresh.
Step 9: Add Soft Contour

- Use a cream or liquid contour one to two shades darker than your foundation. Apply small dots or lines along the temples, under the cheekbones, and the jawline.
- Place contour only where natural shadows would fall for a softer sculpted effect. Keep the product light so the contour adds structure without looking harsh.
- Blend immediately with a damp sponge or soft brush before the product sets. Use upward and outward blending motions to avoid dragging the face downward.
- Soften every edge until there is no visible line where the contour stops. Keep the final result subtle, with dimensions that look natural instead of obvious.
Step 10: Apply Blush

- Smile gently to find the apples of your cheeks before applying blush. Apply a small amount of cream blush with your fingertip or stippling brush.
- Blend blush upward and outward toward the temples using soft circular motions. Choose warm tones like peach, soft orange, or muted pink for natural color. Use cream blush at this stage because it melts smoothly into the finished base
- Build the blush slowly by adding a little color at a time. Check your reflection between layers to avoid applying too much product. Avoid adding a heavy amount at once, since it can look patchy afterward.
Step 11: Add Bronzer And Refine Base

- Use a large, fluffy brush to apply a small amount of bronzer. Sweep bronzer over areas the sun naturally warms, like the forehead and cheekbones.
- Apply bronzer along the jawline to add soft warmth and gentle definition. Use light sweeping motions instead of pressing hard into the skin.
- Blend the bronzer edges well so there is no visible line. Press a tiny amount of powder over shiny or uneven areas after bronzing. Avoid adding more bronzer over uneven spots, since it can look heavy.
Step 12: Lip Makeup

- Line your lips with a brown or nude liner close to your natural lip color. Follow your actual lip shape instead of overdrawing for a soft glam finish.
- Use lip liner to help lipstick grip better and last without feathering. Fill the lips with nude, peach, or soft pink lipstick for natural color.
- Blur the liner and lipstick together using a cotton swab or fingertip. Keep the lip edges soft instead of leaving a sharply outlined finish. Add a light layer of gloss to the center for shine and dimension.
Step 13: Setting Spray

- Hold the setting spray eight to ten inches away from your face before misting. Spray evenly in an X or T shape to lightly cover the whole face.
- Avoid soaking a single area, as excessive spray can disturb the base. Let the spray melt powder and cream layers into a smoother finish.
- Allow the setting spray to air dry completely without touching your face. Avoid patting or blotting, since it can move the makeup underneath. Use this step to reduce any cakey look from powder or double concealer.
For a more detailed explanation, refer to this video.
Different Variations Of Soft Glam Makeup Styles
Soft glam is flexible enough to suit different occasions and lighting. Each variation keeps the same blended base but changes intensity for the event.
- Everyday Soft Glam: Light base, soft blush, mascara only. My go-to for work.
- Wedding Soft Glam: Long-wear base with soft shimmer, built for photos across a long day.
- Party Soft Glam: Slightly bolder eyes and lashes, still kept blended for evenings.
- Natural Soft Glam: Minimal coverage and a skin-like finish for an effortless everyday look.
Best Color Palettes For Natural Soft Glam Makeup
The right palette controls how natural or polished the final result looks. Natural soft glam makeup works best with muted, wearable shades that suit a range of undertones.
| Color Palette Type | Shades Included | Best For | Effect on Look |
|---|---|---|---|
| Warm Neutrals | Caramel, beige, warm brown, soft peach | Daily wear, beginners | Sun-kissed, soft, blended finish |
| Cool-Toned Soft Glam | Taupe, ash brown, soft grey, muted mauve | Cool undertones, subtle sculpting | Soft depth without warmth overload |
| Pink-Based Soft Glam | Dusty pink, soft rose, light berry | Romantic looks, dates, weddings | Fresh, soft, feminine glow |
| Everyday Wearable Shades | Mixed muted tones from all palettes | All occasions, beginners | Versatile, easy-to-blend finish |
If you’re not sure where to start, warm neutrals are the safest first palette since they work across nearly every undertone.
Tips To Achieve Perfect Soft Glam Looks
A good soft glam look depends on control, not heavy coverage. These tips help you keep the makeup smooth, balanced, and naturally polished.
- Apply makeup in thin, buildable layers
- Stick to neutral color palettes
- Blend every product carefully
- Mix cream and powder textures
- Balance eye and lip intensity
- Check your work in natural lighting, not just a ring light
Small adjustments make the biggest difference in soft glam. Keep the finish blended, balanced, and skin-like so the final look feels polished without looking heavy.
Soft Glam Vs Natural Soft Glam Makeup
Soft glam and natural soft glam makeup share the same blended technique, but they differ in intensity, coverage, and finish.
| Feature | Soft Glam | Natural Soft Glam |
|---|---|---|
| Coverage | Medium coverage base | Light, skin-like coverage |
| Eyes | Softly defined with depth | Barely defined, very minimal |
| Finish | Polished glow with structure | Fresh, natural skin finish |
| Intensity | Noticeable but blended | Very subtle and lightweight |
| Occasion | Events, parties, weddings | Daily wear, casual looks |
| Product usage | Moderate layering | Minimal product use |
I pick natural soft glam on days packed with back-to-back meetings, when I want to look awake without having to redo my face at lunch.
Common Mistakes To Avoid
Soft glam makeup may seem simple, but small mistakes can make it look heavy, patchy, or overly done. The goal is to build thin layers, blend edges, and select shades that match your skin tone rather than fight it. Avoiding these common mistakes ensures a smooth, soft, and wearable final look.
- Applying too much foundation instead of building thin, even layers
- Using harsh contour lines that make the face look overly sculpted
- Choosing the wrong undertone shade for your skin tone and base
- Overloading the eyeshadow with dark colors that reduce softness
- Skipping blending between layers, which leaves visible makeup edges
- Using too much highlighter on textured skin makes the texture more noticeable
Avoid these mistakes to keep your soft glam makeup balanced, polished, and natural. Use light products, blend carefully, and select soft colors so each layer complements rather than competes for attention.
Frequently Asked Questions
Do you need a beauty sponge for soft glam makeup, or can you use a brush?
Either works, but a damp sponge gives a more blurred, skin-like finish, which suits soft glam better than a brush that can leave visible streaks.
Can soft glam makeup work with glasses?
Yes. Keep eyeshadow slightly lighter than usual since glasses magnify the lids, and go easy on lower lash mascara, which tends to smudge onto the lens.
How much does it cost to build a soft glam makeup kit?
You can put one together for under 60 dollars using drugstore basics, or spend well over 200 on prestige versions of the same categories. The technique matters more than the price tag.
Can you get a soft glam look using only drugstore products?
Yes, completely. The blending technique creates the look, not the price point of the products.
What’s the main difference between soft glam and full glam?
Full glam uses heavier coverage, sharper contour, and more intense lashes. Soft glam keeps every layer thinner and every edge blended.
Why does my soft glam makeup crease by midday?
Creasing usually means too much concealer or powder sat in one spot. Go back to thin layers, and only set the areas that actually get oily.
Final Verdict: Is Soft Glam Makeup Worth Learning?
If your makeup has ever looked fine up close but never came together as a full face, soft glam makeup is the fix, and the double concealer step is usually where it goes right or wrong.
Keep both passes thin, and you’ll get the brightness without the cakey buildup. One thing worth being upfront about: the 6- to 10-hour wear time only holds if you’re actually using a primer, setting powder, and setting spray as part of the routine.
Skip any of those, and it won’t last nearly as long. Start with the everyday version this week using just a light base and cream blush, then build up from there. Share your results in the comments below.