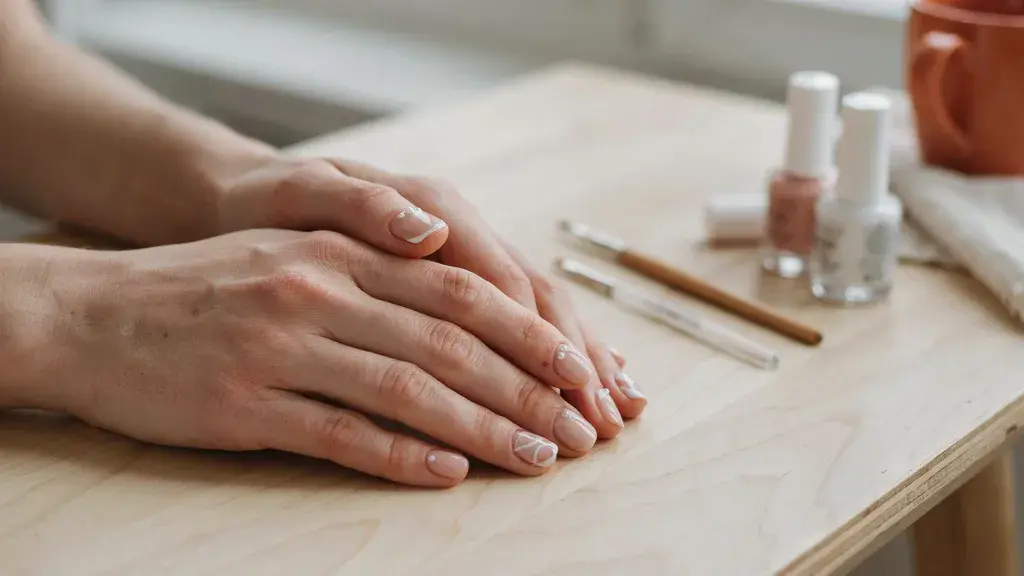
Every nail art tutorial I clicked on for years assumed I had eight brushes, a steady surgeon’s hand, and forty-five free minutes.
None of that is true for me, and I’d guess it isn’t true for you either. What changed my whole approach to simple nail art was realizing minimal doesn’t mean lesser.
A single dot placed well can look more intentional than a hand-painted mural.
I have personally tested every design on this list by hand before I recommend it, so consider this your shortcut to nailing easy, not amateurish, design.
What Actually Makes a Nail Design “Simple”?
People throw around the word “simple” pretty loosely in nail art, so let’s actually define it before you scroll through thirty options.
Factor | Simple Nail Art | Complex Nail Art |
|---|---|---|
Tools needed | Dotting tool, brush, toothpick | Airbrush, multiple fine liners |
Time per hand | 5-15 minutes | 30+ minutes |
Skill level | Beginner-friendly | Requires practice/pro |
Best for | Everyday wear, quick refreshes | Special occasions |
Once you see the gap between those two columns, it’s easy to understand why minimal designshave quietly taken over everyone’s manicure rotation.
Why Minimal Nail Designs are Having a MomentThis isn’t just a trend cycle thing. Simple nail design fits how people actually live right now.
|
Before you jump into the design list, let’s make sure your toolkit can actually keep up.
What You Need Before You Start
You don’t need a professional kit for any of this. Here’s the short list that covers nearly every design below.
Base coat
2-3 polish shades (a neutral plus 1-2 accent colors)
A dotting tool and a toothpick (both come in handy for different designs)
Thin nail art brush, liner brush, or striping brush
Nail tape (for clean lines and geometric shapes)
A small makeup sponge (for gradients and blended effects)
Half-moon stickers or a French tip guide
Chrome powder or foil flecks (optional, for a metallic accent)
Top coat
Kit sorted? Good, because this next part is the whole reason you’re here.
30 Simple Nail Art Ideas to Try at Home
This is the main event: thirty designs, sorted by vibe, so you can screenshot whichever section actually matches your mood this week.
1. Single Dot Accent
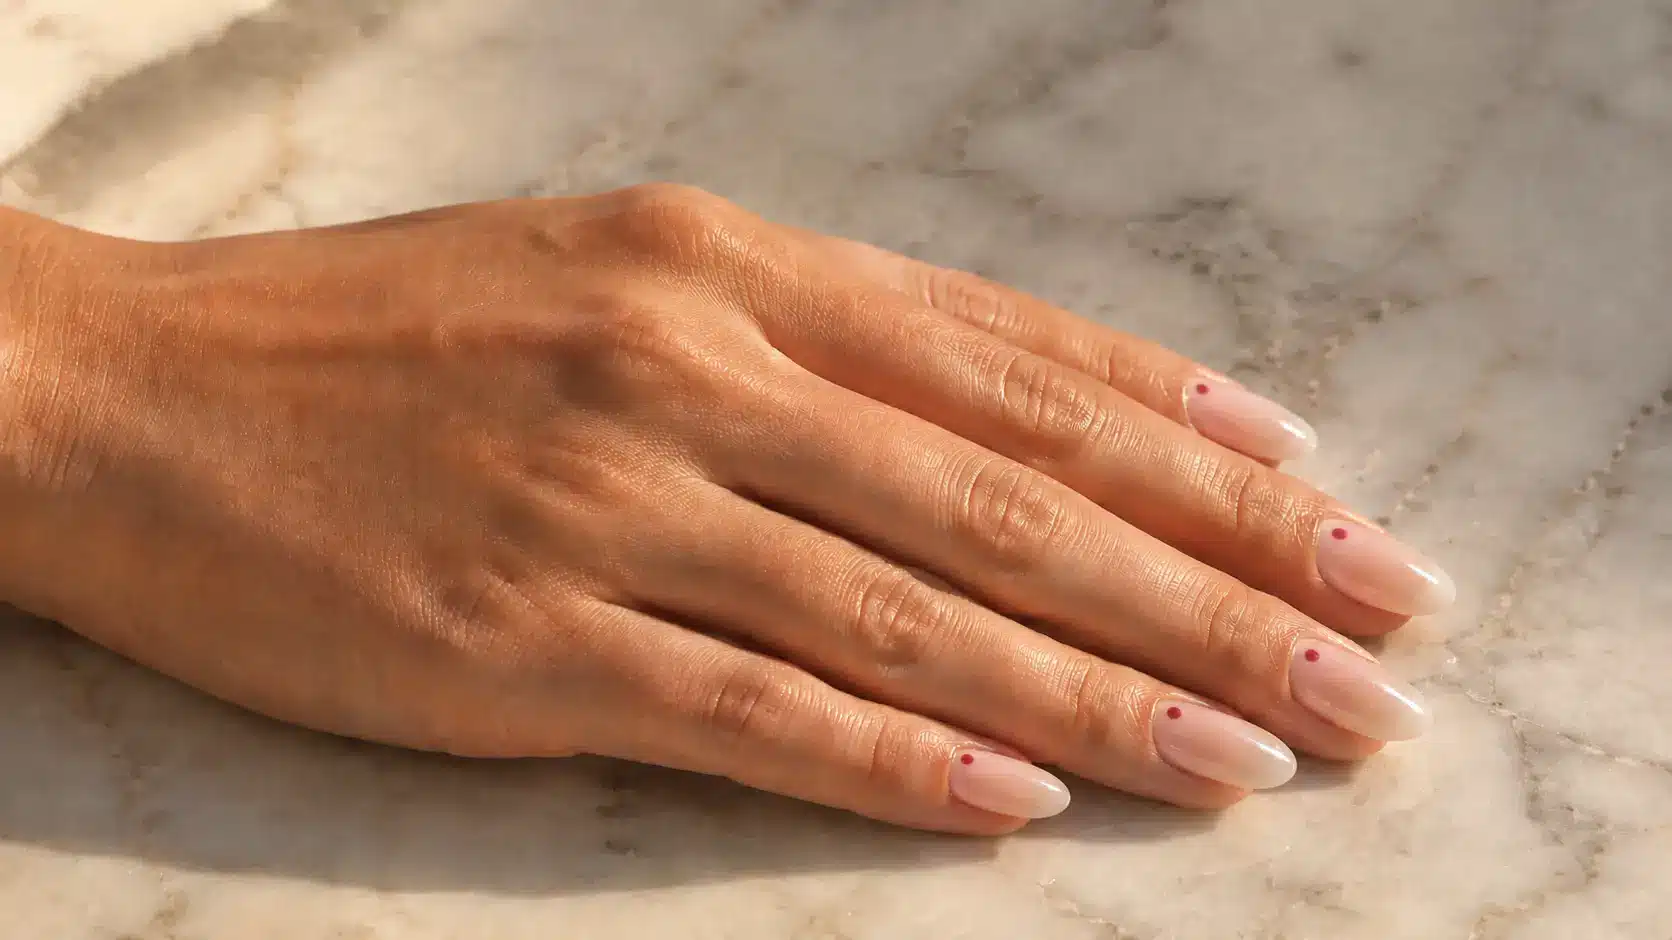
One tiny dot near the cuticle on a bare or sheer nail. Use a dotting tool loaded with a single color, then press once. It’s forgiving because there’s nothing to blend or line up, and it pairs well with almost any outfit.
How to get it: Apply a sheer base coat and let it dry. Dip a dotting tool or bobby pin into polish, place one dot near the cuticle, and seal it with top coat.
2. Negative Space
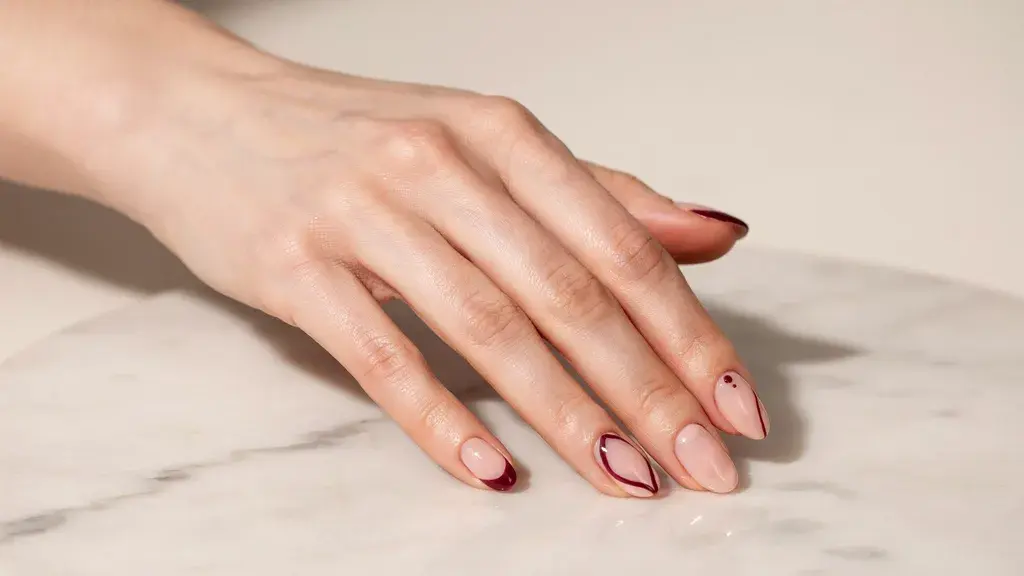
Part of the nail stays bare while polish covers the rest, using tape to mask the shape you want left uncovered. It reads as intentional rather than unfinished, and it works on every nail length or shape.
How to get it: Place nail tape over the area you want to keep bare. Paint the exposed nail, remove the tape while the polish is slightly wet, and finish with a clear top coat.
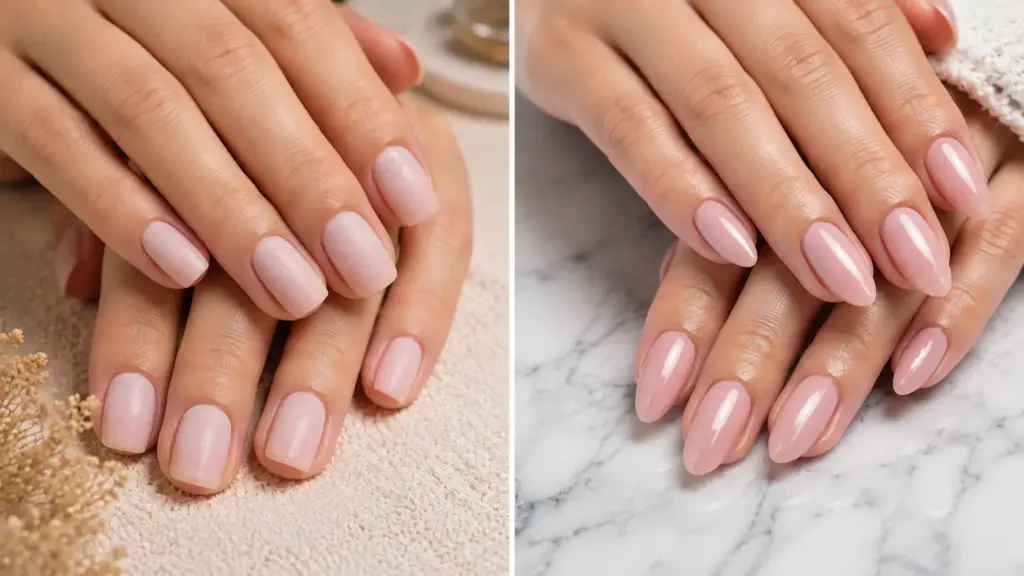
3. Sheer Wash
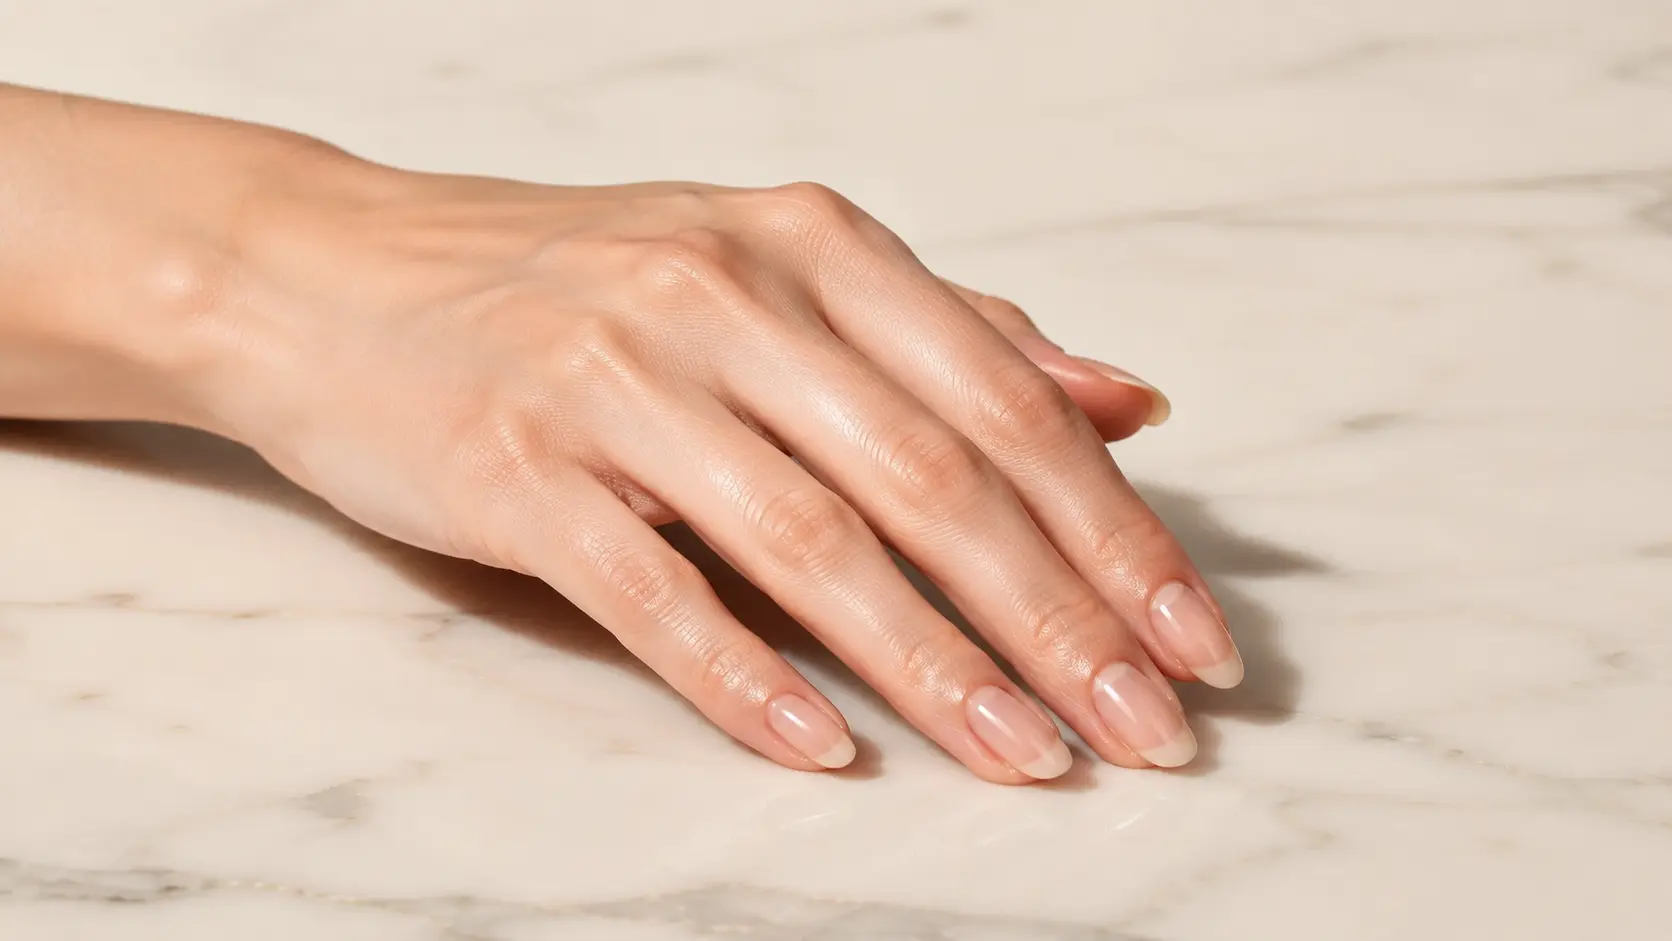
A barely-there tint of color instead of full opaque polish. One thin coat of a sheer shade over bare nails gives a soft, no-makeup-makeup look, and it’s nearly impossible to mess up since there’s no line work involved.
How to get it: Apply one thin coat of sheer polish using three light strokes. Let it dry, then add a second coat only if you want slightly more color.
4. Micro French Line
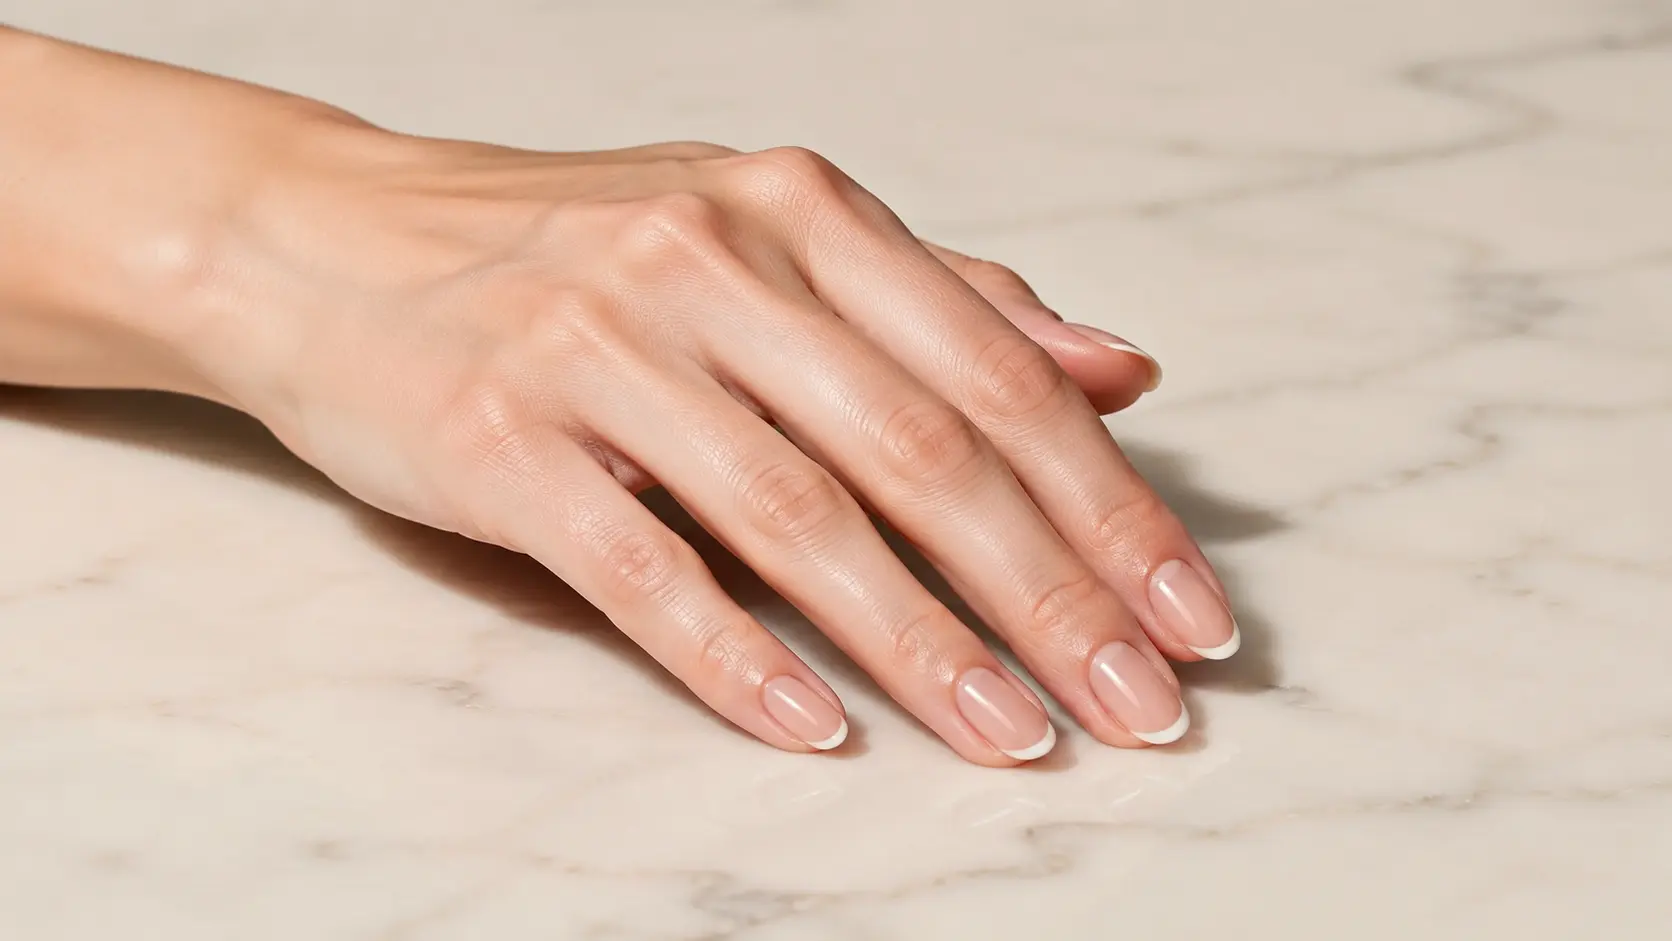
A hairline-thin white or colored tip instead of a traditional French stripe. A striping brush or thin liner gets the job done in one pass. It looks polished without demanding a steady hand for long, wide strokes.
How to get it: Paint the nail with a nude or clear base. Use a fine liner brush to trace a hair-thin line across the free edge, then apply top coat.
5. Tiny Heart
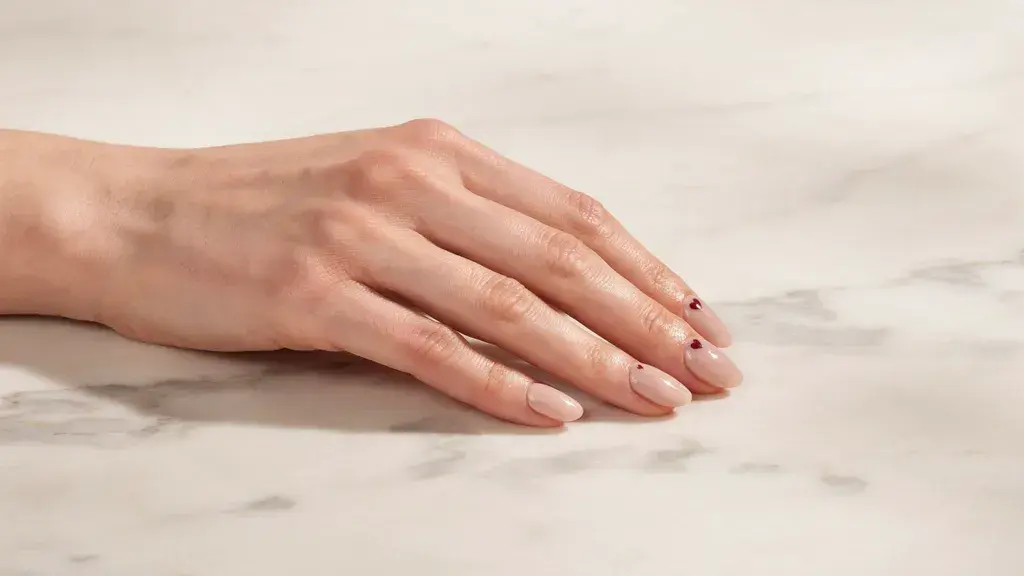
One small heart at the base or tip of the nail, made from two dots pulled into a point with a toothpick. It’s a two-second addition that instantly makes a plain manicure feel finished.
How to get it: Place two small dots beside each other with a toothpick. Drag both dots downward until they meet at a point, creating a simple heart shape.
6. Color Block
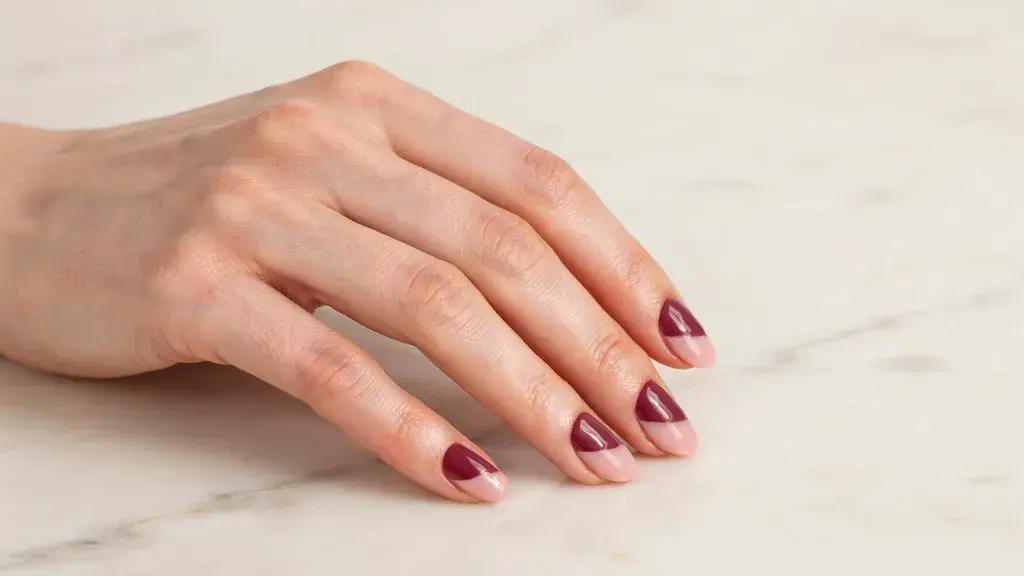
Two contrasting shades split across the nail, either half-and-half or top-and-bottom. Painting each section separately with a regular brush keeps the line clean, and unexpected color pairs make it feel custom.
How to get it: Paint the nail with the first shade and let it dry fully. Add tape across the nail, apply the second color to the uncovered section, and carefully peel the tape away.
7. Polka Dots
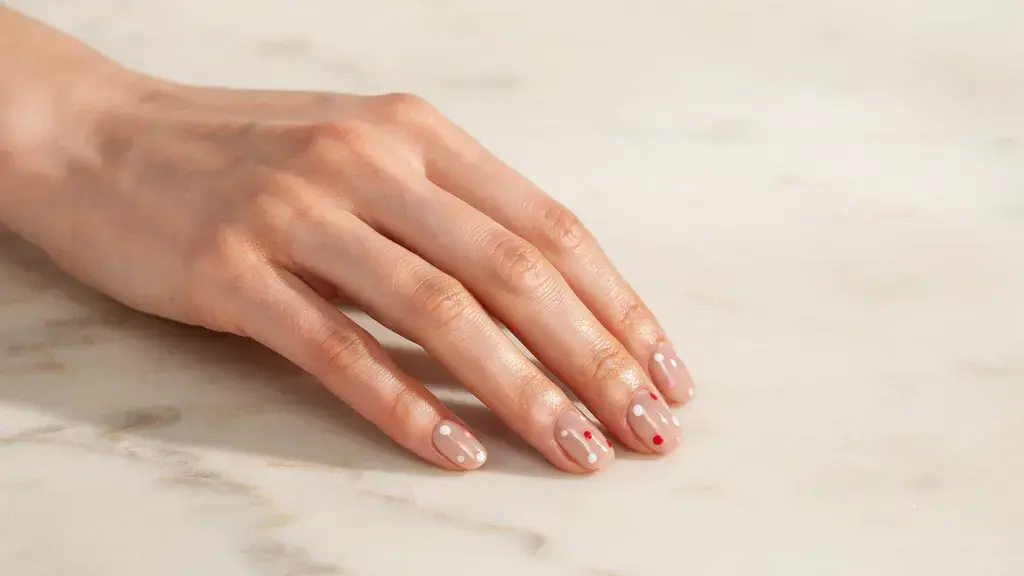
Small dots are scattered across the nail or clustered on one accent finger. Reload a dotting tool for each dot to keep sizing consistent, and slightly imperfect spacing makes it look more hand-done and charming.
How to get it: Apply your base color and allow it to dry. Use a dotting tool to place evenly sized dots across the nail, reloading it with polish after each dot.
8. Confetti Dots
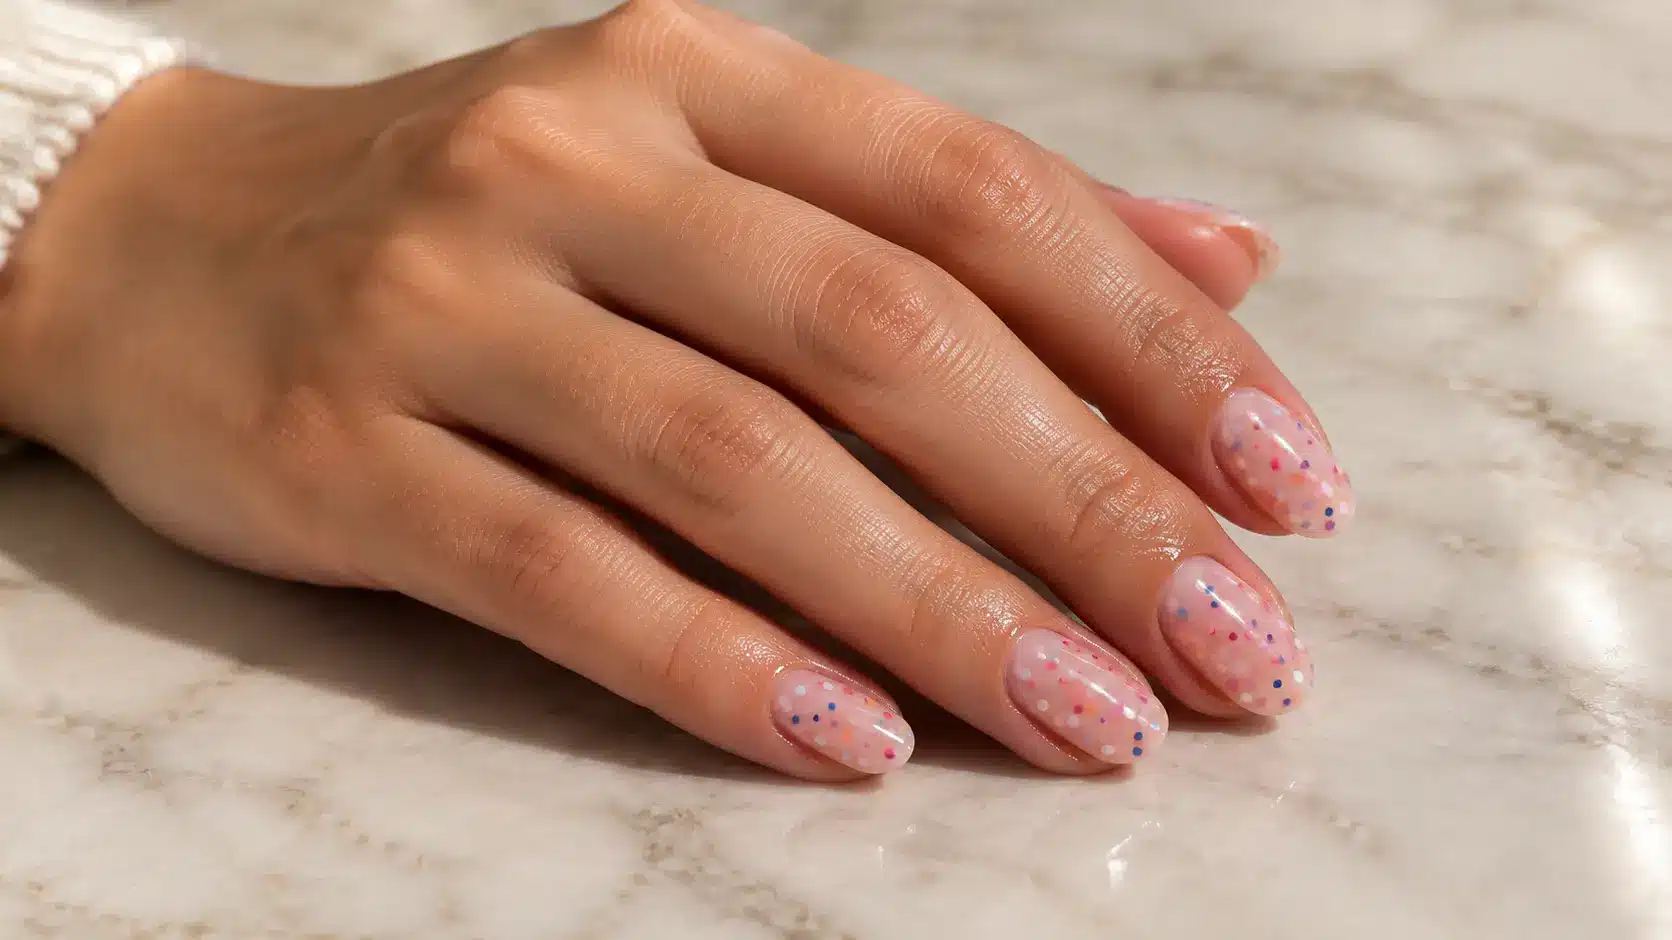
Layer multiple colors of tiny dots, rather than a single uniform shade. Dab a few different polishes with a toothpick in a random pattern, and the messier the placement, the more festive it reads.
How to get it: Start with a neutral or sheer base. Use a toothpick to scatter small dots in several colors, leaving some open space so the design does not look crowded.
9. Checkerboard Mini
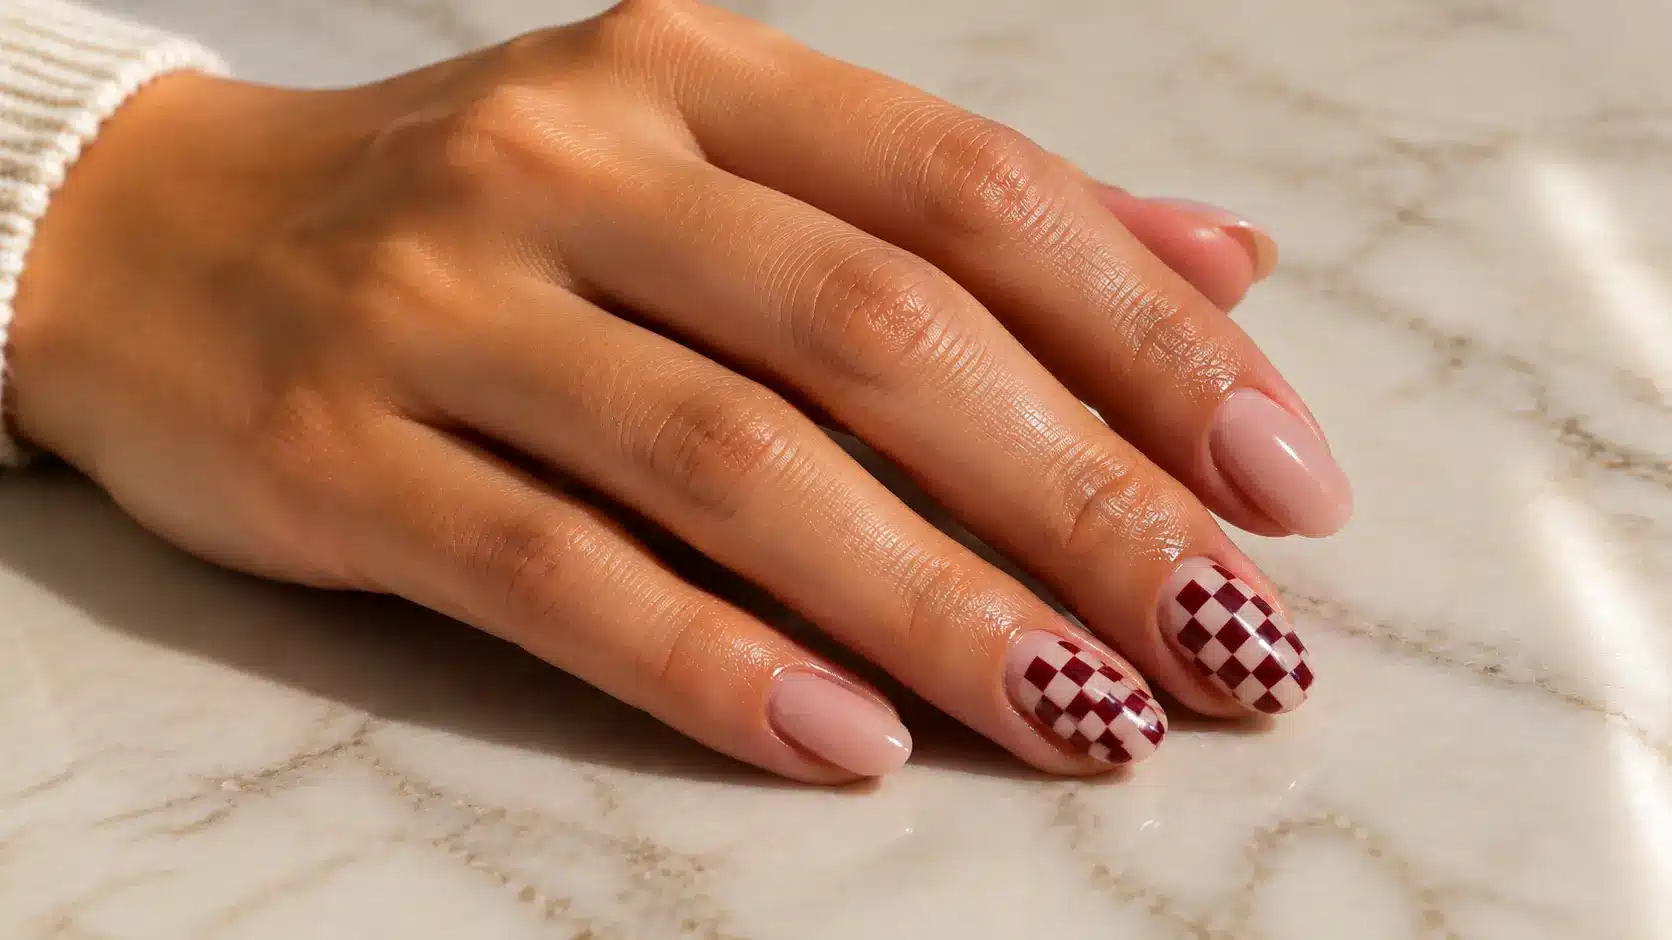
A small grid pattern on one or two accent nails rather than the whole set. Nail tape marks off the squares before you fill them in, which removes the need for freehand precision entirely.
How to get it: Paint a light base and let it dry. Use thin nail tape to create a small grid, fill alternating squares with a contrasting shade, and remove the tape before the polish sets.
10. Color-Tipped
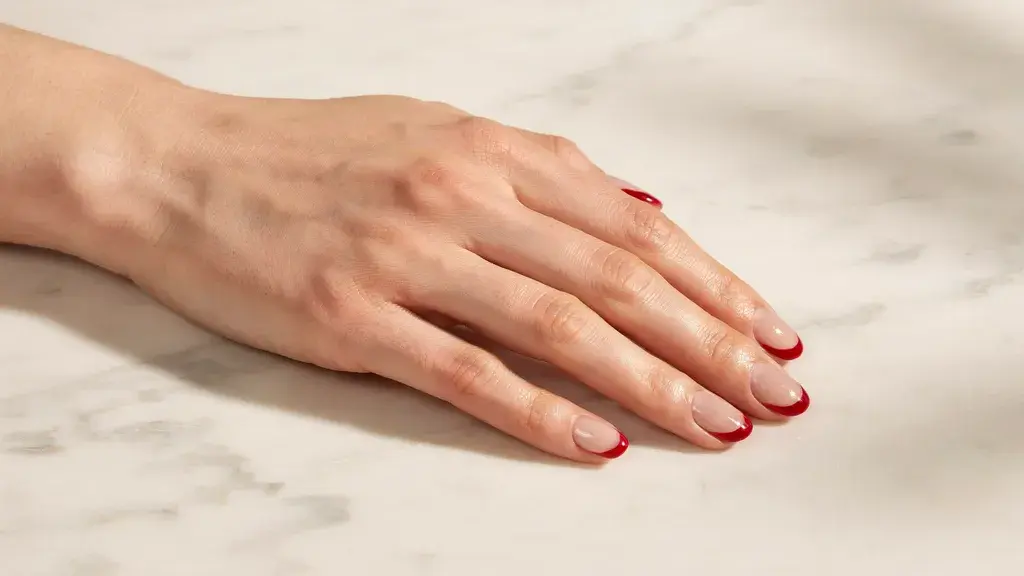
A bold color painted only at the very tip of the nail, like a French tip but chunkier and brighter. One steady horizontal stroke with a flat brush is all it takes, and any color combination works here.
How to get it: Apply a base shade, then sweep a bold polish horizontally across each nail tip with a flat brush. Clean uneven edges with a small brush dipped in remover.
11. Abstract Swirl
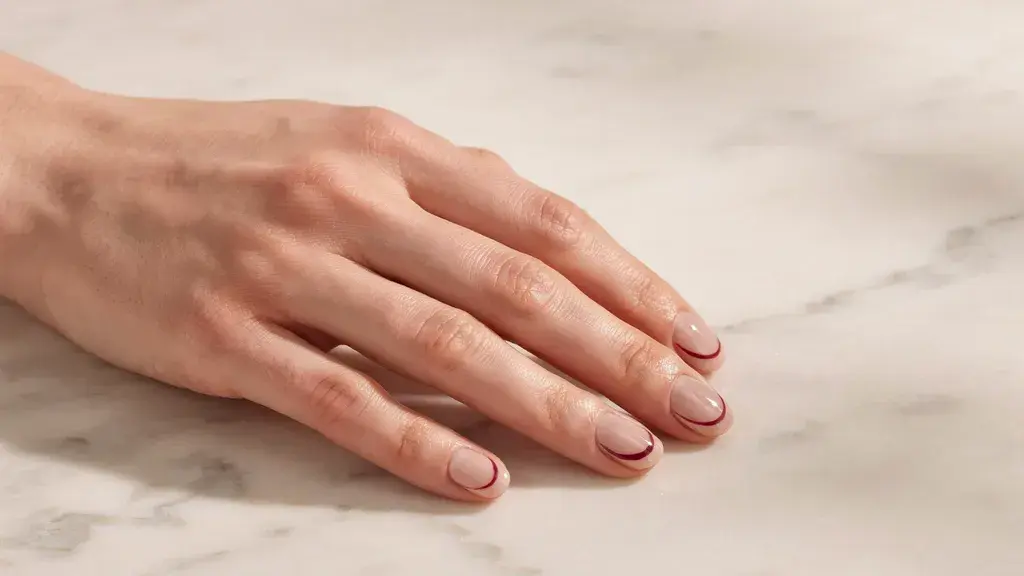
One continuous curved line drawn across the nail with a thin brush. There’s no pattern to match or repeat, so a slightly wobbly line still looks deliberate and artistic rather than like a mistake.
How to get it: Load a liner brush with a small amount of polish. Draw one loose, curved line across the nail without stopping, then seal the design once it dries.
12. Single Squiggle
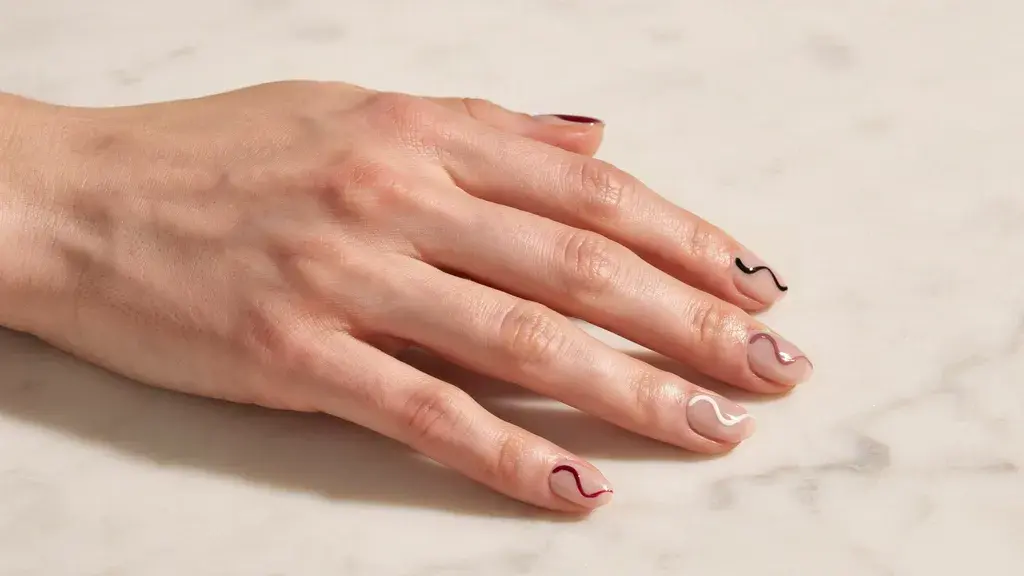
A wavy freehand line running the length of the nail in one contrasting color. A liner brush with a small amount of polish keeps the line thin, and one pass is genuinely all this design needs.
How to get it: Apply a solid or sheer base. Starting near the cuticle, move a fine brush gently from side to side while pulling it toward the tip.
13. Striped Accent
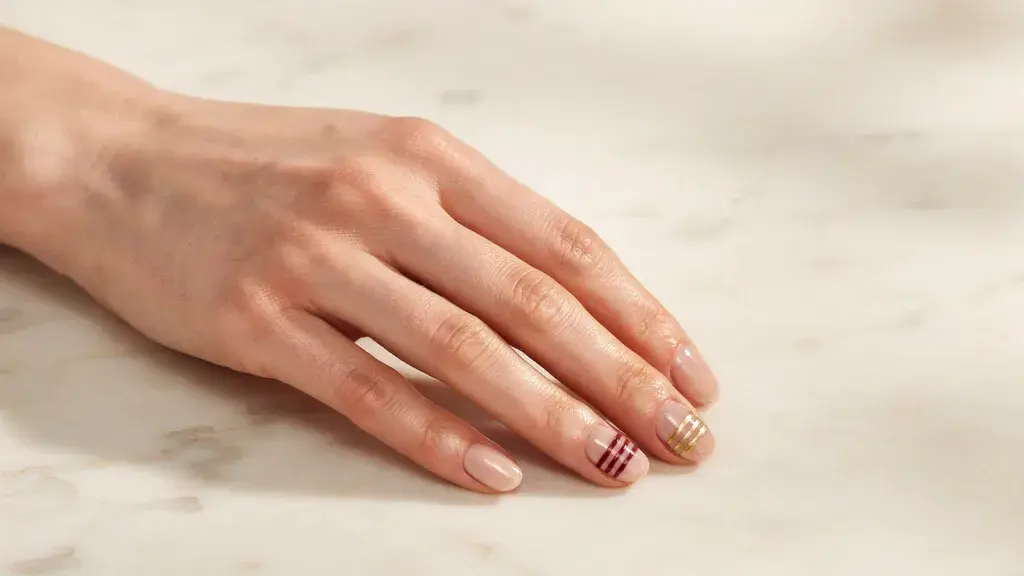
A few thin parallel lines across one nail, using tape as a guide for spacing. Paint over the tape, peel while slightly wet, and you get crisp, graphic lines without any actual line-drawing skill required.
How to get it: Place thin strips of nail tape at equal distances across one dry accent nail. Paint over them, then peel each strip away while the polish remains slightly wet.
14. Geometric Line
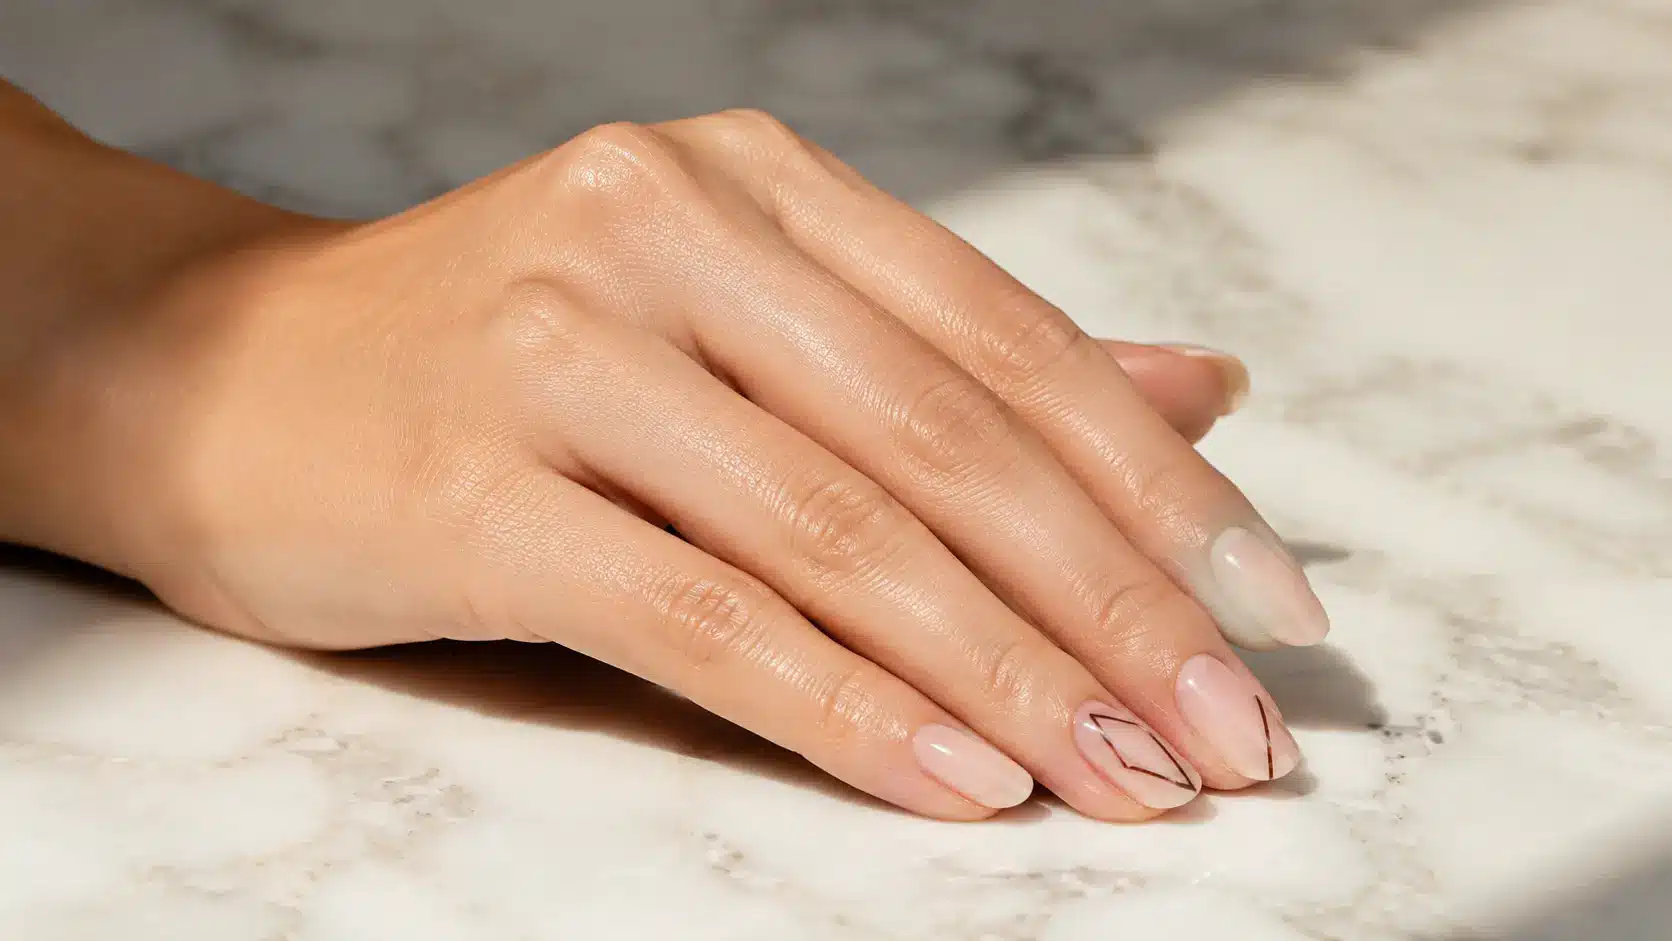
A single angular line, like a diagonal or a triangle outline, placed on an otherwise bare nail. Nail tape keeps the edges sharp, and the negative space around it does most of the visual work.
How to get it: Arrange nail tape into a diagonal, triangle, or angular shape. Trace along the tape with polish, remove it carefully, and leave the surrounding nail bare.
15. Wavy Line Art
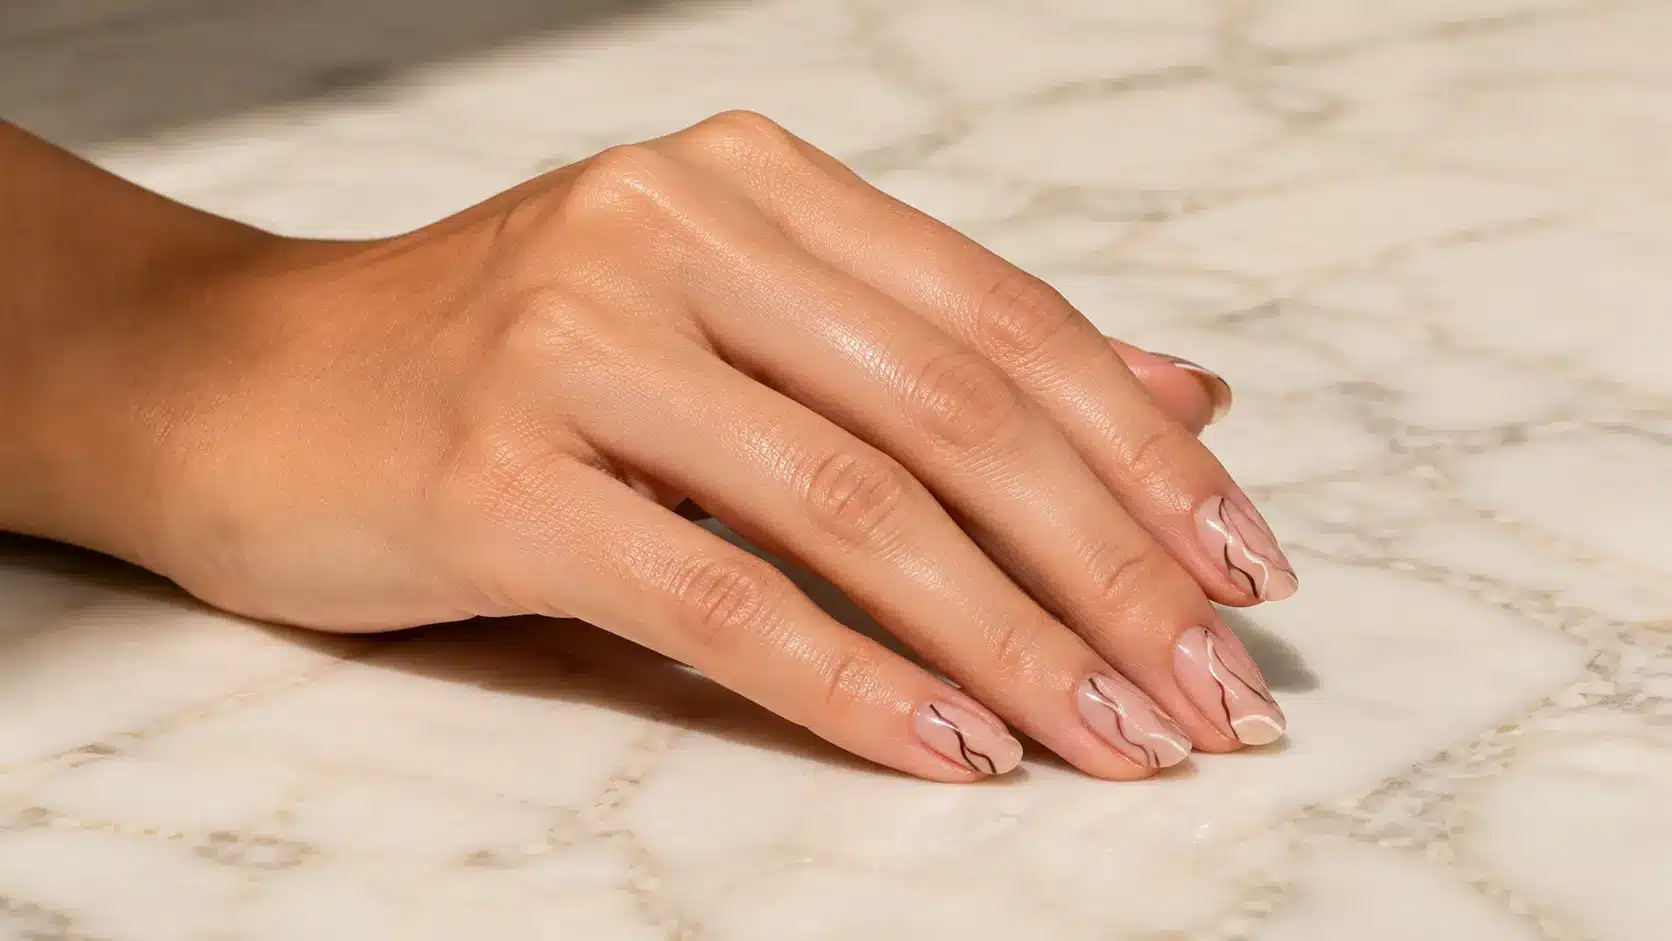
Several soft, rounded lines mimicking water or ribbon shapes drawn with a thin brush. It’s less structured than striped designs, so imprecision actually blends into the intended look instead of standing out.
How to get it: Paint several loose, flowing lines with a fine liner brush. Vary their curves and spacing instead of trying to make every line look identical.
16. Classic Thin French
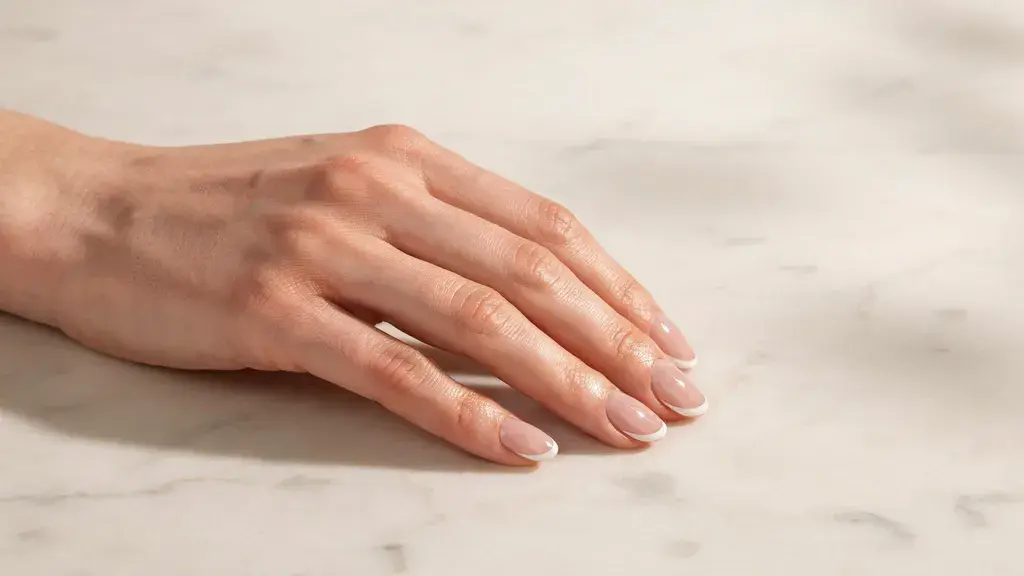
A slim white or nude line at the tip instead of the traditional thick French stripe. A striping brush or French tip guide gets a clean curve, and the thinner width makes it far more forgiving to paint.
How to get it: Apply a nude base and let it dry. Trace the natural curve of each tip with white polish and a fine brush, working from one side toward the center.
17. Reverse French
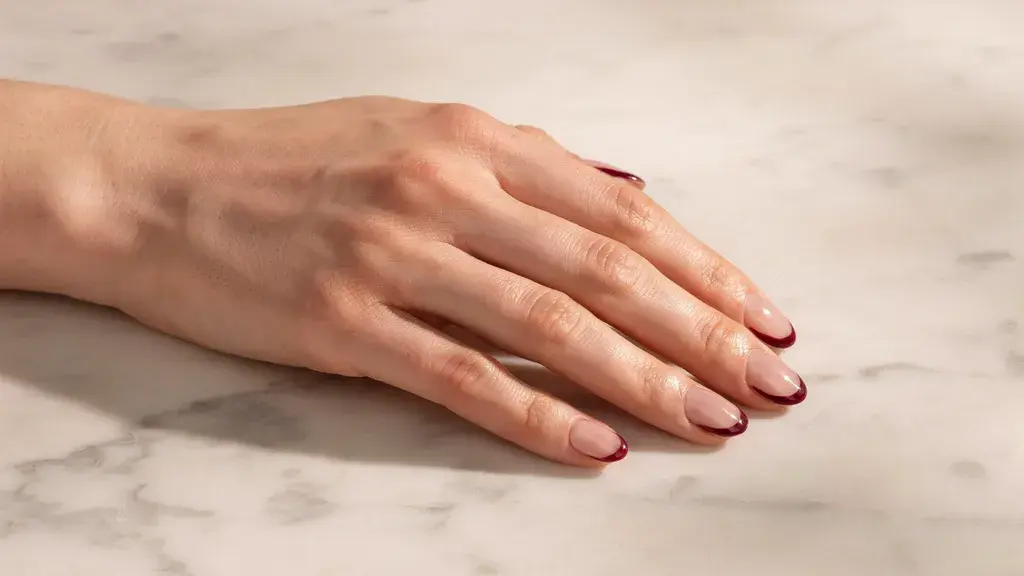
The color sits at the base of the nail near the cuticle instead of at the tip. A half-moon sticker or guide creates the curve, and this variation photographs especially well on shorter nail lengths.
How to get it: Position a curved guide just above the cuticle. Paint the exposed half-moon area, remove the guide before the polish fully dries, and add top coat.
18. Colored French
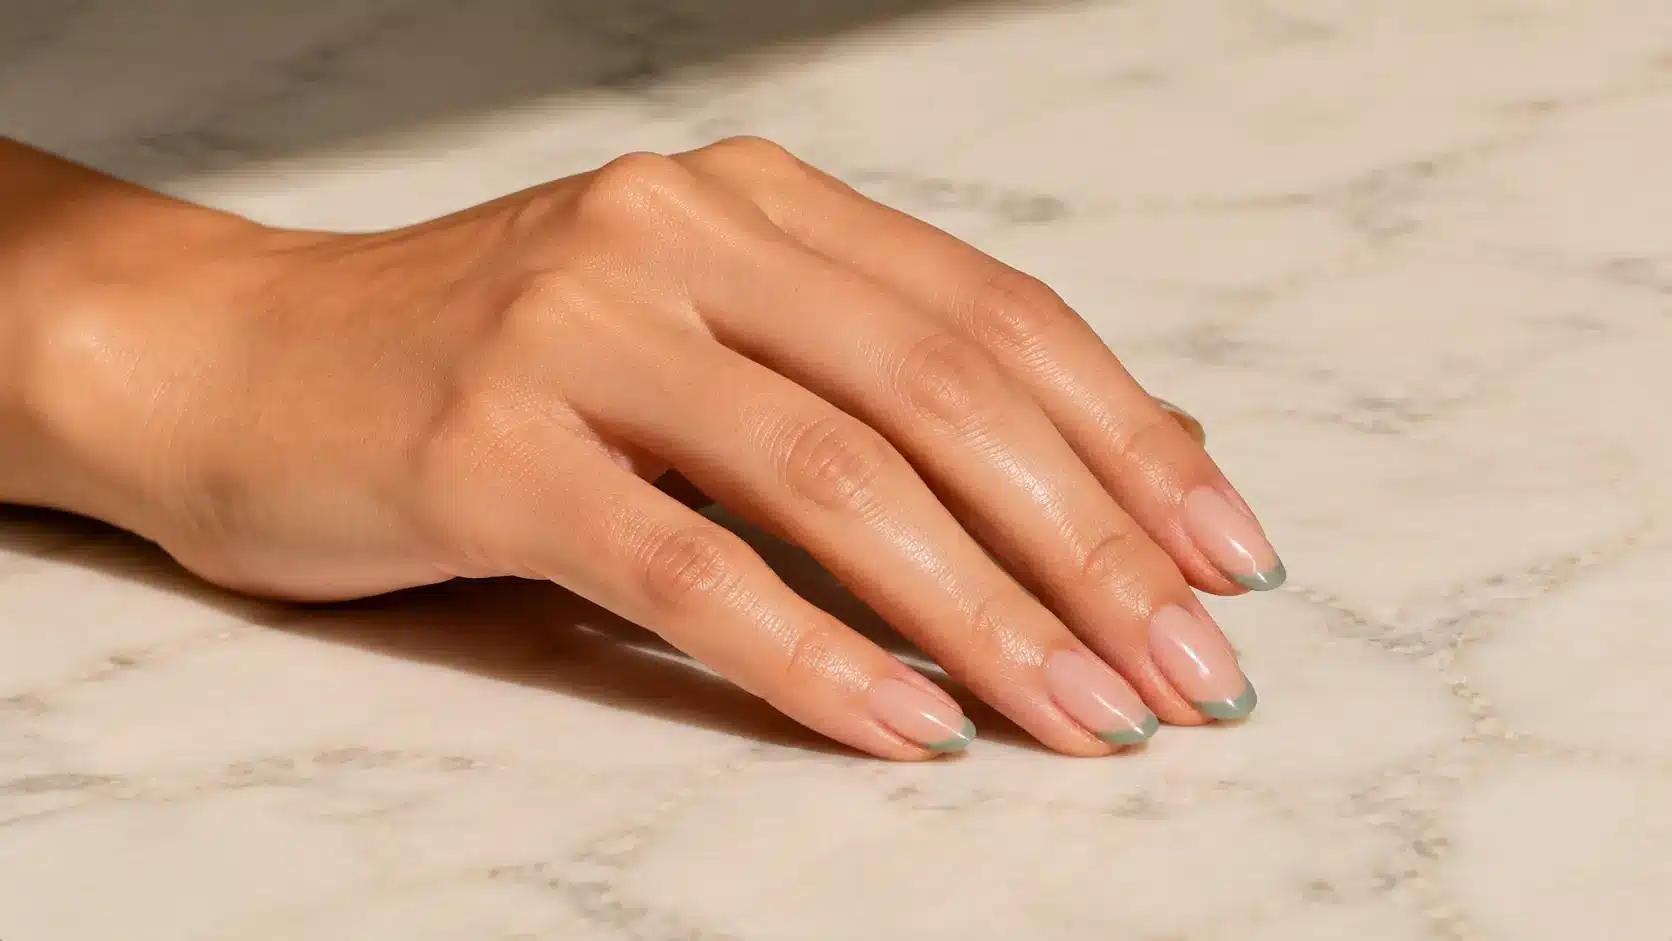
A classic French shape, just swapped from white to any color you want, like sage green or lilac. The technique stays the same as a regular French tip, so if you know one, you already know this one.
How to get it: Begin with a clear or nude base. Use a French-tip guide or slim brush to paint the tips in your chosen color, then clean up the curve if needed.
19. Double Line French
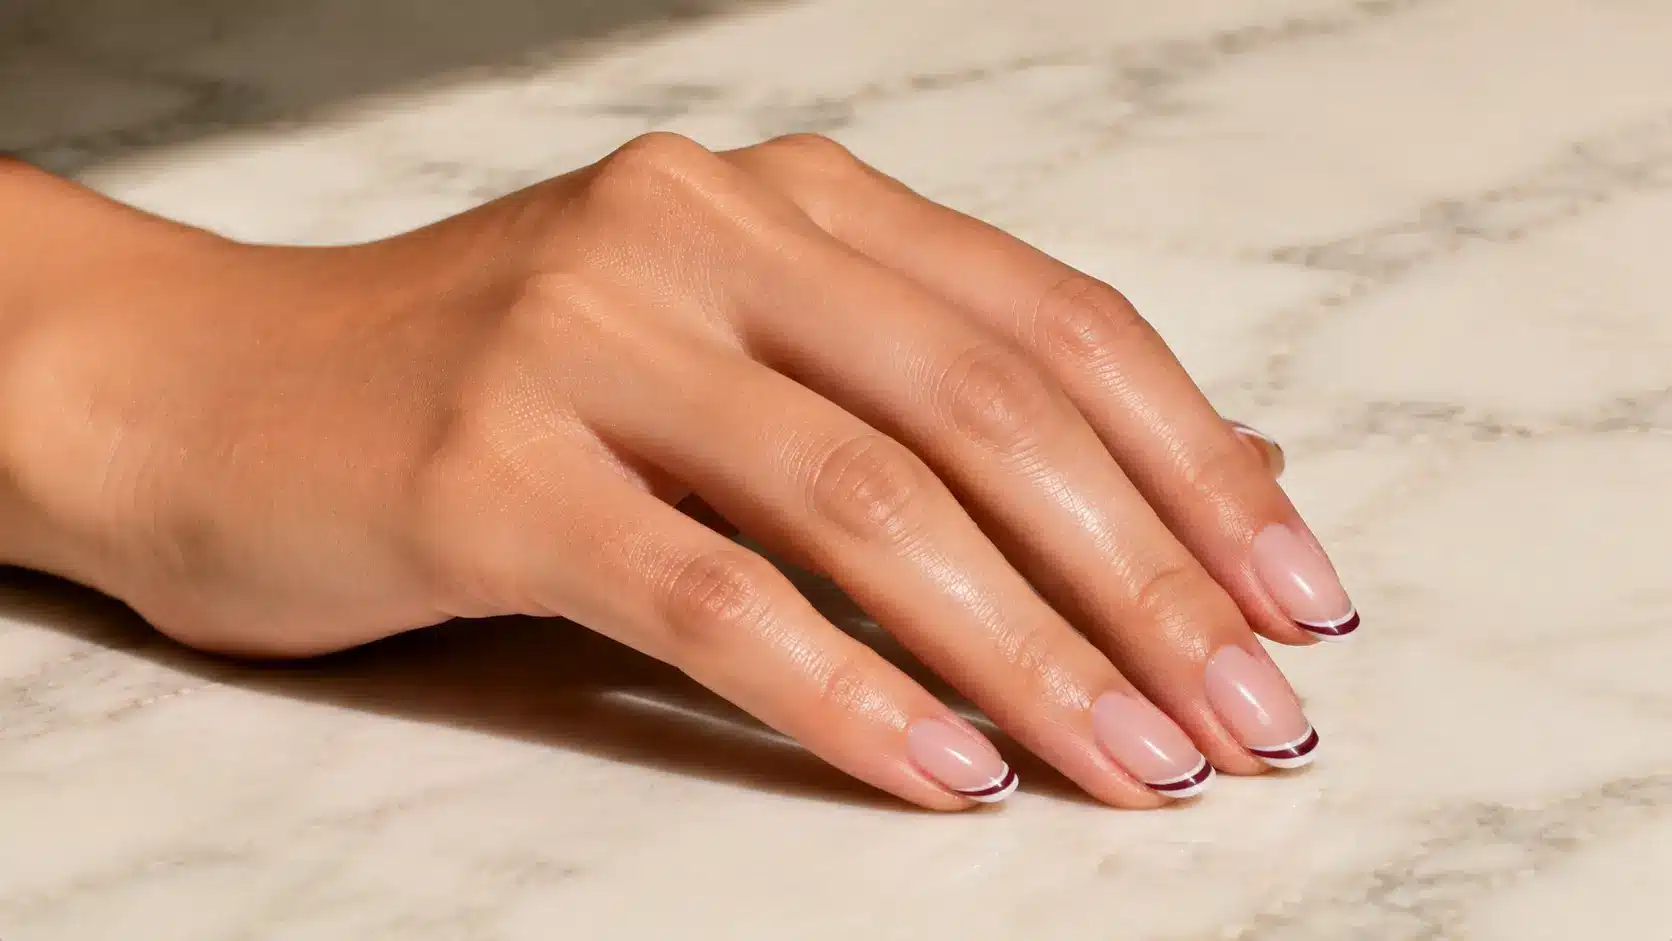
Two thin parallel lines at the tip instead of one solid block of color, often in two different shades. A fine-liner brush handles both lines, and the layered look reads as more detailed than the effort required.
How to get it: Draw one thin line along the tip and let it dry. Add a second parallel line just below it, leaving a narrow strip of the base visible between them.
20. Diagonal French
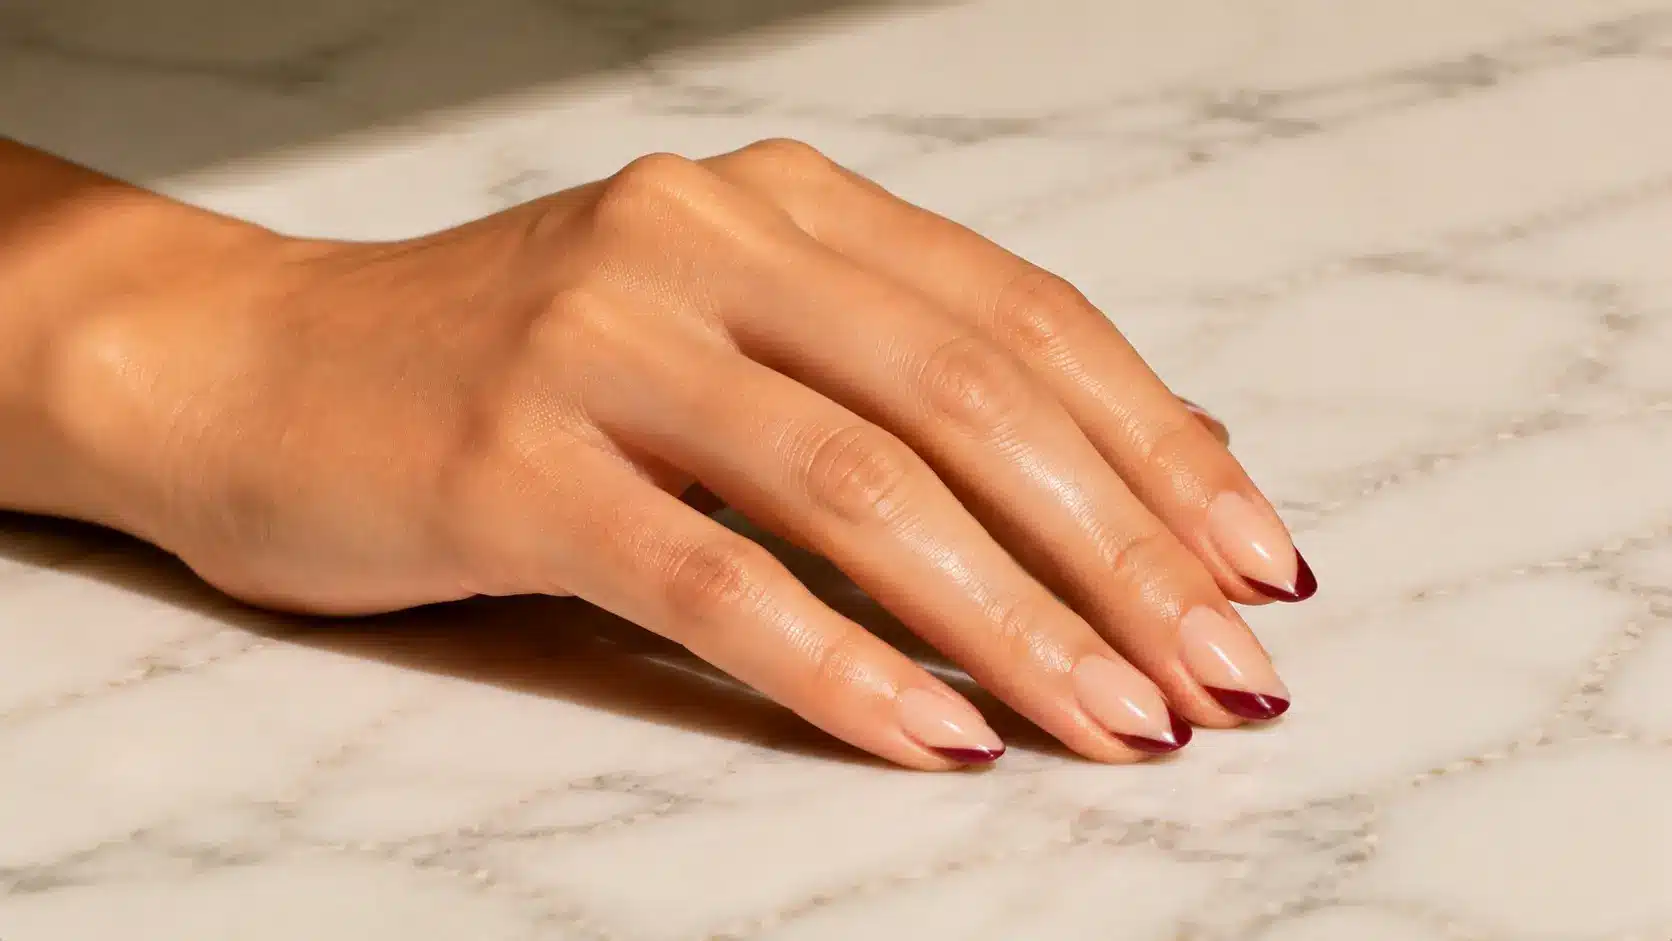
The tip line runs at a slant instead of following the natural curve of the nail. Tape marks the angle before you paint, and the asymmetry makes an otherwise basic French tip feel current.
How to get it: Place tape diagonally across the upper section of the nail. Paint the exposed tip, peel off the tape while wet, and repeat the angle on each nail.
21. Dainty Daisy
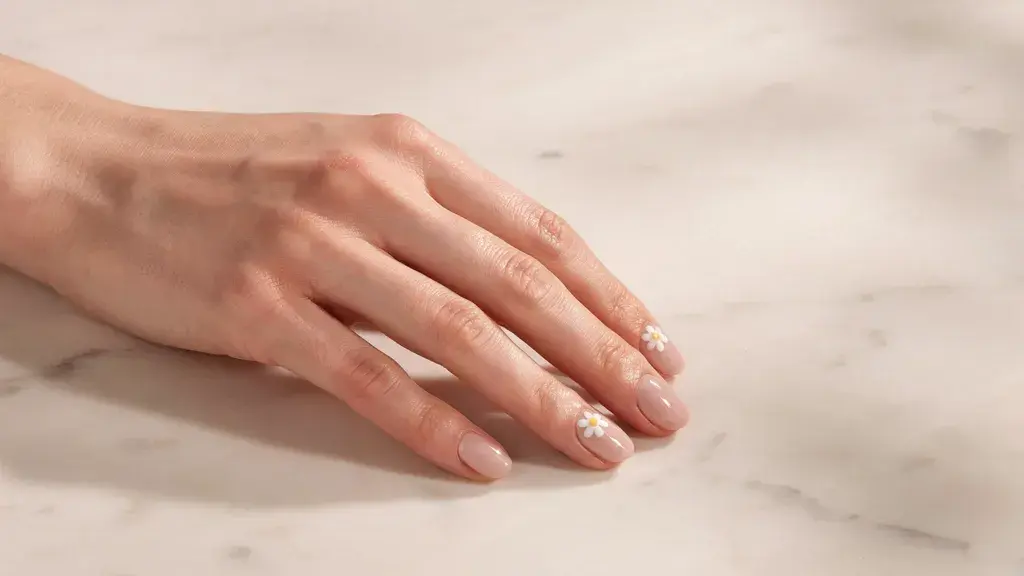
A five-petal flower made from dots pulled into oval shapes, with a contrasting center dot. A toothpick or dotting tool builds the whole flower, and slightly uneven petals only add to the handmade charm.
How to get it: Arrange five small dots in a circle using white or pastel polish. Pull each dot slightly toward the center, then add one contrasting dot in the middle.
22. Single Flower Accent
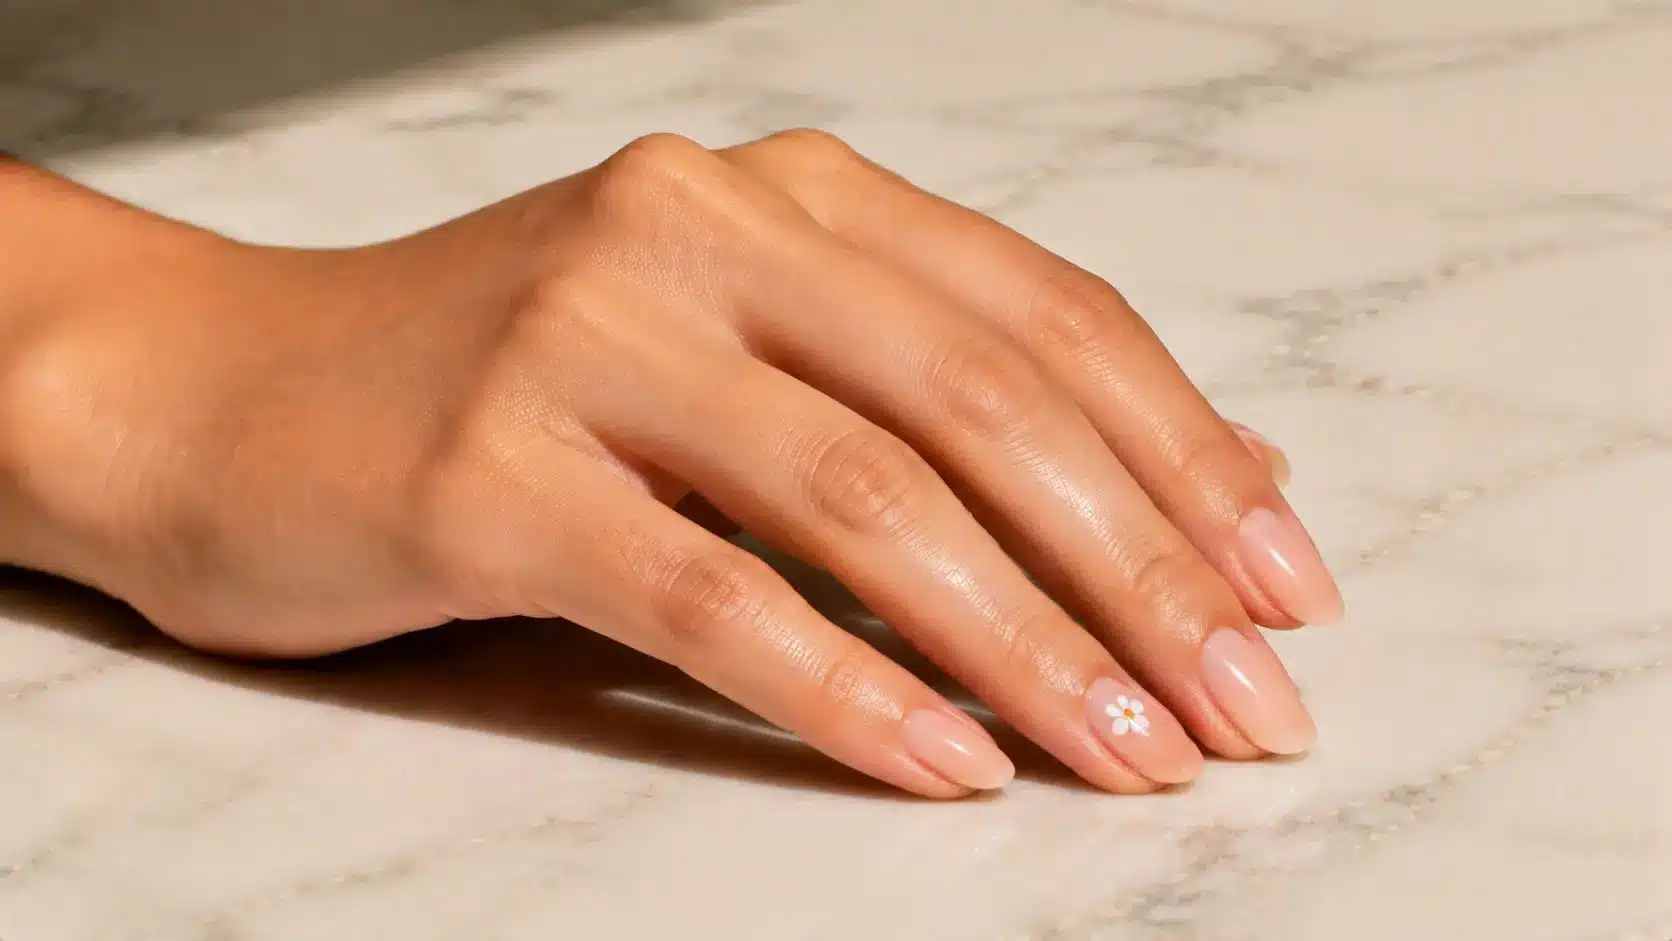
One small flower placed on just one nail, rather than a repeated pattern across the set. This keeps the design fast to execute while still giving the manicure a clear focal point.
How to get it: Choose one nail as the focal point. Create a small flower with dots or short brushstrokes, leave the remaining nails plain, and seal the full set with top coat.
23. Leaf Outline
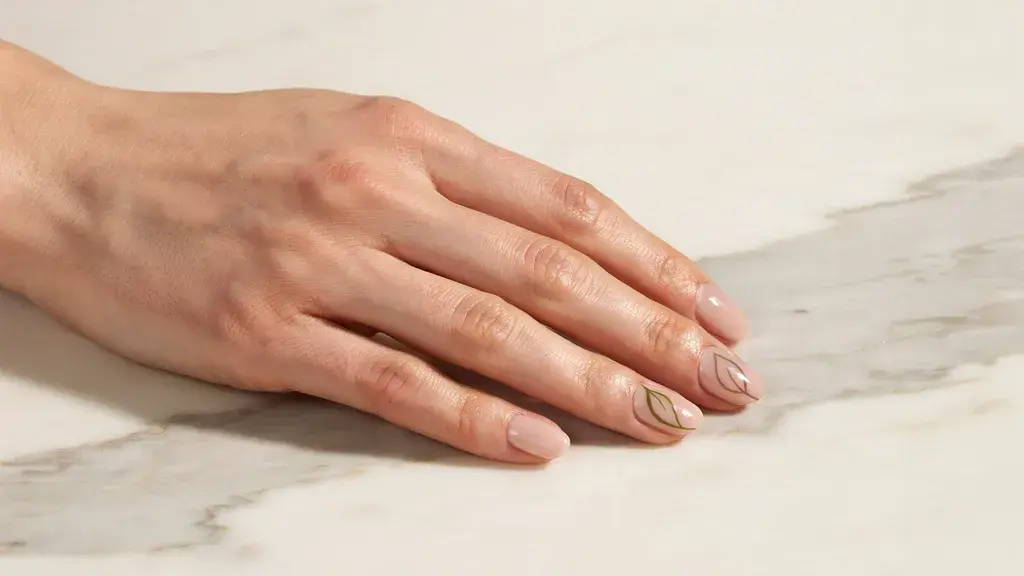
A simple leaf shape drawn with a thin brush, filled in or left as an outline. There’s no shading or gradient required, so one confident brushstroke per leaf is genuinely the whole technique.
How to get it: Draw a short curved stem with a liner brush. Add two tapered strokes on either side to form the leaf, leaving the center bare for an outlined effect.
24. Evil Eye Motif
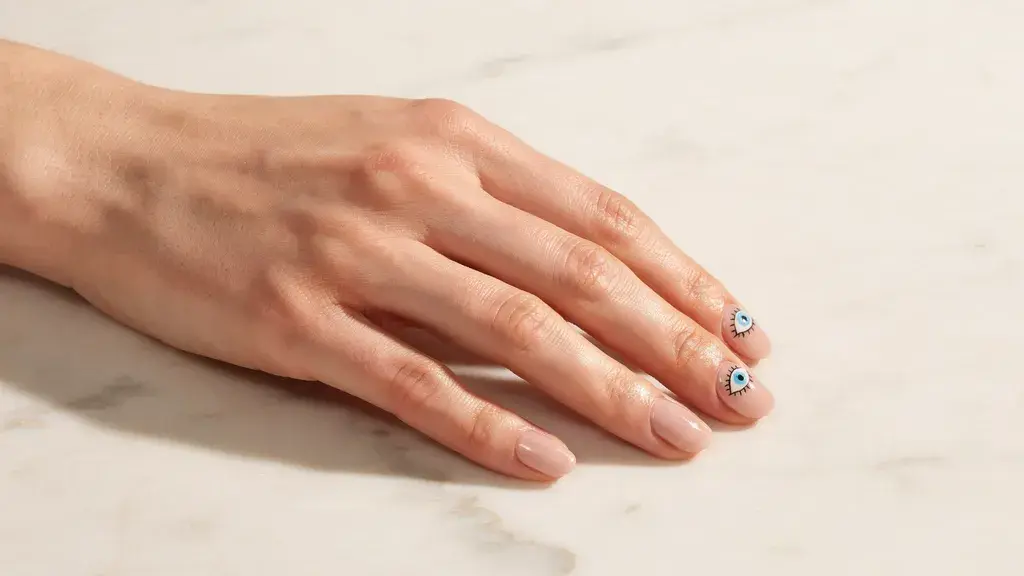
A small oval built in layers: white base, colored iris, dark center dot, with thin lash strokes around the edge. Each layer is simple on its own, and the design holds up even if the strokes aren’t perfectly even.
How to get it: Paint a small white oval and let it dry. Layer a colored dot and a smaller dark dot in its center, then add fine lash lines around the outer edge.
25. Dot-Flower
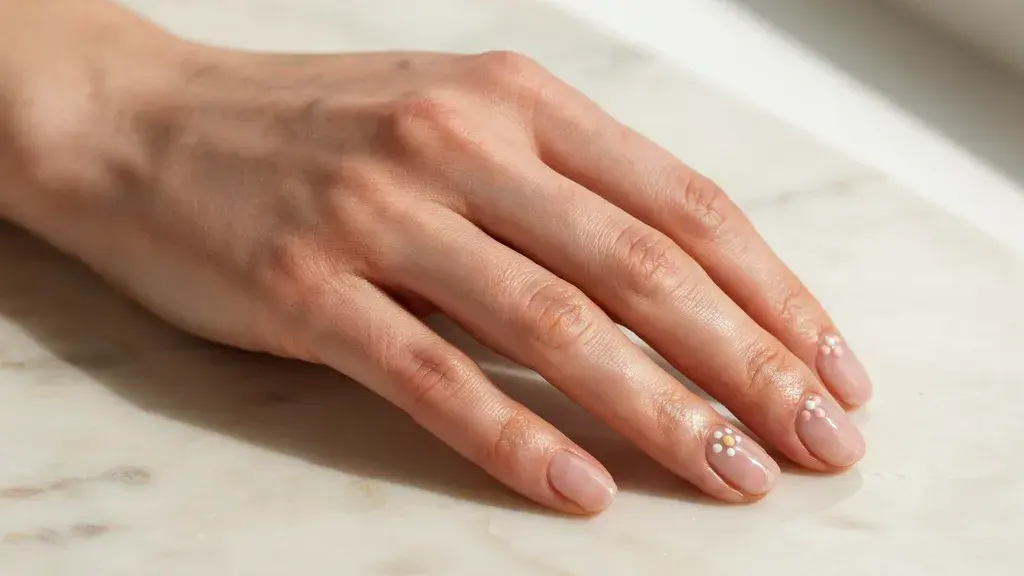
A flower shape made entirely from dots instead of painted petals, arranged in a small circle around a center dot. It’s the easiest floral option here since there’s no brush control involved at all.
How to get it: Place one center dot on the nail. Add five or six dots around it in a circular pattern, keeping them close enough to read as petals.
26. Glitter Tip Gradient
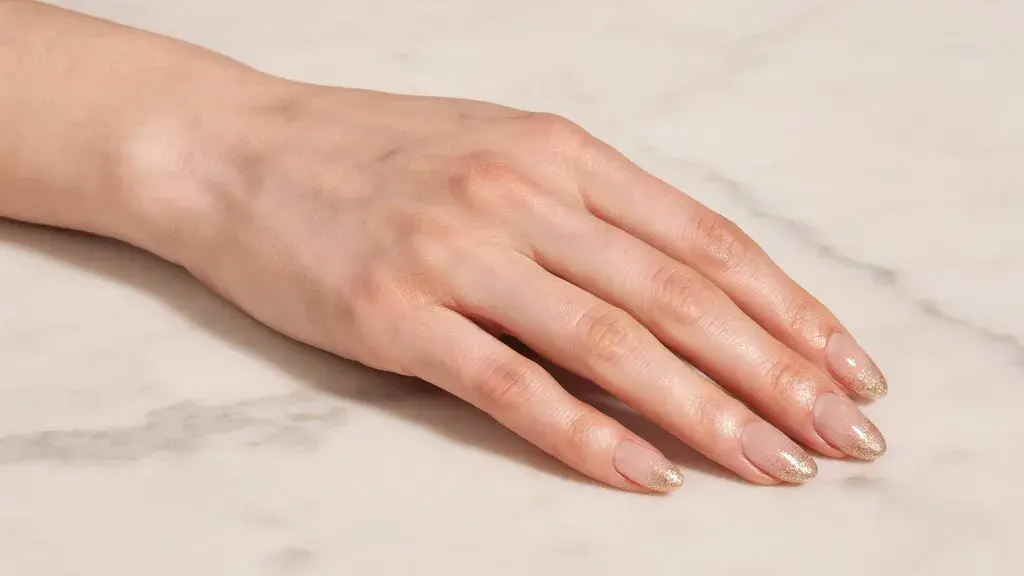
Glitter polish concentrated at the tip and blended upward with a makeup sponge. Building intensity gradually, rather than all at once, keeps the fade looking smooth rather than patchy.
How to get it: Dab glitter polish onto a small makeup sponge. Press it heavily at the tip and more lightly toward the middle, repeating until the gradient looks smooth.
27. Chrome Fleck Accent
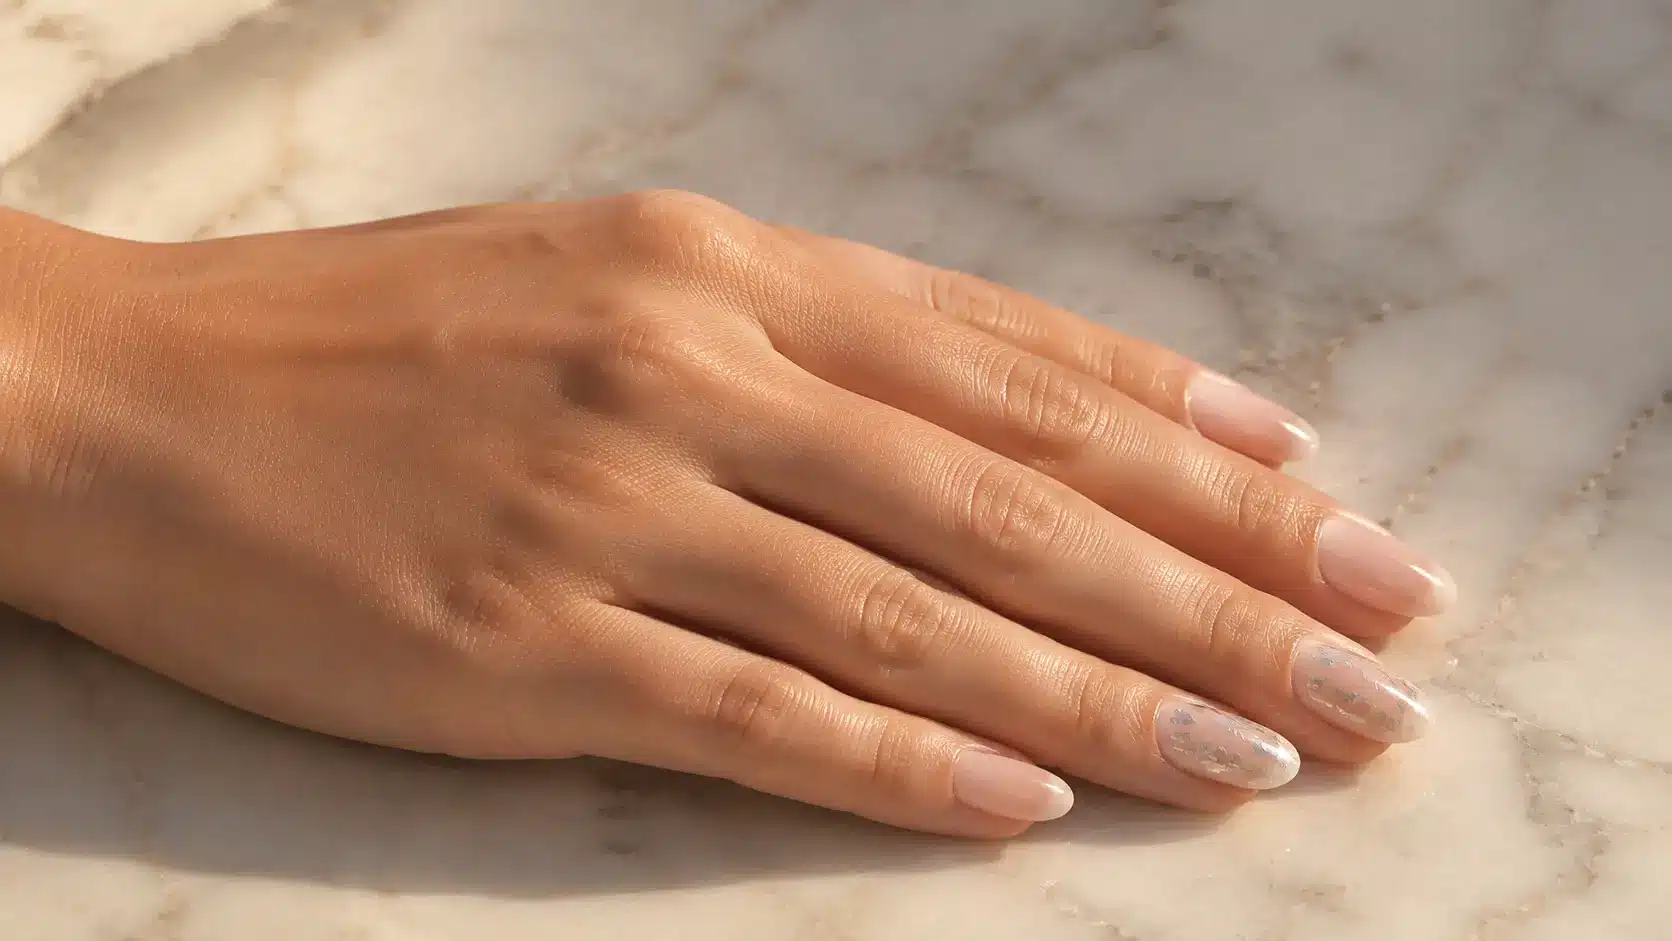
A few flecks of chrome powder or foil pressed onto a wet top coat instead of a full chrome nail. This gives a metallic moment without requiring mastery of an even, all-over chrome application.
How to get it: Apply a base shade, then a slightly tacky top coat. Press small pieces of metallic foil or chrome flakes onto selected areas and seal them with another top coat.
28. Matte-Glossy Combo
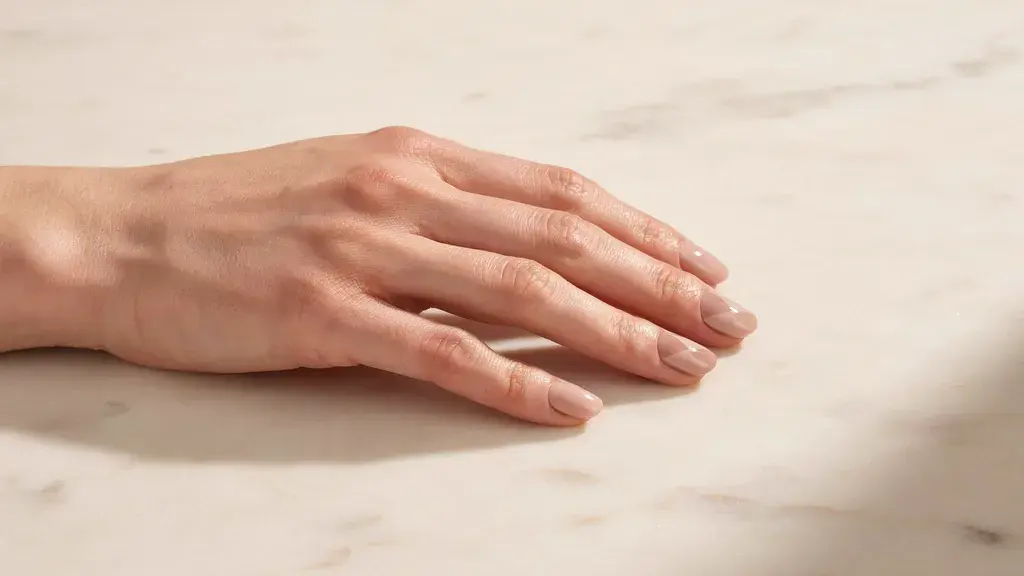
A design or shape painted in matte top coat over an otherwise glossy nail, or the reverse. The contrast in finish does all the visual work, so no color change or line art is needed at all.
How to get it: Cover the nail with matte top coat and let it dry. Paint a simple shape or stripe over it using glossy top coat to create a subtle finish contrast.
29. Aura/Blooming Accent
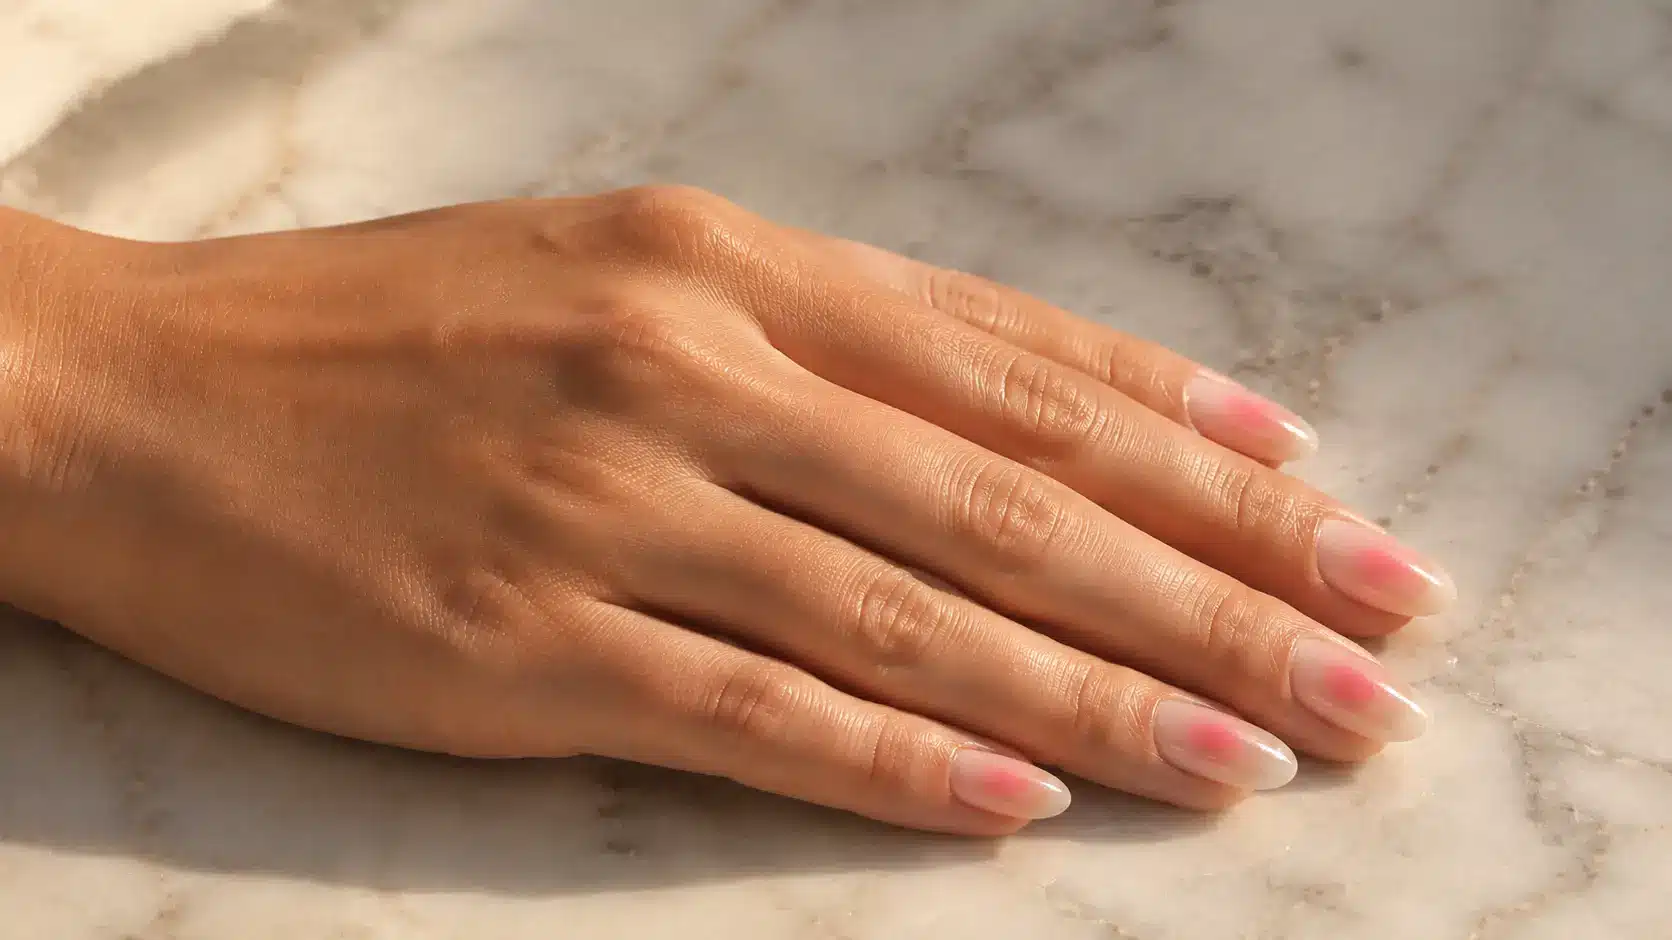
A soft, blurred halo of color around the center of the nail, blended outward with a sponge. It looks complex but forgives uneven edges since the whole point is a diffused, cloud-like effect.
How to get it: Paint a light base, then dab a small amount of color onto the nail’s center with a sponge. Blend outward using lighter pressure so the edges remain soft and diffused.
30. Milky Halo
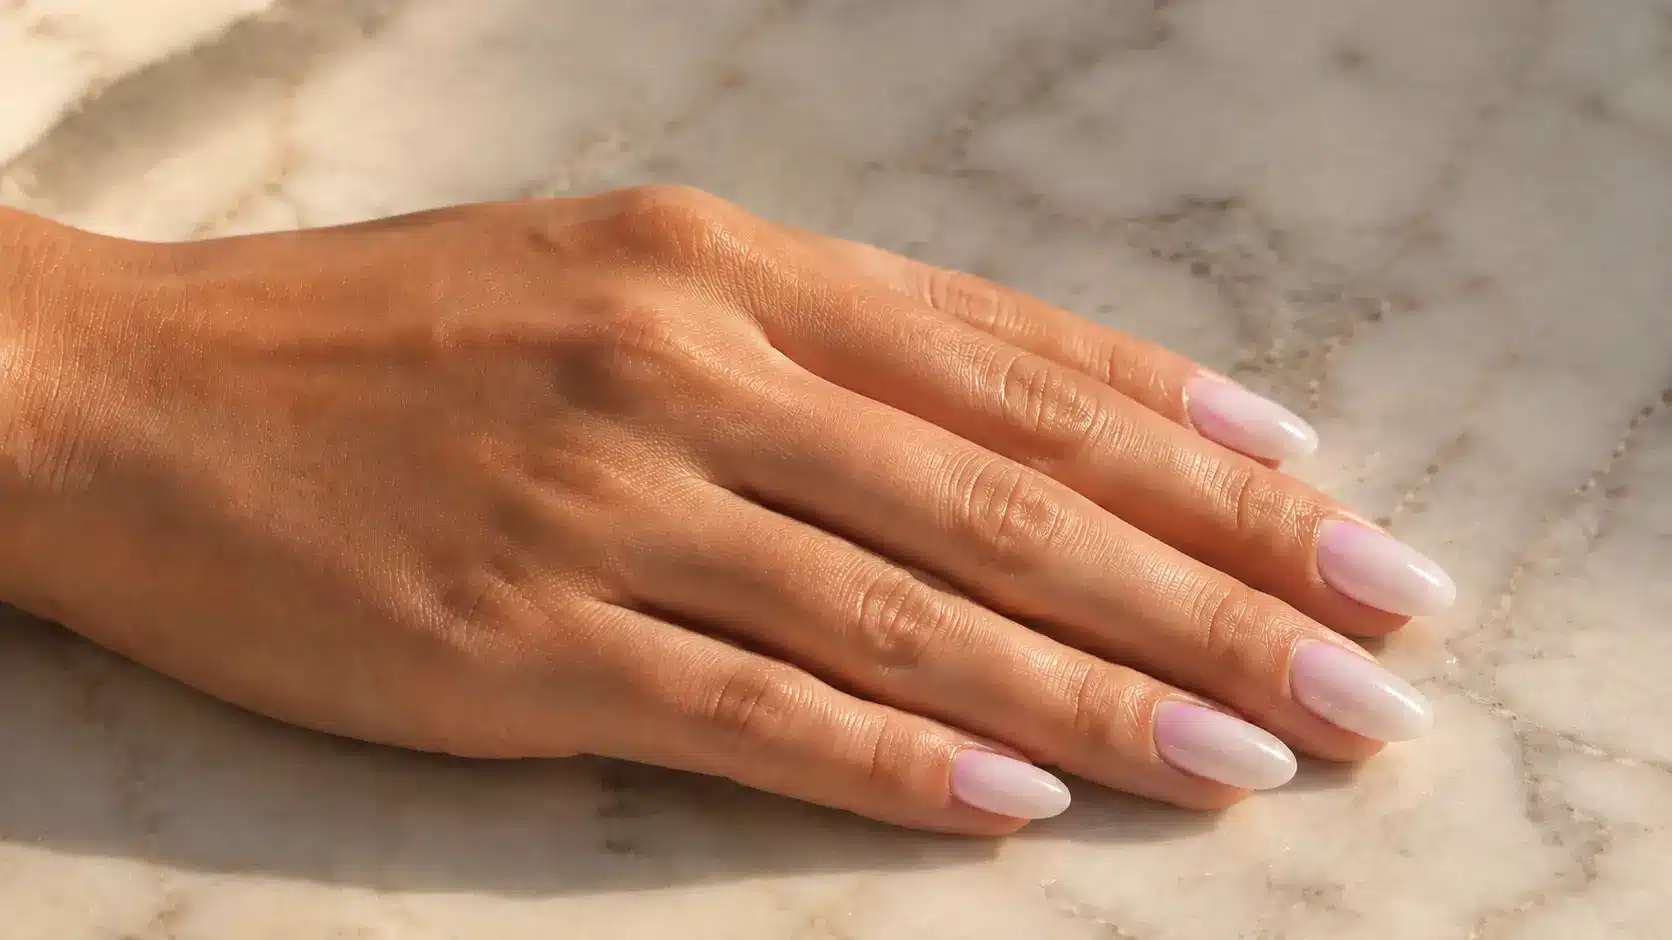
A sheer, barely-there ring of color pulled inward from the cuticle over a bare or milky base. One light layer with a small brush is enough, and the translucency easily hides small imperfections.
How to get it: Apply a milky or sheer base coat. Use a small brush to place translucent color near the cuticle, then blend it gently inward before finishing with a glossy top coat.
Picking a design is the fun part, but even the simplest look can turn messy without a few small technique habits.
Quick Tips to Make Simple Nail Art Look Polished
The gap between “clean simple” and “messy simple” usually comes down to a handful of small habits, not talent.
Start by letting your base coat dry completely before you touch a single tool to it. Work on one nail at a time instead of rushing through all ten, and reload your dotting tool or brush before every new dot or line so the sizing stays even.
Once the design is done, clean up any stray edges with a thin brush dipped in remover to achieve a crisp, salon-finish look.
Seal everything with a top coat, and you’re set. If you want that same polish to last even longer, the prep steps for doing gel nails at home work just as well under simple designs.
Getting the finish right is only half the job; keeping it looking that way for more than a day is the other half.
How to Make Your Simple Nail Design Last
Easy designs still chip if you skip basic upkeep, so a little maintenance goes a long way here.
- Cure or dry each layer fully before moving on to the next
- Apply a thin top coat; refresh every 2-3 days
- Avoid hot water soaks after your manicure, as prolonged water exposure can soften nails and cause polish to lift faster, according to the American Academy of Dermatology (AAD).
- Keep cuticles oiled so the polish edge doesn’t lift early
With the technique and upkeep both covered, there’s really nothing left standing between you and your next manicure.
Conclusion
I’ll be honest, my first few attempts at nail art looked nothing like the photos I was copying, and that was fine.
The point was never perfection. Pick one design from this list, the one that made you pause while scrolling, and just try it this weekend.
You’ll mess up a line or two, wipe it off, and try again, and that’s genuinely how everyone gets better at this.
Simple nail art was never the lesser option. It’s the smart one. Go grab your polish and get started.
Frequently Asked Questions
What Nail Shape is Most Flattering for Older Hands?
Rounded or soft square shapes tend to flatter aging hands best, since sharp points can emphasize joint changes.
What Nail Colors Should I Avoid for Older Hands?
Very dark or overly bright shades can highlight uneven skin tone; muted nudes and soft pinks look more even.
What is the Most Popular Nail Trend Right Now?
Barely-there, “your nails but better” looks are leading right now, favoring soft finishes over bold, heavily decorated sets.
What Nail Color Looks Classy on Any Occasion?
Soft nudes, milky whites, and dusty mauves read as classy since they complement most skin tones without competing.