


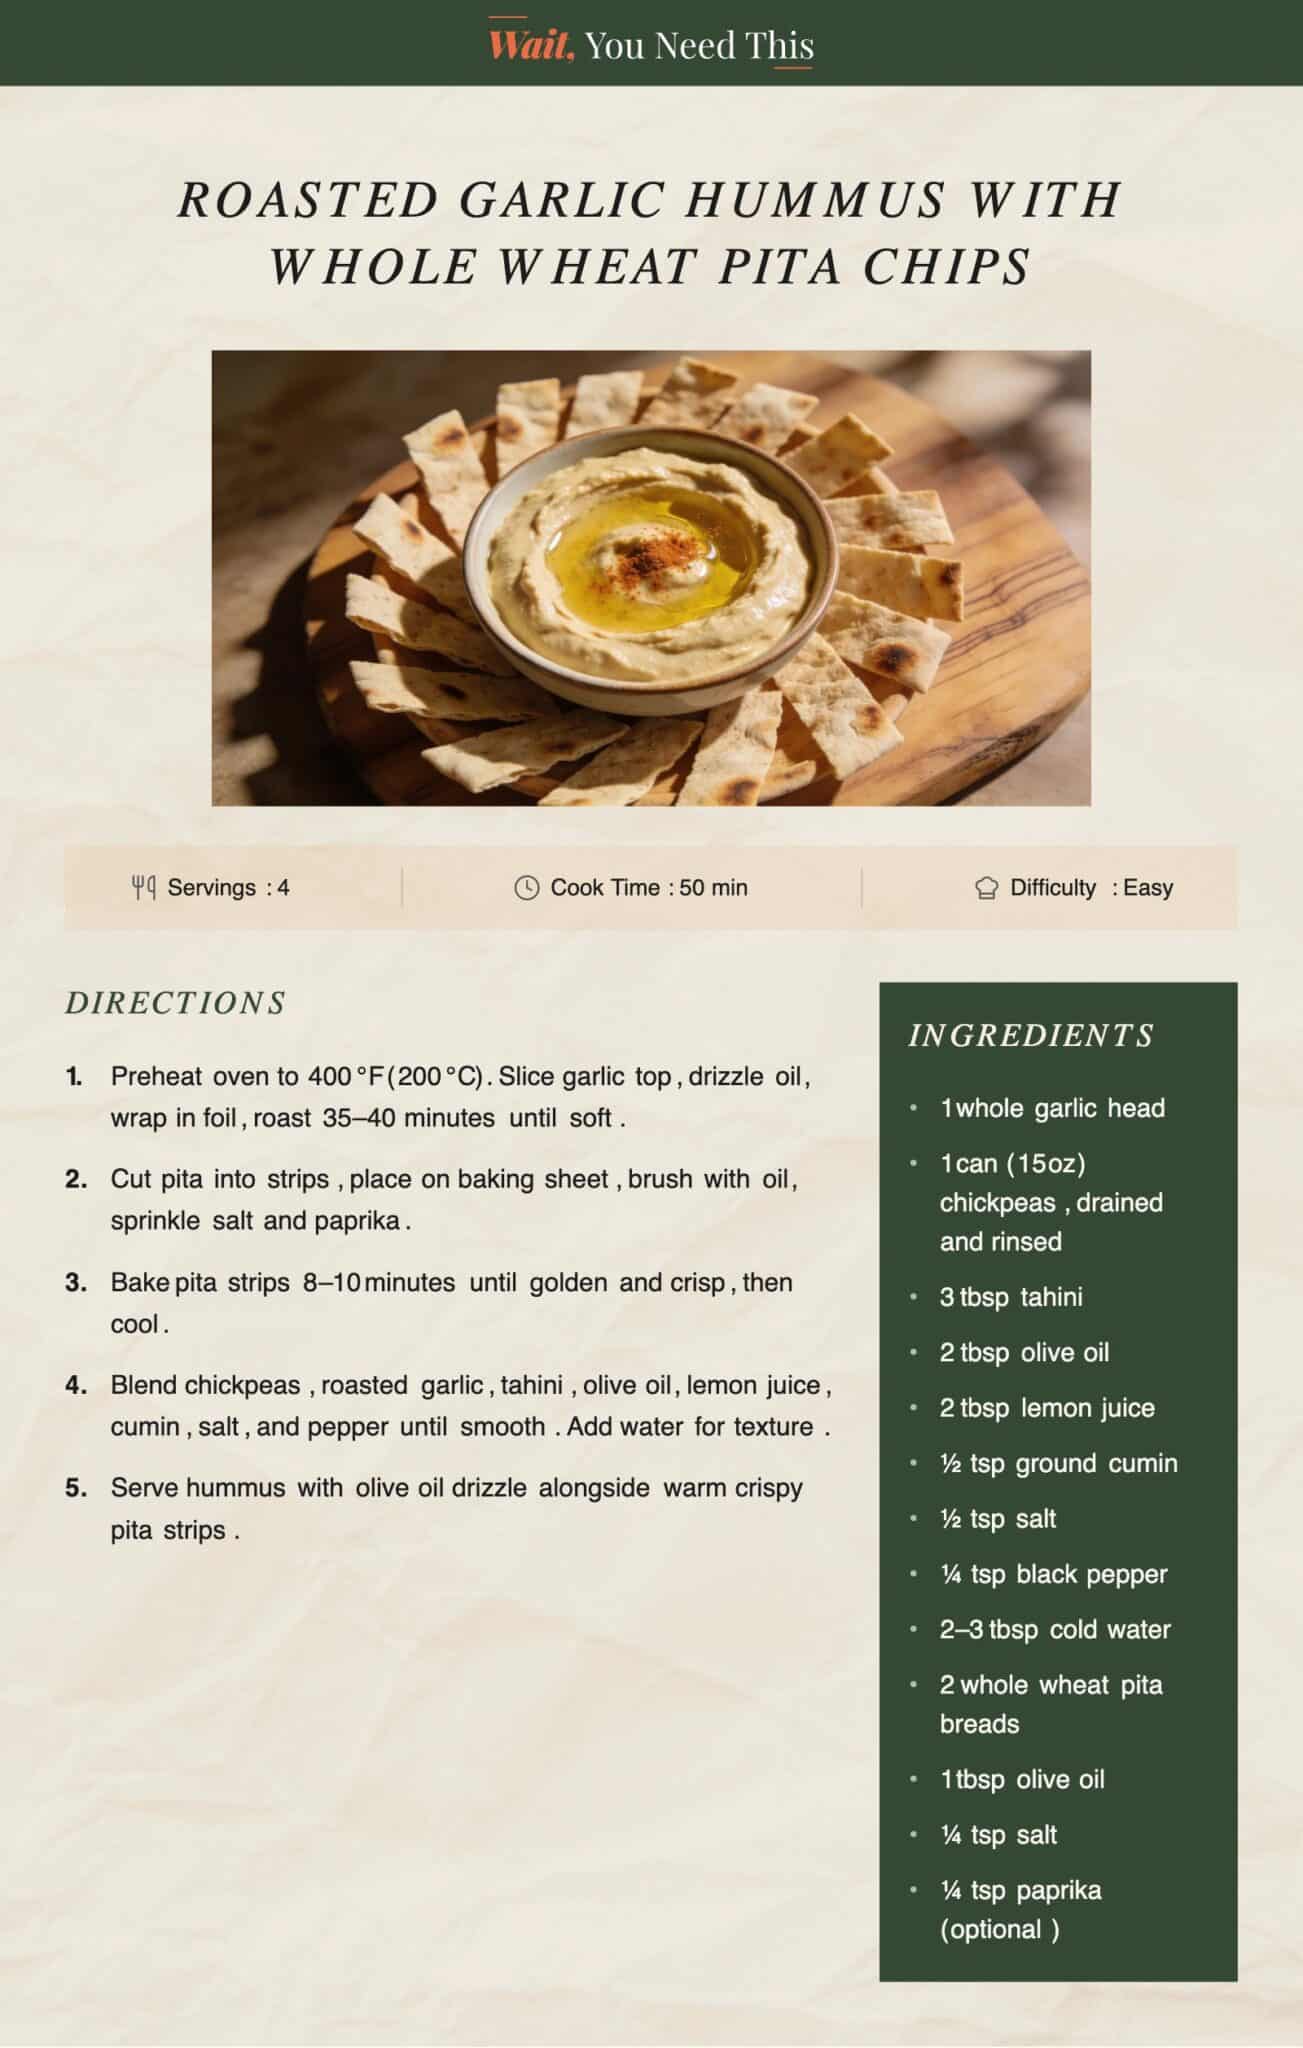
When I need a snack that feels more substantial than chips or crackers, hummus is usually where I land. It’s quick to make, keeps well in the fridge, and works for everything from afternoon snack breaks to light lunches.
This roasted garlic version is one I come back to often because the flavor is deeper and richer than standard hummus. Roasting the garlic mellows its sharpness, bringing out a soft sweetness that blends perfectly with chickpeas and tahini.
Among the wholesome snacks for work I prep for the week, this one, paired with crispy whole-wheat pita strips, always disappears first.
Ingredients
Serving size: 4 tbsp hummus with 5 pita strips | Nutritional values: ~230 kcal | Protein: 8g | Carbohydrates: 29g | Fat: 9g | Vitamins: B6, C Servings: 4 | Total Time: 50 minutes
For the Roasted Garlic Hummus
- 1 whole garlic head
- 1 can (15 oz) chickpeas, drained and rinsed
- 3 tbsp tahini
- 2 tbsp olive oil
- 2 tbsp lemon juice
- ½ tsp ground cumin
- ½ tsp salt
- ¼ tsp black pepper
- 2–3 tbsp cold water (for texture)
For the Whole Wheat Pita Strips
- 2 whole wheat pita breads
- 1 tbsp olive oil
- ¼ tsp salt
- ¼ tsp paprika (optional)
Roasted Garlic Hummus with Whole Wheat Pita Chips: Steps to Make
Roasted garlic hummus with whole-wheat pita strips is a creamy chickpea spread blended with roasted garlic and tahini, served alongside crispy-baked pita for dipping. Rich in fiber, plant protein, and healthy fats in every serving. If you enjoy cooking with legumes, understanding how different beans compare helps you find other protein-rich bases beyond chickpeas for your weekly meal prep.
Step 1: Roast the Garlic
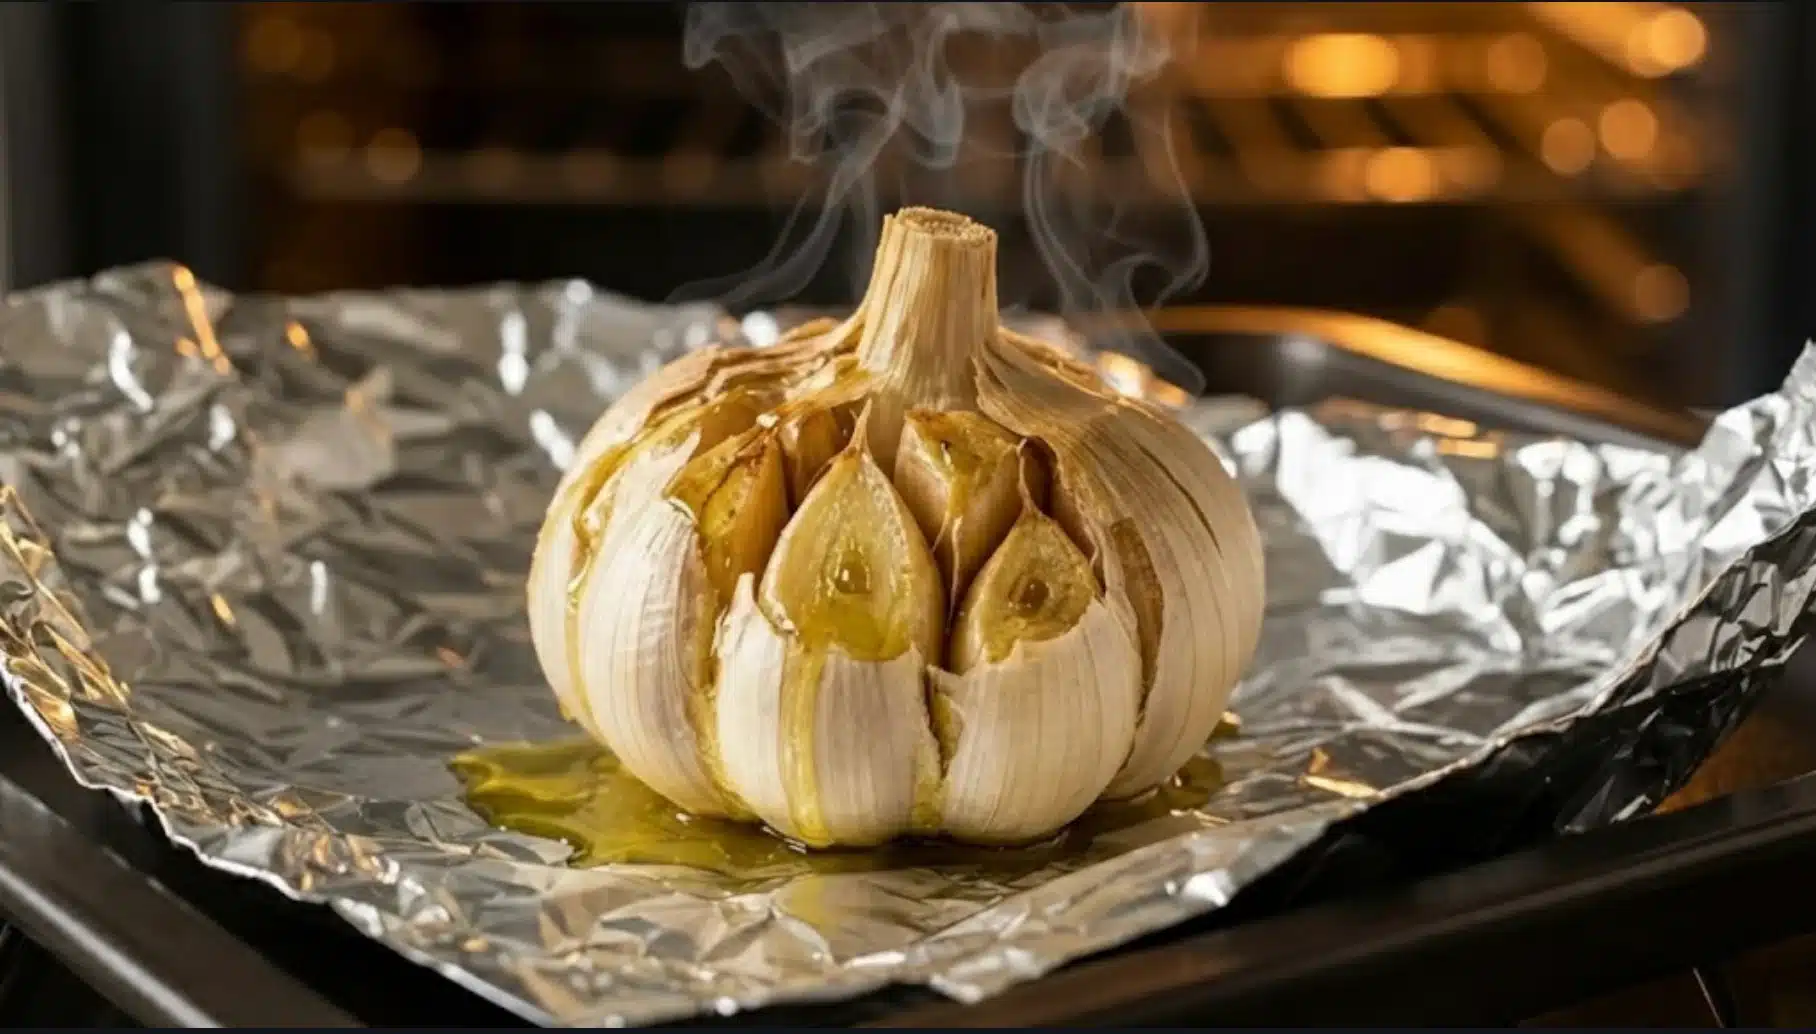
Preheat your oven to 400°F (200°C). Slice the top off the garlic head, drizzle with olive oil, wrap in foil, and roast for 35–40 minutes until the cloves turn soft, golden, and deeply fragrant throughout.
Step 2: Prepare the Pita Strips

While the garlic roasts, cut the whole wheat pita breads into thin strips or triangles. Arrange them on a baking sheet, brush lightly with olive oil, and sprinkle with salt and paprika if using.
Step 3: Bake the Pita Strips
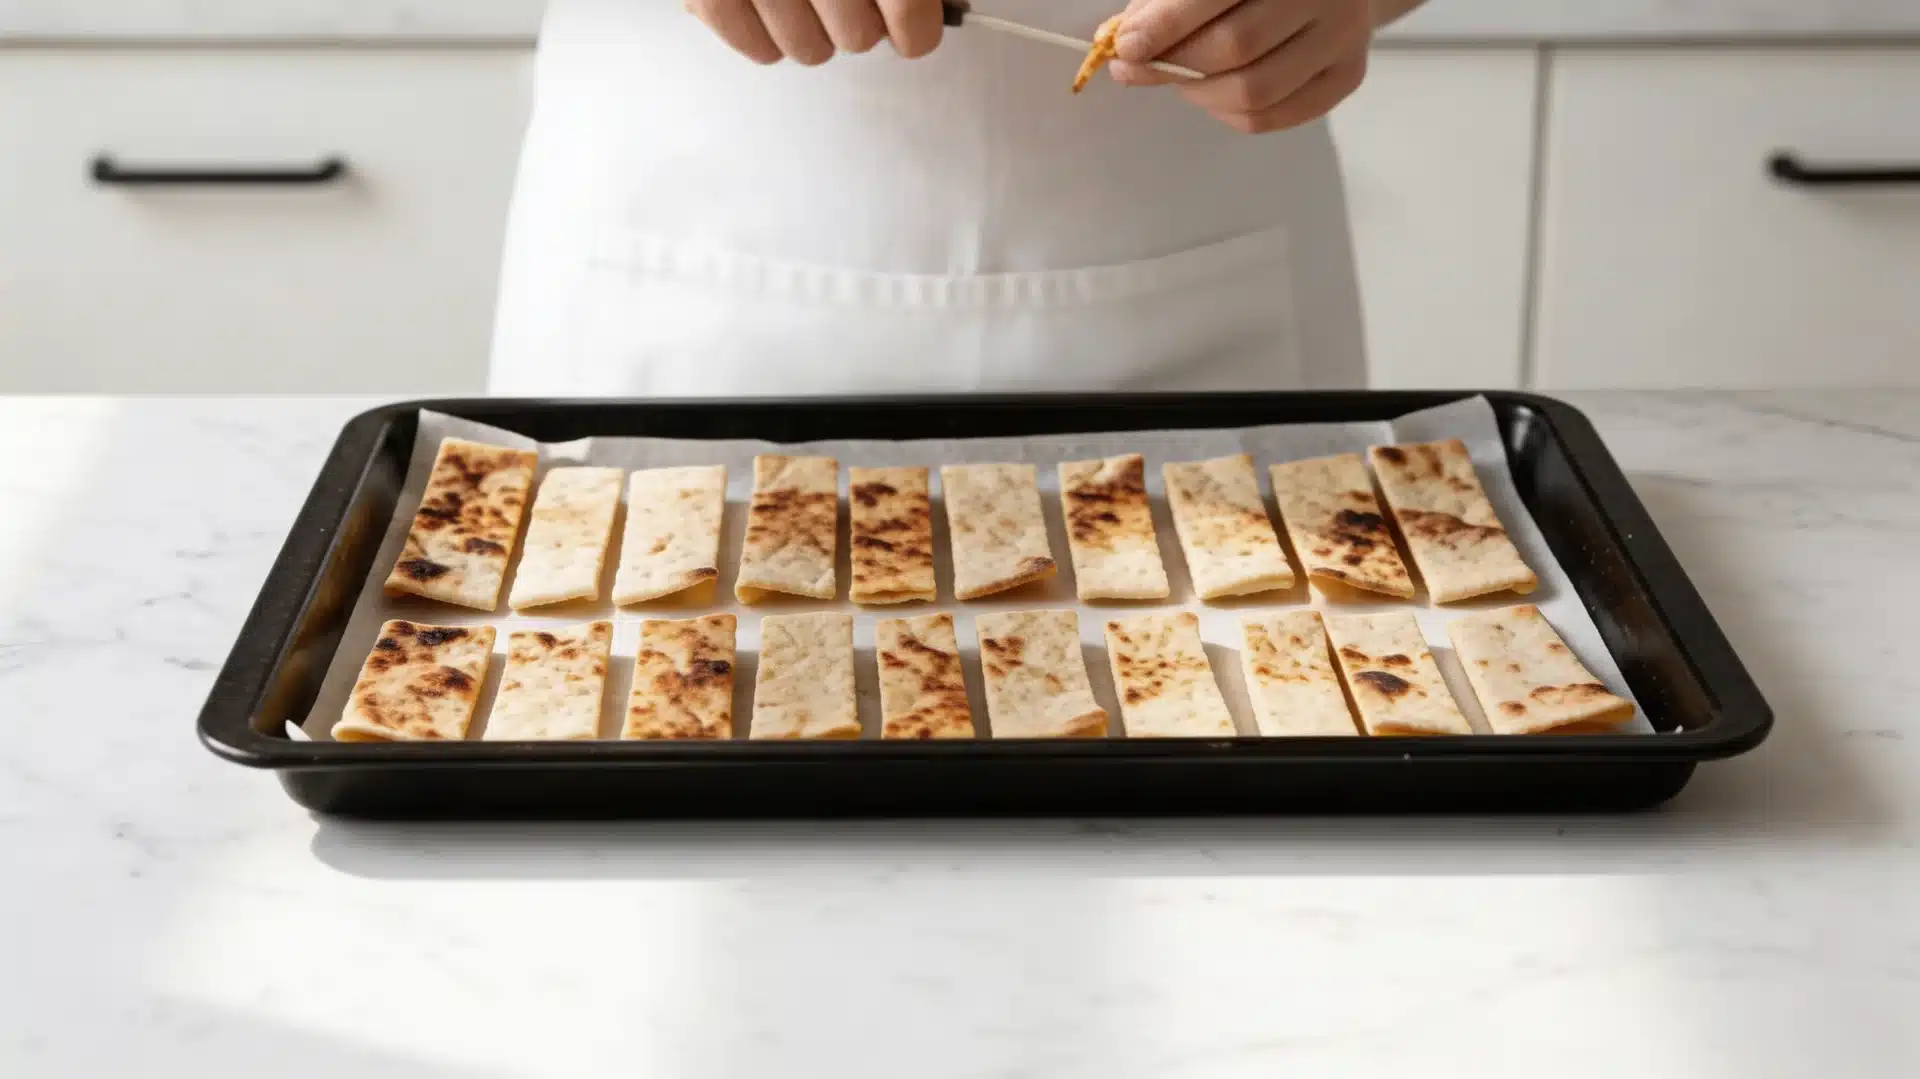
Slide the pita strips into the oven and bake for 8–10 minutes until lightly golden and crisp. Watch them closely in the final two minutes so the edges don’t overbrown. Set aside to cool completely.
Step 4: Blend the Hummus

Add chickpeas, roasted garlic cloves squeezed, tahini, olive oil, lemon juice, cumin, salt, and pepper to a food processor. Blend until smooth, adding cold water one tablespoon at a time until creamy and spreadable.
Step 5: Serve

Spoon the hummus into a wide serving bowl and finish with a drizzle of olive oil. Place the crispy whole-wheat pita strips alongside and serve immediately, while the pita is still warm and crunchy.
Final Thoughts
Roasted garlic hummus is one of those recipes that feels far more impressive than the effort it actually takes. The roasting step does most of the work, softening the garlic and adding a mellow sweetness that completely changes the final flavor.
I prepare a batch at the start of most weeks and keep it in the fridge for quick snacks and light lunches throughout the day. The flavor genuinely improves overnight, making it even better on day two.
Paired with your own baked pita strips, it’s a snack worth keeping in permanent rotation on your weekly prep list. What’s your favourite dip to pair with pita chips? Drop a comment below.


