
Cloud bread has turned into one of those recipes people try at least once after seeing it float across TikTok feeds. The texture looks unreal, soft, jiggly, almost like eating a sweet edible cloud, and that visual alone drives curiosity.
I remember watching it for the first time and thinking I should try it at home just for fun. I didn’t expect it to be so sensitive to technique or so dependent on egg whites behaving perfectly.
I also didn’t expect how quickly I would fail the first attempt because my bowl wasn’t clean enough.
I kept wondering if I was doing something wrong or if it just needed more practice. My kitchen became a small experiment space for getting it right.
Cloud Bread Explained: The Internet’s Favorite 3-Ingredient Illusion
Cloud bread skips flour entirely. It’s made with whipped egg whites, sugar, and cornstarch, then baked low and slow until the foam sets into a soft, pillowy shape without falling flat.
It went viral on TikTok after clips of egg whites puffing into glossy clouds racked up millions of views, and the trend hasn’t really slowed down since.
As someone who’s spent more weekends than I’d like to admit testing food trends before recommending them to friends, I get why this one stuck. It photographs beautifully, takes almost no skill to attempt, and feels closer to making a soufflé than baking bread.
It’s best eaten within a few hours of coming out of the oven, since it deflates and turns chewy as it sits. Leftovers keep in an airtight container at room temperature for a day, or briefly in the fridge, though the texture firms up. People usually eat it plain, topped with fruit or cream, or as a low-carb stand-in for bread.
Ingredients That Influence Texture and Stability
Three ingredients do all the work in this cloud bread recipe, and each one earns its place for a specific reason.
- Egg Whites: The structural base, they trap air and hold the foam together once whipped.
- Sugar: Stabilizes the foam and adds a light sweetness.
- Cornstarch: Keeps the texture from collapsing as it bakes.
- Temperature & Freshness: Eggs at room temperature whip up to a bigger volume than cold ones.
- Clean Equipment: Any trace of fat or oil in the bowl will flatten your foam before it even starts.
I learned the equipment rule the hard way the first time I tried this. A bowl I thought was clean turned out to have a faint film of oil from a previous bake, and the egg whites never went past a watery froth.
Step 1: Separate the Eggs Carefully

Take 3 large eggs and carefully separate the whites from the yolks. The whites need to be completely free of yolk or fat, since even a small trace will stop them from whipping properly.
Use the shell-to-shell method, or crack each egg into a small bowl first before adding the white to your main mixing bowl. Clean separation is the single biggest predictor of whether this works.
Tip: Separate the eggs while they’re cold, the yolks hold together better, then let the whites sit until they reach room temperature before whipping.
Step 2: Whip Egg Whites Until Frothy

Pour the egg whites into a large, grease-free bowl and start whipping with a stand mixer or hand mixer on medium speed, until the mixture turns frothy and pale.
This is where the air gets trapped in, which is what gives cloud bread its lift. Take your time here — rushing this stage almost always shows up later as a flatter bake.
Step 3: Add Sugar Gradually

Once the whites are frothy, add 3 tablespoons of granulated sugar a little at a time while the mixer keeps running. Adding it all at once can deflate the foam rather than strengthen it.
You’ll notice the mixture turning glossier and thicker as the sugar dissolves in, that’s the meringue base forming, and it’s what gives the final bread its soft bite.
Step 4: Add Cornstarch and Mix

Sift in 1 tablespoon of cornstarch (or corn flour) so it doesn’t clump in the foam. This is what keeps the bread from caving in once it comes out of the oven.
Tapioca or plain flour works as substitutes, though cornstarch gives the cleanest hold. Mix just until it’s evenly distributed.
Step 5: Whip to Stiff Peaks

Turn the mixer to high and beat for about 4–6 minutes, until the foam is thick and glossy and holds a stiff peak when you lift the whisk; it should look and behave like shaving cream.
Get this stage right, and the rest of the recipe is forgiving. Under-whip and the bread sinks; over-whip and it turns grainy instead of smooth.
Tip: Stop the mixer the moment you see firm, glossy peaks, a few extra seconds can break the structure you just built.
Step 6: Prepare the Baking Tray

Line a baking sheet with parchment paper or a silicone mat, and keep the surface flat so the mixture doesn’t spread unevenly once it’s scooped on.
Skip greasing the tray, added fat here works against the foam the same way it would in the mixing bowl.
Step 7: Shape the Cloud Bread Mixture

Scoop the mixture onto the center of the tray and shape it into a soft mound with a spatula or spoon.
Try not to press it down; keeping height in the mound is what keeps the air inside, and that’s what makes it fluffy once baked.
Step 8: Bake Until Lightly Golden

Bake at 300°F (150°C) for about 25–30 minutes, until the top turns lightly golden.
A note on timing: Bake times for cloud bread vary noticeably by oven and by how tall your mound is shaped. Start checking at 25 minutes, and give it a few extra minutes if the center still looks wet rather than set.
Keep the oven door shut while it bakes; a sudden temperature drop can cause the center to sink before it’s finished setting.
Step 9: Slice and Serve

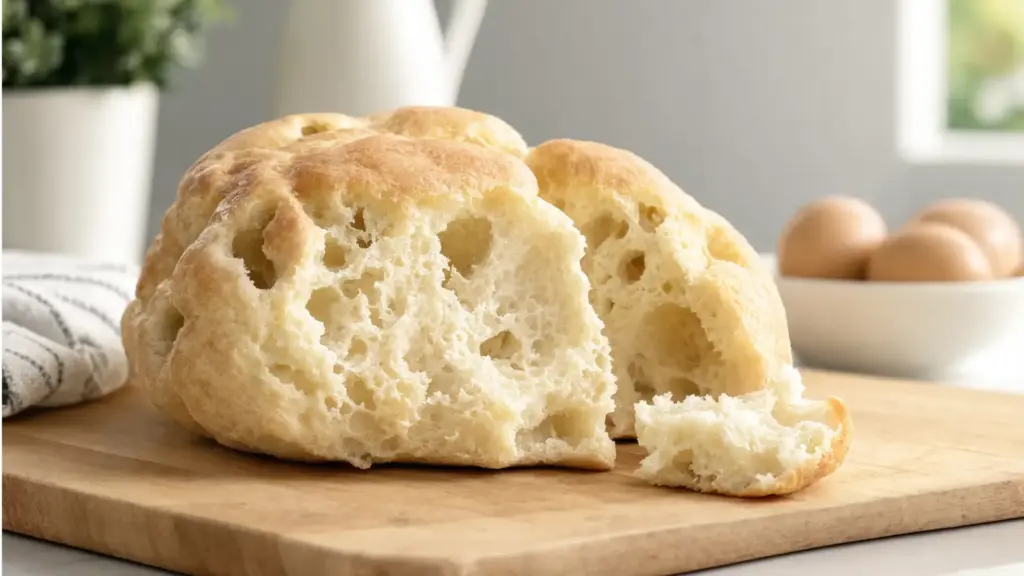
Once it’s cooled, slice or tear it open. Inside, it should be soft and airy, closer to angel food cake than to bread, with a slightly eggy edge to the flavor.
It’s at its best the same day you bake it. I usually serve mine plain with a bit of fruit on top, the lighter the topping, the more the texture gets to do the talking.
For a visual walkthrough of the process, the video below covers the same steps in real time.
Fixing Common Cloud Bread Issues
Most cloud bread problems trace back to one of a handful of causes, so the table below maps each symptom to its likely fix.
| Problem | Likely Cause | Fix |
|---|---|---|
| Flat or runny mixture | Trace fat in the bowl | Wash and dry the bowl thoroughly before starting |
| Foam won’t firm up | Eggs too cold, or not whipped long enough | Let eggs warm up first, then keep whipping |
| Cracked surface | Oven running hot | Lower the temperature slightly and bake a touch longer |
| Sticky inside | Pulled out too early | Bake a few more minutes until the center sets |
| Grainy texture | Whipped past the right point | Stop as soon as the foam looks glossy and holds shape |
Once you’ve made it a couple of times, you start sensing these problems before they happen; the foam just looks “off” a beat before it would’ve gone wrong.
Flavor Variations and Creative Additions
Once you’ve nailed the base, there’s room to play, though some add-ins are gentler on the foam than others.
- Sweet Vanilla Cloud: Vanilla extract and a touch more sugar push it closer to marshmallow.
- Chocolate Dust Version: A light dusting of cocoa folded in gently, without weighing the foam down.
- Savory Herb Cloud: Garlic powder, salt, and dried herbs create a sandwich-style base.
- Cheese-Enhanced Version: Soft cream cheese adds richness and is popular in keto baking.
- Colorful TikTok Style: Food coloring swirled in for the pastel, photo-ready batches you see online.
I’ll admit the colorful versions are the ones I make when I’m filming for friends rather than actually eating, they photograph far better than they taste, and a little gel coloring goes a long way before it starts dulling the foam’s shine.
Cloud Bread vs Real Bread
Cloud bread doesn’t taste like regular bread, since there’s no flour or yeast involved. It’s lighter, airier, and slightly eggy, closer to meringue than a loaf. Sweet versions lean toward marshmallow; savory ones taste more like baked egg foam.
| Feature | Cloud Bread | Real Bread |
|---|---|---|
| Base Ingredients | Egg whites, sugar, cornstarch | Flour, yeast, water |
| Texture | Light, airy, fluffy | Dense, chewy, structured |
| Taste | Mild, eggy or sweet | Wheat-based, rich flavor |
| Rising Method | Whipped air (no yeast) | Yeast fermentation |
| Mouthfeel | Soft, melts quickly | Firm, chewy bite |
| Best Use | Snack or low-carb alternative | Sandwiches, meals, and toast |
Treat it as its own thing rather than a bread replacement, and it’s far more satisfying, the comparison only disappoints if you’re expecting a sandwich loaf.
Frequently Asked Questions
Can I use a hand whisk instead of an electric mixer?
You can, but expect it to take 10–15 minutes of steady whisking instead of a few minutes with a machine. Your arm will feel it before the foam does, most people find an electric mixer worth the counter space for this recipe specifically.
Why does my cloud bread smell strongly of egg?
That smell usually fades as it cools, but if it lingers, very fresh eggs tend to have a stronger sulfur note than older ones. A few drops of vanilla extract in the mixture mask it well without affecting the texture.
Can I make the mixture ahead and bake it later?
Not really — whipped egg whites start losing air within 20–30 minutes of sitting, even refrigerated. It’s best to whip, shape, and bake in a single continuous session rather than splitting the steps over time.
Is cloud bread suitable for kids or people with egg allergies?
It’s fine for kids since it’s just egg whites, sugar, and cornstarch, but it’s not a safe option for anyone with an egg allergy, there’s no substitute ingredient that replicates the whipped structure egg whites provide here.
Can I freeze cloud bread?
Freezing isn’t recommended; thawing brings moisture back into the foam, and it turns rubbery rather than airy. It really only holds up well fresh or within a day at room temperature.
Conclusion
This cloud bread recipe rewards patience more than skill; clean equipment, properly whipped egg whites, and a gentle bake are really the whole game.
Once you’ve worked through the steps, you’ll find that making cloud bread becomes second nature, and the troubleshooting table becomes something you no longer need to check.
What keeps me coming back to it isn’t the bread itself so much as how forgiving it is to experiment with, a swirl of color here, a pinch of herbs there, and suddenly the same three ingredients look completely different on the plate.
Give it a try this week, and drop a comment with how your first batch turned out.