
You know that moment when sushi cravings hit, but rolling feels like too much effort? I’ve felt that too, and that’s exactly where baked sushi comes in.
It turns everything I enjoy about classic sushi- creamy fillings, seasoned rice, and bold flavors-into a warm, layered casserole I can easily make at home without any stress. No rolling mats, no complex steps, just simple ingredients coming together in one dish that always feels satisfying.
What I love most is the balance: the rice stays lightly tangy and structured, while the topping becomes rich, creamy, and slightly golden straight from the oven. It’s also flexible enough for me to change anytime, whether I want different proteins, extra spice, or a lighter version based on what I’m craving.
Where Baked Sushi Comes From and What It Offers Nutritionally
Baked sushi is a fairly recent food trend, not a dish eaten for generations. It’s widely traced to the Philippines in 2020, where it gained massive popularity on social media during pandemic lockdowns, though a similar version called pan sushi had already been served as a Hawaiian potluck favorite for years.
That timeline makes baked sushi more of a millennial and Gen Z creation than a traditional Japanese dish, even though it borrows core elements from classic sushi, like seasoned rice, seafood, and nori, which have been part of Japanese cooking for centuries.
The food is easy to carry and eat anywhere; you can take it in a bento box to work or to a park for a healthy snack.
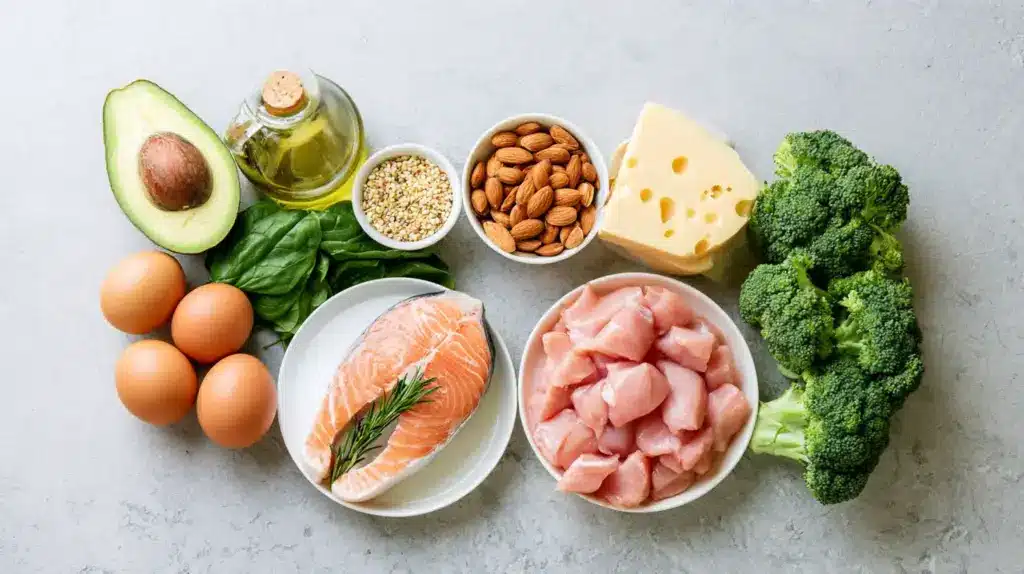
Nutritionally, it offers a solid mix of carbohydrates from the rice, protein from seafood or plant-based fillings, and healthy fats from creamy sauces or avocado, with the exact numbers depending on portion size and toppings used.
Essential Ingredients for Making Baked Sushi
Making baked sushi at home starts with a simple set of ingredients that work together to build structure, creaminess, and bold flavor in every layer. Each component plays an important role, from the sticky rice base to the rich, savory topping and fresh finishing elements.
- Sushi Rice (Short-Grain Rice): Forms the base layer and gives the dish its sticky structure, so it holds together after baking
- Rice Vinegar: Adds the signature tangy sushi flavor and balances the richness of the toppings
- Sugar & Salt: Used in rice seasoning to enhance taste and create a balanced flavor profile
- Mayonnaise (Preferably Kewpie): Creates a creamy, rich texture in the topping mixture
- Furikake Seasoning: Adds umami, crunch, and seaweed flavor to the rice layer
- Sesame Seeds: Give a nutty aroma and light crunch
- Green Onions: Add freshness and a mild, sharp flavor
- Fresh Toppings (Avocado, Cucumber): Add a cooling contrast to the creamy baked layer
- Seaweed Sheets (Nori): Used for serving and scooping each bite
Keeping everything ready before cooking makes the process smoother and helps you achieve consistent results every time.
Step-by-Step Method to Prepare Baked Sushi
Each stage builds on the previous one, starting from rice preparation to final baking and serving. Following the correct order ensures proper texture, balanced flavor, and structural stability, so the dish holds together well while still staying creamy, flavorful, and enjoyable to eat.
Serving size: 6 servings | Prep time: 30 minutes | Cook time: 20 minutes | Calories: 360 per serving
Step 1: Wash and Prepare the Rice

Start by thoroughly washing Japanese sushi rice under cold water around five times until the water runs clear. This removes excess starch and helps improve texture. Use a rice-to-water ratio of 1 cup rice to 1.5 cups water.
Let the rice rest for about 30 minutes, optionally with kombu for added flavor, before cooking it in a rice cooker until fully done and properly steamed.
Step 2: Season the Rice

Once the rice is fully cooked, fluff it gently to avoid breaking grains. While still warm, mix rice vinegar, sugar, and salt, or use ready-made sushi vinegar for convenience.
Slowly fold the mixture into the rice so every grain is evenly coated. This step builds flavor and gives the rice its signature tangy taste while maintaining a sticky yet structured texture suitable for layering in baked sushi.
Step 3: Prepare Toppings and Fillings

Chop imitation crab into small pieces and mix it with mayonnaise, sour cream, cream cheese, or yogurt, depending on preference. For extra flavor, a second mixture can include steamed crab combined with scallions, sesame oil, sesame seeds, and sauces like yuzu shoyu.
Each mixture should be well combined to create a creamy, flavorful base that balances richness, seasoning, and texture before layering onto the rice.
Tip: This step can slightly change depending on the variation you choose, for example, a spicy tuna version may use a thinner layer for stronger flavor impact, while a creamy salmon or vegetarian version can use a thicker base for a richer, layered bite.
Step 4: Prepare the Baking Tray

Take a baking tray and evenly spread the seasoned sushi rice across the base. Aim for about one to one-and-a-half inches in thickness to ensure proper structure.
Press the rice firmly but gently so it forms a compact layer without becoming overly dense. A well-packed rice base is important because it supports the toppings and helps the baked sushi hold its shape after baking and slicing.
Step 5: Season the Rice Layer

Sprinkle a generous layer of furikake seasoning evenly over the pressed rice. This adds umami, texture, and aroma to the base. Depending on the topping style, different furikake blends, such as tuna mayo or soy-seasoned, can be used for variety.
This layer enhances the depth of flavor and ensures the rice is not bland, creating a stronger foundation before adding creamy seafood mixtures on top.
Step 6: Add the Crab Mixtures

Spread the prepared crab mixtures evenly over the seasoned rice layer. Make sure coverage is consistent to ensure even baking and flavor distribution.
You can also divide the tray into sections to feature different flavors, such as imitation crab on one side and fresh crab on the other. This step creates contrast in texture and taste while maintaining a balanced layered structure throughout the dish.
Step 7: Add Toppings

Add optional toppings like fish roe, sesame seeds, or crispy seaweed for extra texture and visual appeal. These toppings enhance both flavor and presentation after baking.
They should be lightly sprinkled so they do not overpower the creamy layer underneath. This step also allows customization, letting each portion have slightly different taste and texture to suit preferences before the dish goes into the oven.
Step 8: Bake or Broil

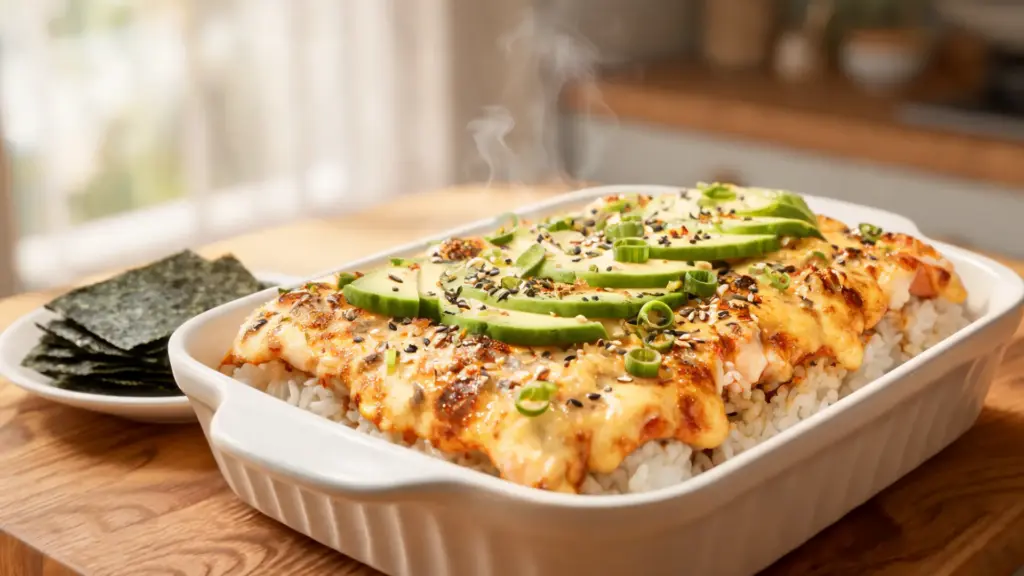
Place the assembled tray into a preheated oven or broiler. Cook until the top becomes slightly golden, bubbly, and lightly crisped. This usually takes only a short time, so careful monitoring is important to avoid burning.
The heat blends flavors together while warming the creamy layer. Proper baking ensures a balanced texture contrast between the soft rice base and the rich, slightly crisp topping.
Step 9: Serve with Seaweed

Once baked, allow the dish to cool slightly before slicing into squares or portions. Serve with roasted seaweed sheets so each piece can be scooped or wrapped.
This adds crunch and completes the sushi-inspired experience. The combination of warm baked layers and crisp seaweed creates a balanced bite that mimics traditional sushi flavors while maintaining the convenience of a casserole-style preparation.
For a more detailed recipe, refer to the video:
Flavor Variations for Baked Sushi
Baked sushi variations are different versions of the same base recipe where the core structure stays the same, seasoned rice layered with a creamy topping and baked, but the ingredients are adjusted to change flavor, texture, and spice level.
| Flavor Variation | Main Ingredients |
|---|---|
| Salmon-Style | Baked salmon flakes, mayonnaise, soy sauce, sesame oil |
| Spicy Tuna | Tuna, sriracha, sesame oil, mayo, soy sauce |
| Vegetarian | Tofu, mushrooms, mixed vegetables, light mayo or yogurt |
| Chicken Option | Cooked shredded chicken, mayo, chili paste, and soy sauce |
| Light Cream Version | Reduced cream cheese, avocado, yogurt, mild seasoning |
Each variation keeps the layered baked structure intact while changing protein choice and seasoning intensity to match different taste preferences. For a side that pairs well, flatbread with pepper spread adds a different texture without competing with the main flavors.
Serving Ideas and Presentation

Most versions of the baked sushi focus heavily on the baking steps but underexplore the serving style, which affects the overall experience. Presentation matters because this dish is usually shared at the table rather than plated individually. Cutting into even squares helps maintain structure and makes scooping easier.
Fresh add-ons improve contrast significantly. Crisp vegetables like cucumber or radish balance creamy layers, while avocado softens spice intensity. Seaweed sheets should remain dry until serving to avoid sogginess. Another overlooked detail is temperature contrast: serving slightly warm rather than piping hot improves flavor clarity and prevents topping separation.
Plating gaps often include missing crunch elements or a lack of acidity. A light drizzle of citrus-based sauce or a garnish of pickled vegetables can lift richness and prevent heaviness, especially in larger servings.
Tips for Perfect Baked Sushi
Before you start baking, a few small techniques can make a big difference in the texture, flavor, and overall structure of your baked sushi.
- Use Short-Grain Rice Only: It has the right starch content to stay sticky and hold shape after baking
- Season While Rice Is Warm: Vinegar mixture absorbs better when rice is hot, not cold
- Press Rice Firmly in Tray: Helps create a stable base so layers don’t fall apart after baking
- Keep Layer Even: Uniform spreading ensures consistent baking and better slices
- Broil for Crispy Top: Finish with a short broil to get a golden, slightly crisp surface
- Let It Rest Before Cutting: Resting helps layers set, making cleaner squares when serving
- Add Fresh Toppings Last: Avocado, cucumber, or sauces should go after baking for freshness
Following these tips helps improve texture, balance flavors, and ensure your baked sushi holds its shape well, giving you a more consistent, restaurant-style result every time you make it at home.
Lighter Nutrition Adjustments for Baked Sushi
Here’s a cleaner breakdown of practical ingredient swaps that help reduce calories, fat, and carbs while keeping the texture and flavor close to the original baked sushi experience.
| Ingredient Component | Lighter Alternative | Key Benefit |
|---|---|---|
| Creamy Base | Replace half the cream cheese with Greek yogurt | Reduces fat, keeps creamy texture |
| Rice Layer | Use brown rice or a 50% cauliflower rice mix | Lowers carbs, adds fiber |
| Protein Filling | Swap imitation crab with tuna or salmon | Higher protein, fewer processed ingredients |
| Sauce Usage | Use less mayo and add sauces after baking | Cuts calories and prevents heaviness |
| Sodium Control | Choose low-sodium soy sauce | Reduces overall salt intake |
| Portion Balance | Add extra cucumber or vegetables | Increases volume without extra calories |
These swaps help keep the dish lighter without changing the core structure that makes baked sushi satisfying and creamy.
Common Mistakes to Avoid
Even when following a recipe carefully, small mistakes can change the final texture and taste of sushi. Knowing what to avoid helps ensure better structure, balanced flavor, and cleaner results every time.
- Overmixing rice breaks grains and leads to a mushy, uneven base instead of a firm layer
- Excess Mayo Use: creates an oily filling and weakens the structure during baking
- Uneven Layering: causes inconsistent cooking, with dry edges and soft center spots
- Skipping Rest Time prevents rice from setting properly, making slicing messy and unstable
Avoiding these issues helps maintain better texture, cleaner layers, and more consistent serving results.
Frequently Asked Questions
Can baked sushi be prepared ahead of time?
Yes, it can be assembled a few hours in advance and stored in the refrigerator before baking. However, baking just before serving gives the best texture and prevents the rice from becoming too firm.
What type of baking dish works best?
A ceramic or glass baking dish works best because it distributes heat evenly. A shallow tray is preferred since it allows better layering control and helps the top crisp without overcooking the base.
Can this type of sushi be made in an air fryer?
Yes, smaller portions can be cooked in an air fryer using heat-safe containers. It cooks faster, so careful monitoring is needed to prevent the creamy topping from drying out or burning.
How do you prevent sushi bake from becoming soggy?
Avoid adding too much sauce and ensure the rice is not overcooked. Properly pressing the rice layer and baking at the right temperature helps maintain structure and prevents excess moisture buildup.
Final Serve
A well-prepared baked sushi recipe brings together simple pantry ingredients and transforms them into a shareable oven dish that fits casual meals or gatherings.
The balance of seasoned rice, creamy topping, and light baking creates a texture that feels comforting without requiring advanced technique. Small adjustments to spices, protein, or toppings allow for flexibility across preferences while keeping the structure intact.
In my own experience testing variations of sushi, small changes in rice compression and sauce ratio made the biggest difference in consistency.
I also noticed how serving temperature changes flavor perception more than expected. For anyone trying it at home, experimenting with texture balance can lead to better results than strictly following ratios.
Feel free to share your own version or tweaks in the comments.