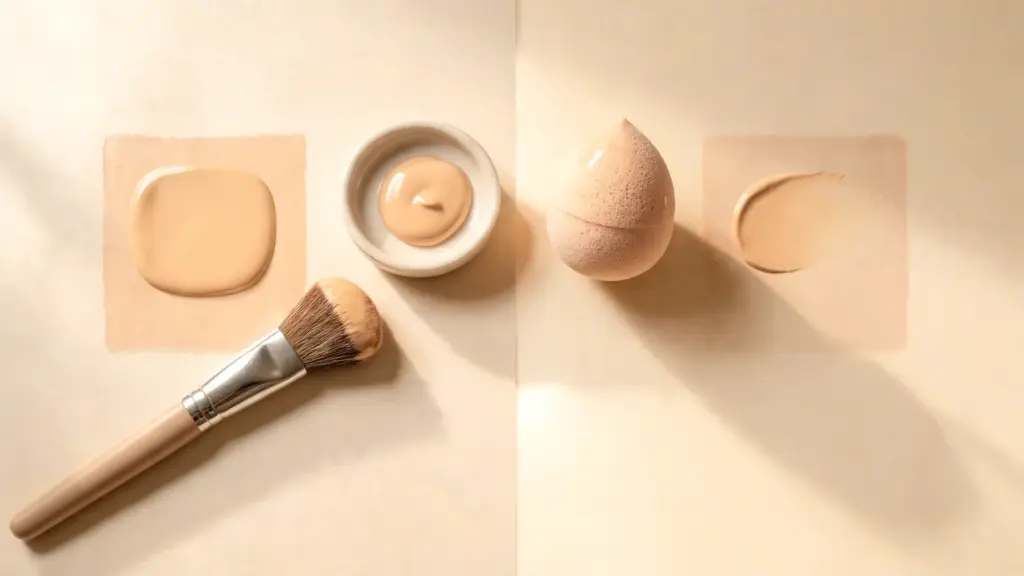

I have had plenty of makeup mornings where the foundation looked great on one cheek and strange on the other. Same product. Same face. Different tool. That is usually when the whole foundation brush vs sponge question starts to feel personal.
A brush and a sponge can both apply foundation well, but they do not give the same result. One gives more control. One softens the finish. One saves more product. One can make a thick foundation look lighter.
As someone with training in fashion styling and cosmetic science, I like to think of makeup tools as small choices that change the whole base. You do not need a huge kit. You need the right tool for your skin, your formula, and the finish you want that day.
What Is A Foundation Brush?
A foundation brush is a bristle tool made to press, buff, or spread foundation across the skin with control. Because bristles hold product on the surface rather than soaking it up, a brush deposits more pigment where you put it, which is why it works so well for medium-to-full coverage.
Bristle density changes the outcome too. A tightly packed brush deposits more product and builds coverage fast, while a looser, softer brush spreads a thinner layer for a lighter look.
Unlike a sponge, a foundation brush is normally used dry. Wetting the bristles can thin out the foundation and make it harder to build even coverage.
Brushes work with most foundation formulas, including liquid, cream, and powder, and they tend to sit nicely on dry skin since the motion does not grip flaky patches. A brush is not only for heavy makeup days. Shape, pressure, and product amount decide the final result far more than the tool alone.
What Is A Makeup Sponge?
A makeup sponge, like the original Beautyblender, is usually dampened before use, and that dampness is the point. A wet sponge presses foundation into thin, even layers instead of pushing it straight onto the skin.
Because the material absorbs part of the formula, coverage often comes out lighter and softer, which many describe as a skin-like finish. That soft, dewy result is close to what people chase with a glass skin routine, just built through foundation instead of skincare products.
A few things worth knowing about sponges:
- Always wet it under lukewarm water first, then squeeze until damp, never dripping.
- Use a gentle press-and-bounce motion rather than dragging or rubbing.
- Sponges work best with liquid and cream formulas, and the soft, bouncy motion is gentle on oily or textured skin, smoothing pores without pulling at them.
A sponge should stay damp, not soaked. Too much water thins the foundation more than planned and can leave the finish patchy rather than soft.
Foundation Brush vs Sponge: What Is The Difference?
The main difference in foundation brush vs sponge application comes down to product placement. A brush places more foundation on the skin. A damp sponge softens and sheers out foundation because it holds water and absorbs some formula.
| Feature | Foundation Brush | Makeup Sponge |
| Best finish | Polished, controlled, more covered | Soft, natural, skin-like |
| Coverage | Medium to full | Light to medium |
| Product use | Less product waste | More product absorption |
| Best formulas | Liquid, cream, powder | Liquid and cream |
| Best skin match | Dry, normal, or areas needing coverage | Oily, textured, or uneven-looking areas |
| Main motion | Press, stipple, or buff | Bounce and press |
| Common problem | Streaks if dragged | Patchy finish if too wet |
| Beginner ease | Takes a little practice | Usually easier to start with |
| Cleaning need | Often weekly or more | Best cleaned often because it is porous |
| Replace when | Bristles shed or feel rough | Sponge tears, smells, or loses bounce |
A brush gives more control when you want coverage on redness, uneven tone, or spots. A sponge gives a softer result when the foundation looks heavy. Neither tool is the winner every time. The better choice depends on your skin, your product, and your day.
Which Tool Works Better For Finish, Coverage, And Smooth Edges?
This is where the choice becomes easier. A brush and sponge can both give a good base, but they work in different ways. I usually look at coverage, finish, skin texture, and how the foundation sits near the nose, jaw, and smile lines.
1. Foundation Brush

- Coverage: A foundation brush provides higher, buildable coverage because the bristles deposit more product onto the skin. This works well when you want to cover redness, uneven tone, or dark spots.
- Best formulas: Brushes work well with liquid, cream, stick, and powder foundation. Dense brushes are better for thicker formulas, while softer brushes work better for light liquid foundation.
- Finish: A brush provides a more polished, controlled finish. It can make the base look neat, especially around the cheeks, jawline, and forehead.
- Technique: Use pressing, stippling, or small buffing motions. Avoid dragging the brush across your face, as it can leave lines and smudge your foundation.
- Pros: A brush wastes less product, gives more control, and works well when you need coverage in specific areas. It also lasts longer when properly cleaned and dried.
- Cons: A brush can leave streaks if you use too much pressure. On very dry patches, rough buffing can make texture look more visible.
2. Makeup Sponge

- Coverage: A makeup sponge gives lighter, softer coverage because it absorbs some foundation and presses the rest into thin layers. This helps heavy formulas look less thick.
- Best formulas: Sponges work best with liquid foundation, skin tints, BB creams, CC creams, and cream products. They are not the best first choice for powder foundation.
- Finish: A sponge gives a soft, skin-like finish. It is helpful when you want the foundation to look smooth without sharp edges or obvious brush marks.
- Technique: Wet the sponge first, then squeeze out all extra water. It should feel damp, not dripping. Use a bouncing or pressing motion instead of wiping.
- Pros: A sponge is easy for beginners, gentle around textured areas, and helpful near the nose, smile lines, and chin. It can soften a foundation that looks too heavy.
- Cons: A sponge can waste more product because it absorbs foundation. It also needs frequent washing because moisture, makeup, and skin oil can collect inside it.
Tip: If you want coverage and softness together, apply foundation first with a brush, then lightly press over it with a damp sponge. The brush gives better placement, while the sponge softens streaks and helps the base look less heavy.
A brush works better when you want control, coverage, and less product waste. A sponge works better when you want a softer finish with fewer harsh edges. Once you know how each tool behaves, the choice becomes less confusing and more about what your skin needs that day.
Which Tool Works Better For Your Skin Type?
Your skin type can affect how foundation sits, so the right tool isn’t always the same for everyone. A brush gives more control, while a sponge can soften the finish. Use this table to match the tool to your skin needs.
| Skin type or need | Better tool | Why it works |
| Dry skin | Sponge for soft finish, brush for targeted coverage | A damp sponge can make dry areas look less heavy. A brush works better when used gently on areas that need more coverage. |
| Oily skin | Brush | A brush keeps more foundation on the skin, which helps with matte or long-wear formulas that need stronger coverage. |
| Textured skin | Sponge | Pressing with a damp sponge can help foundation sit more smoothly over uneven areas without dragging product around. |
| Mature skin | Sponge with light brush use | A sponge keeps foundation thinner around fine lines. A brush can be used only where extra coverage is needed. |
| Acne-prone skin | Clean brush or clean sponge | Either tool can work, but hygiene matters most. Dirty tools can affect the finish and may bother reactive skin. |
| Everyday makeup | Sponge | A sponge provides a softer, more forgiving base and is easier when you want quick, light coverage without sharp edges. |
| Fuller makeup | Brush | A brush gives faster coverage and better control when you want a more finished base for photos, events, or long days. |
If your oily skin routine already leans on mattifying products, a dense brush usually keeps up better than a sponge, since it will not add extra water into the mix. The best tool is the one that matches your skin that day. If your foundation looks heavy, try a sponge. If it disappears too fast or needs more coverage, use a brush. For many people, using both gives the most balanced result.
Makeup Foundation Brush vs Sponge: Which Is Better?
There is no single winner. A brush gives you more coverage and control, while a sponge gives you a softer, lighter finish; the better choice depends on the result you want that day. That is the most honest answer to the foundation brush vs sponge question.
Most makeup artists do not pick a side either; they use both. A common routine is to apply with a brush first, then press a damp sponge over the top, since the brush lays down coverage and the sponge smooths out any harsh edges.
So if you are choosing just one, pick a brush for fuller coverage and a sponge for a lighter, skin-like finish.
How Do You Apply Foundation With A Brush, Sponge, Or Fingers?

A good foundation is not only about the tool. It is also about pressure, motion, and the amount of product you use. I always suggest starting with a small amount first because thin layers are easier to fix than one heavy layer.
- Applying Foundation With a Brush: Dot foundation across moisturized skin, then press and buff it in short motions. Use light pressure around the nose, hairline, and jaw. If you see streaks, tap over them instead of dragging the brush or adding more product.
- Applying Foundation With a Sponge: Wet the sponge, squeeze out extra water, then use it damp. Press and bounce the foundation across the face instead of wiping it. Use the pointed tip around the nose, mouth, and under-eye area, especially if you deal with dry under eyes that make foundation cling and look uneven. Build coverage slowly in thin layers.
- Applying Foundation With Fingers: Fingers work best for quick, light coverage or small touch-ups. Hand warmth can help thin liquid foundation so it spreads faster. Wash your hands first, then tap the product into the skin. For full coverage, a brush or sponge gives better control.
A brush gives control, a sponge softens the finish, and fingers are useful when you need a quick fix. The best method is the one that helps your foundation sit evenly without making the skin look heavy.
Beautyblender vs Brush: Which Gives A Softer Finish?
A damp Beautyblender usually gives a softer finish than a dense foundation brush. That is because Beautyblender is a branded makeup sponge, while a brush is a whole category of tools with many shapes and densities.
A dense brush presses more foundation onto the skin, so the result often looks more covered. A Beautyblender softens the product and helps thin out heavy-looking areas. It is a good choice if your foundation looks too visible around pores, smile lines, or dry spots.
That said, a Beautyblender is not the same as every sponge. Shape, texture, and quality matter. A very hard sponge can disturb the foundation rather than smooth it. A good brush can also look soft if you use light pressure.
For the best result, think less about the name and more about the action: brush for placing, sponge for softening.
Tips to Help the Foundation Look Smooth
Patchy foundation is not always caused by bad foundation. Many times, it comes from skin prep, tool motion, product amount, or a dirty applicator. Before you throw away a bottle you liked last week, check these small things first.
- Prep lightly: Use a moisturizer that suits your skin so foundation does not grab dry spots or slide too fast.
- Start with less product: Thin layers look smoother than one thick coat, especially around pores, smile lines, and the chin.
- Match tool to formula: Thick cream foundation often works better with a dense brush. Thin liquid foundation often looks softer with a sponge.
- Press over texture: Pressing helps foundation sit better on uneven areas. Rubbing can lift the product and create patches.
- Check natural light: Daylight shows streaks near the jaw, nose, and forehead better than bathroom lighting.
- Clean tools often: Product buildup can change how foundation spreads and may make skin feel less comfortable.
This is the advice I come back to most: do not keep adding product to fix texture. Most of the time, less foundation and better pressing give a cleaner finish.
Which Brush and Sponge Brands Are Worth Knowing?
Brand choice matters less than tool shape, softness, density, and cleaning. Still, good brands can help you find a reliable starting point. Use this table as a reference, not a shopping rule.
| Sponges | Brushes |
| Beautyblender, known for reusable sponges and sponge care guidance | Sigma Beauty, known for foundation brushes and brush care products |
| Real Techniques sponges, built for beginner-friendly application | MAC Cosmetics 170 brush, made for pressing and buffing foundation |
| Real Techniques Miracle Complexion Sponge, part of its wider tool range | Morphe M104 Domed Foundation Brush, suited to powders, creams, and liquids |
| Sephora sponge category, useful for comparing sponge shapes | e.l.f. Cosmetics buffing brush, a budget-friendly face brush pick |
| The MAC 170 Synthetic Rounded Slant Brush is described by MAC as suitable for applying and buffing foundation or primer, with dense fibers for controlled coverage. Morphe describes its M104 brush as dense and suitable for powders, creams, and liquids. |
If you are new to makeup tools, I would not buy five brushes at once. Start with one dense foundation brush and one soft sponge. Use them for two weeks, then notice which one makes your foundation look better on your actual skin.
How Do You Keep Makeup Tools Clean And Safe?

Foundation tools collect oil, product, and skin debris fast, and a sponge often holds onto it longer since it stays damp and porous. A brush can trap buildup at the base of the bristles too, right where it is easy to miss.
The FDA warns that cosmetics can turn harmful once bacteria or fungi build up, so regular cleaning is about skin safety, not just a tidy makeup bag.
For sponges, rinse well, squeeze out extra water, and let them dry in an open, ventilated spot.
For brushes, clean the bristles, rinse until the water runs clear, and dry them flat so water does not sit inside the ferrule.
Frequently Asked Questions
Can I use a sponge for powder foundation?
A sponge can apply powder foundation, though it is not always the easiest option. A dry sponge may press on more product than planned, while a brush spreads powder more evenly. Save the sponge for touch-ups or targeted areas rather than a full powder application.
Should I use the same sponge for concealer and foundation?
Yes, the same sponge can handle both if you keep it clean and use separate sides when possible. The pointed tip works well under the eyes for concealer. Replace the sponge sooner if it holds a smell, stains, or the texture changes after washing.
Why does my brush leave streaks?
Streaks usually happen when too much foundation is applied, the brush is dragged, or the bristles are too flat for the formula. Press, tap, or buff in small sections instead of long strokes. A clean, damp sponge over the top can soften leftover lines.
Is a brush or sponge better for beginners?
A sponge tends to feel easier for beginners since pressing and bouncing forgive small mistakes. A brush takes more practice with pressure and motion. Start with a sponge for light, everyday coverage, then bring in a brush once you want fuller results.
Final Takeaway
The best foundation tool is not the one everyone online uses; it is the one that works well on your own skin. Some mornings call for the control of a brush, other mornings call for the softer press of a sponge, and that flexibility is really the answer to the foundation brush vs sponge question.
That is why the foundation brush vs sponge choice works best as a flexible rule. Brush first when you want coverage. Sponge first when you want a lighter look. Use both when you want coverage without hard edges.
Try each tool with the same foundation for a few days. Then comment with which one gave you fewer streaks, less waste, or the better finish on your skin.