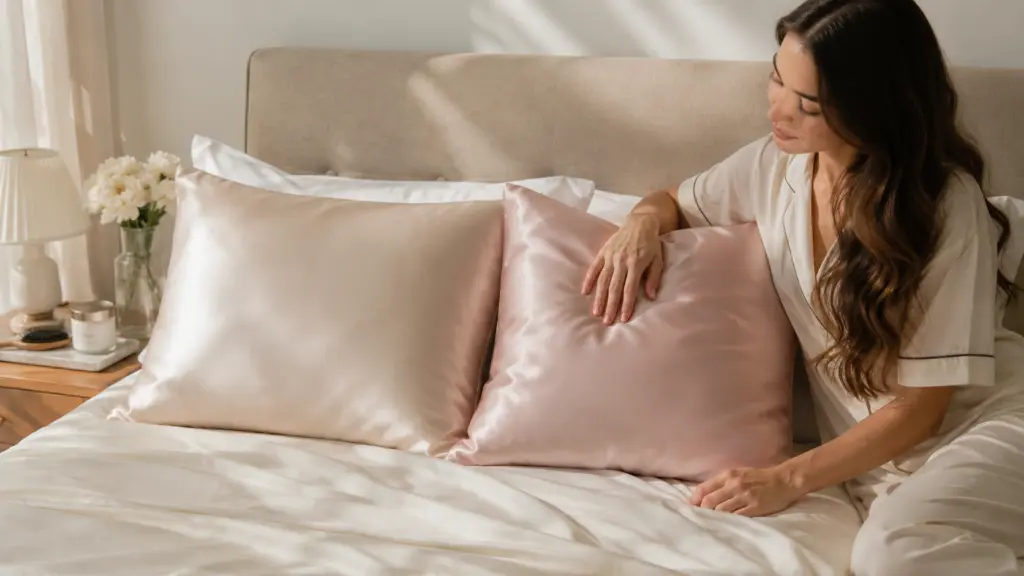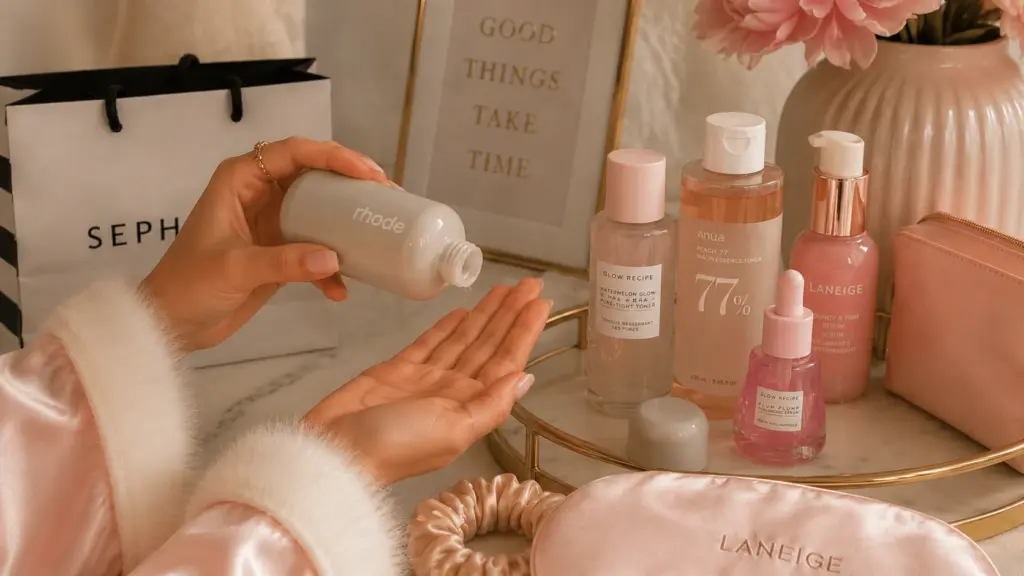
What if clean, polished nails did not require hours at a salon or a full kit of products? What if the simplest looks were actually the best ones?
Most people think great nails need bold color or detailed art. But the truth is, a groomed, put-together look is easier to pull off than you think. The problem is knowing where to start.
That is exactly what you will find here. From sheer pinks and milky whites to soap nails and micro French tips, these natural nail ideas cover styles for every length, skin tone, and routine. You will also get shade-matching tips, nail care basics, and easy DIY steps.
Ready to find the one look that actually works for you?
A Closer Look at Natural Nail Designs
Natural nail designs focus on keeping your nails looking clean, polished, and put-together without heavy color or bold art.
Think sheer pink polishes, soft nude tones that match your skin, barely-there glossy finishes, and simple accents like thin French tips or a single fine line.
The goal is a groomed look that feels intentional, not bare, not overdone. From a nail care standpoint, this style is genuinely practical.
It suits short and long nail lengths equally well, hides minor chips far better than dark shades, and fits office dress codes without a second thought.
If you have brittle nails or prefer low-maintenance routines, natural designs let your nails breathe while still looking well-kept every single day.
Natural Nail Ideas for a Clean, Minimal Look
From sheer pinks to soap nails, these 25 styles cover every variation of a clean, minimal look, organized by finish, shape, and level of detail to help you decide fast. Let’s get started.
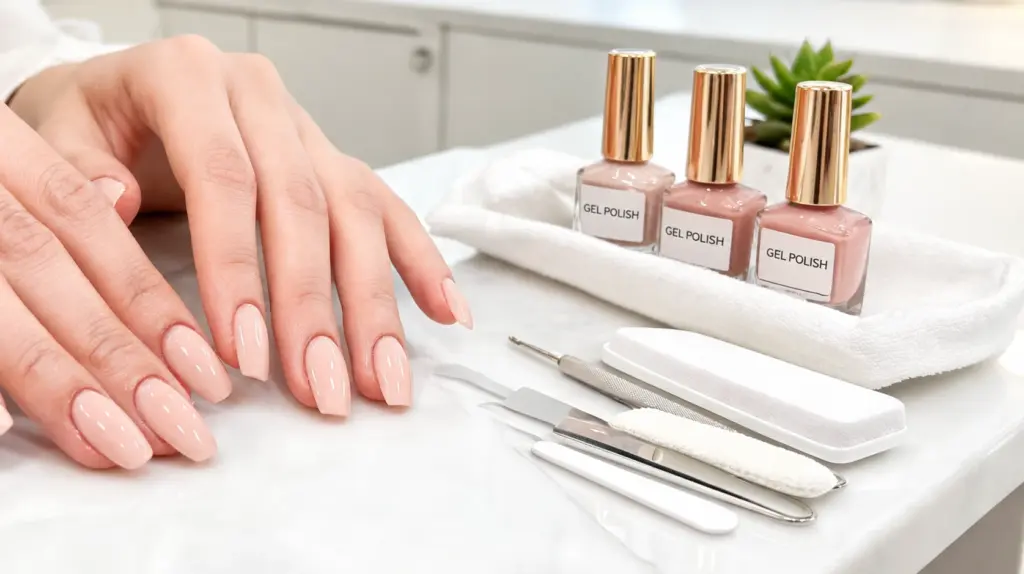
1. Sheer Pink Gloss Nails

Sheer pink is the most forgiving nail polish finish; it evens out nail tone, hides minor imperfections, and gives a healthy flush without masking the natural nail underneath. Two thin coats hit the sweet spot between barely-there and polished.
- Shade Selection: Cooler pinks suit fair and pink-toned skin, while warmer, peachy-pinks are more flattering on medium to deep skin tones.
- Finish Matters: A glossy topcoat over sheer pink intensifies the “lit from within” effect that makes this style so popular.
Note: Essie’s “Ballet Slippers” and OPI’s “Bubble Bath” remain the most reached-for shades for this exact look.
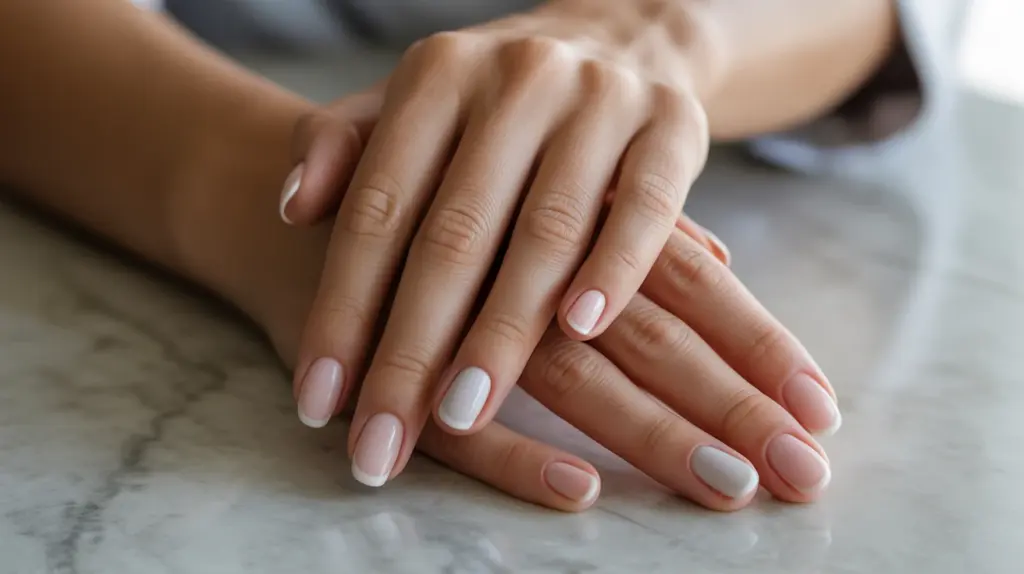
2. Milky White Nails

Milky white sits between sheer and opaque; it has enough coverage to look intentional but stays soft enough to never feel stark. It visually lengthens short nails and works across all seasons without feeling trend-dependent.
- Formula Choice: Look for a cream-based white, not a bright or cool white; the warmth in the formula is what keeps it looking natural.
- Short Nail Benefit: The slight opacity creates the illusion of a cleaner, more elongated nail bed on shorter lengths.
Note: One coat gives a sheer milky effect; two coats build it to full soft-white coverage, both work depending on preference.
3. Nude Nails with Micro French Tips

The micro French tip scales the classic design down to under 1mm at the tip, making it far more wearable for everyday settings. The result reads as a well-groomed nail rather than a statement manicure.
- Application Tip: Stripping tape placed just below the free edge gives a cleaner line than freehand. Remove it immediately while the polish is still wet.
- Gel Advantage: Gel polish holds the thin tip line sharper and longer than regular polish, which tends to soften the edge within days.
Note: Match the tip shade to off-white rather than stark white for a finish that looks natural under all lighting.
4. Glossy Clear Nails

A high-quality, clear topcoat does more than add shine; it seals and strengthens the nail plate, making this one of the few styles that actively supports nail health while looking polished. No color commitment, no upkeep stress.
- Reapplication Routine: Adding a fresh layer every two to three days maintains the glass-like finish and significantly extends wear before chipping begins.
- Product Quality: Drugstore topcoats and professional-grade formulas produce noticeably different results, with thickness and self-leveling ability varying widely.
Note: Seche Vite and HK Girl are the two most consistently recommended topcoats for a smooth, ultra-glossy finish.
5. Soft Beige Minimal Nails

Beige occupies a unique space, more visible than a skin-tone nude but never loud enough to draw attention. It works particularly well on medium and olive skin tones, where standard nudes can disappear entirely against the skin.
- Greige Option: Shades labeled “greige” (grey-beige) skew cooler and read more modern, making them a strong alternative for those who find warm beige too yellow.
- Outfit Pairing: Beige nails are a true neutral; they complement both warm- and cool-toned wardrobes without clashing.
Note: if a beige shade looks too yellow on the nail, it has too much warmth for your undertone, so go one shade cooler.
6. Baby Boomer Ombre (French Fade)

The baby boomer gradient blends a soft pink or nude base into a white tip with no visible line between them; it reads softer and more modern than a traditional French manicure.
The blended finish makes it far more forgiving to maintain as it grows out.
- Sponge Technique: Dabbing a small sponge over the blending point while both shades are still tacky creates the smoothest gradient; circular motions work better than straight dabbing.
- Gel vs. Polish: Gel gives a cleaner fade due to its slower set time, which allows more blending before the product locks in.
Note: This technique has a learning curve, expect the first attempt to need refining before the blend looks seamless.
7. Peachy Nude Nails

Peach nudes add a warm, healthy flush to the nail that mimics the natural color of a well-circulated nail bed. They strike a balance between nude and color, expressive enough to feel intentional, subtle enough to suit any setting.
- Undertone Match: Fair skin benefits from light, blush-peach tones; deeper skin tones carry richer, terracotta-leaning peaches more naturally.
- Lighting Awareness: Peach shades can shift orange under warm artificial lighting. Test the shade in multiple lighting conditions before committing.
Note: Avoid peach shades with heavy orange pigment, as they lose the natural quality that the style depends on.
8. Bare Nails with Cuticle Oil Shine

This approach prioritizes nail health over product; a well-buffed, oiled nail with no polish looks intentionally groomed when maintained consistently.
It is also the lowest-maintenance option that still produces a noticeable result.
- Buffing Order: Use a four-sided nail file in sequence, file, smooth, buff, shine, to remove ridges and build a natural surface gloss without any product.
- Oil Frequency: Daily cuticle oil application improves nail bed flexibility and visible health over two to four weeks of consistent use.
Note: Jojoba-based cuticle oils absorb the fastest and leave the least residue compared to heavier oils like castor
9. Minimal Dot Accent Nails

A single dot near the cuticle area on one or two nails creates a deliberate focal point without covering the nail in art. The placement and size of the dot determine whether the look reads as minimal or playful.
- Tool Options: A dotting tool gives the cleanest circle, but the rounded tip of a bobby pin or a toothpick dipped in polish works just as well for small dots.
- Color Combinations: White or gold dots on a nude base are the most refined pairings, black dots read slightly edgier but still fall within minimal territory.
Placing the dot on the ring finger only is the most common approach, it draws the eye without repeating across every nail
10. Transparent Nails with Tiny Hearts

A clear or sheer base with one micro heart on a single accent nail keeps the design understated. The heart size is the deciding factor; anything larger than 4mm shifts the look from minimal to decorative.
- Stamping vs. Freehand: A nail stamp gives far more precision on small designs than freehand painting, especially for symmetrical shapes like hearts.
- Color Choice: White hearts on clear nails are the most natural-looking; red hearts add a subtle personality without overwhelming the transparency of the base.
Note: Apply the heart to the ring finger or middle finger; central placement on the nail reads cleaner than off-center positioning.
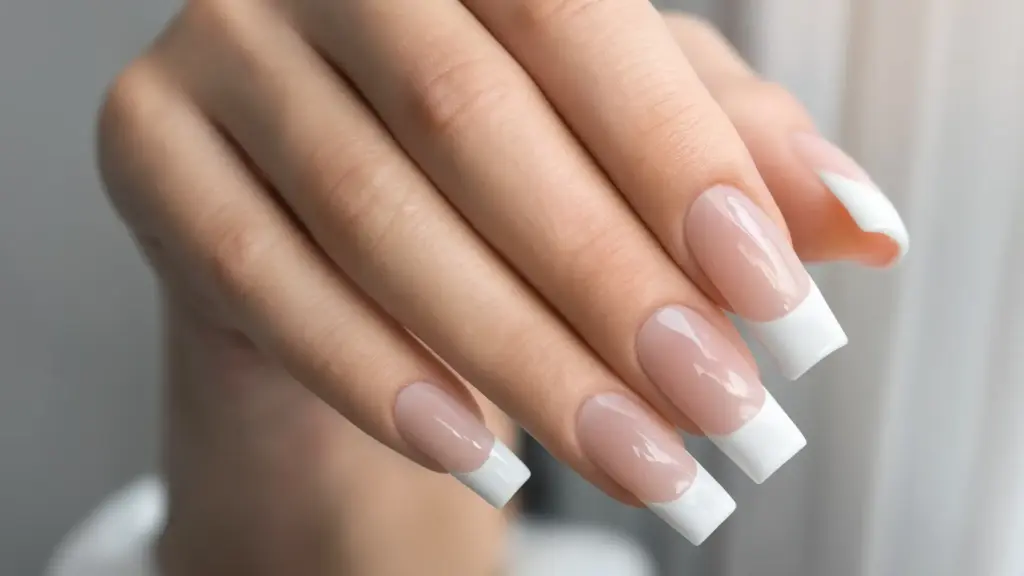
11. Classic Short French Tips

Short nails and French tips are a natural pairing; the white tip adds definition to the free edge without requiring length to make an impact. Square and squoval shapes frame the tip line most evenly.
- Tip Proportion: The white section should not extend past the natural free edge; a tip that covers too much of the nail plate loses the clean, classic proportion.
- Longevity by Formula: Regular polish chips fastest at the tip line; gel and dip powder both hold the white significantly longer with less visible wear.
Note: Keep the pink base sheer rather than opaque; a full-coverage pink base shifts the look from classic French to something heavier.
12. Nude Nails with Gold Line Detail

A single thin line in gold across one nail adds structure and intentionality to an otherwise plain nude manicure. Line placement changes how the design reads; horizontal lines feel modern, diagonal lines feel more editorial.
- Application Method: Striping tape placed and removed before the polish dries gives the sharpest line; a striping brush requires a steadier hand but allows more placement flexibility.
- Metal Tone Match: Gold suits warm and olive skin tones more naturally; silver lines work better against cooler, pink-toned complexions.
Note: Placing the line at the midpoint of the nail creates a visual break that makes fingers appear longer.
13. Matte Nude Nails

A matte topcoat changes the entire character of a nude shade; the same color that looks soft and glossy reads more serious and textural when matted down. It is also more forgiving of small chips since the dull finish makes wear less obvious.
- Application Note: Apply matte topcoat in one smooth stroke per section, going over the same area twice drags the product and creates streaks.
- Fingerprint Risk: Matte surfaces show fingerprints and smudges more visibly than gloss. Avoid touching nails for at least ten minutes after application.
Note: Matte topcoats dull faster than glossy ones and need reapplication every few days to maintain the flat finish.
14. Light Grey Neutral Nails

Grey functions as a true neutral in nail polish, it coordinates with virtually every outfit and reads as polished in professional settings where stronger colors may not be appropriate. Lighter greys are particularly versatile.
- Warm vs. Cool Grey: Cool greys can wash out pink-toned skin, a greige or slightly warm grey keeps the look from feeling stark against lighter complexions.
- Jewelry Pairing: Light grey pairs sharply with silver jewelry and works equally well with gold for a contrast-based styling approach.
Note: Test grey shades against your skin in natural light, artificial lighting flattens grey tones and makes shade selection unreliable.
15. Blush Pink Nails

Blush pink is one of the most consistently flattering nail shades across all skin tones, it has enough pigment to look deliberate while remaining soft enough to never feel bold. Unlike sheer pink, it provides full, even coverage.
- Finish Variation: Glossy blush reads feminine and polished; matte blush shifts into a more editorial, fashion-forward direction; both are valid depending on the occasion.
- Year-Round Wear: Unlike bright or pastel pinks that feel season-specific, blush pink works consistently across all months without feeling out of place.
Note: If a blush shade pulls too purple on the nail, it has a cool undertone. Look for one with a slight peach base instead.
16. Almond-Shaped Nude Nails

With an almond shape, the silhouette does the visual work; a plain nude lets the shape remain the focal point without competing color or art. This is one of the few nail styles where less product genuinely produces a better result.
- Filing Technique: File from the outer edge inward toward the centre tip in one direction only; back-and-forth filing weakens the nail wall and increases breakage risk.
- Length Requirement: A true almond needs moderate nail length to taper properly; very short nails produce a blunt oval rather than the intended pointed almond form.
Note: Keep sidewall filing symmetrical on both sides; uneven taper is the most common issue with DIY almond shaping.
17. Minimal Swirl Designs on Nude Base

A single abstract swirl or thin line on one accent nail adds an artistic element while keeping the overall look restrained. The nude base does the balancing work, without it, even a thin swirl can feel busy.
- Brush Selection: A size 0 or 00 liner brush gives the line control needed for swirl work; standard nail brushes are too wide to produce fine, consistent strokes.
- Color Options: White, warm brown, and metallic gold are the most natural-looking swirl colors on a nude base. Black creates a stronger contrast that leans more graphic than minimal.
Note: Practice the swirl shape on paper first; the pressure applied to the brush determines line thickness, and consistency across nails matters.
18. Clear Nails with Foil Flecks

Loose nail foil pieces pressed onto a tacky, clear base create an organic, scattered texture that looks intentional without being uniform. No two nails look identical, which gives the design a handmade quality that sets it apart from standard glitter.
- Application Method: Press foil pieces onto a still-tacky layer of clear polish or gel, avoid sliding the foil, as it tears and loses its clean edge.
- Sealing Step: A thick topcoat over the foil is non-negotiable; unsealed foil edges lift within days and cause the entire design to peel.
Note: Gold and rose gold foil catch light most visibly under natural daylight, making them the strongest choice for this style.
19. Soft Lavender Natural Nails

Muted, dusty lavender sits comfortably within the neutral family, desaturated enough to avoid reading as a bold purple but distinct enough to add quiet personality. It functions similarly to grey but with a softer, slightly more feminine quality.
- Shade Specifics: The key is choosing a grey-toned or dusty lavender; bright or vivid purples fall outside the natural nail category entirely and produce a very different result.
- Skin Tone Fit: Lavender works best on cool and neutral undertones; on very warm skin tones, it can pull slightly grey and unflattering.
Note: Pair with silver jewelry rather than gold; the cool tone of the shade coordinates more naturally with cooler metals.
20. Neutral Nails with Negative Space

Leaving part of the nail intentionally unpolished creates a geometric, considered design using the simplest possible method.
The bare nail becomes a design element rather than a starting point, which is what separates this from an unfinished look.
- Tape Method: Painter’s tape or nail striping tape placed along the area to remain bare gives clean edges. Remove immediately after applying polish and before it dries.
- Length Consideration: Longer nails give negative space more room to read clearly; on very short nails, the unpolished section can look accidental rather than deliberate.
Note: Clean the tape edge the moment it is removed; waiting causes the polish to drag and blur the line.
21. Glossy Nude Coffin Nails

The coffin shape, tapered sides with a flat, squared tip, is structured enough to make a plain nude look considered and deliberate. The shape carries the style, so the color does not need to.
- Shape Precision: Sidewalls must remain straight during filing; any flare or curve in the body of the nail disrupts the clean coffin silhouette.
- Length Reality: A proper coffin requires real length, which means gel extensions or acrylics for those without naturally long nails, it cannot be achieved on very short natural nails.
Note: Glossy topcoat on coffin nails reflects light along the flat tip edge, which sharpens the shape visually more than a matte finish would.
22. Barely-There Glitter Nails

Micro-fine glitter mixed into a clear or nude base , rather than applied on top, creates a shimmer that shifts in light without reading as sparkly at a glance.
The particle size is everything; chunky glitter produces an entirely different result.
- Chrome Alternative: Chrome powder buffed over a cured gel base mimics this effect with an even smoother, more seamless finish and no risk of glitter fallout.
- Layering Caution: Too many coats of glitter-infused polish build up visibly on the nail edge — one to two coats keeps the shimmer subtle and the finish smooth.
Note: Glitter mixed into the base formula wears more evenly than glitter applied as a top layer, which tends to catch and peel at the edges.
23. Thin Double French Tips

Two parallel lines at the tip one white, one gold or nude, layer the classic French design without adding color or complexity elsewhere on the nail. The gap between the two lines is the detail that makes it look intentional.
- Consistency Requirement: The spacing between both lines must be identical across all ten nails — any variation makes the design look uneven rather than precise.
- Tape Execution: Apply the first line, let it dry fully, then tape off above it for the second — attempting both lines wet increases the chance of smearing the first.
Note: Keep both lines under 1mm each, thicker lines push the look from minimal layered detail into bold graphic territory.
24. Natural Nails with White Half-Moons

The half-moon design paints the lunula the natural pale crescent at the nail base, in white while leaving the rest bare or nude.
It references a manicure style popular from the 1920s through the 1940s, now revisited as a vintage-modern detail.
- Edge Precision: A round reinforcement sticker from a stationery pack placed over the lunula while painting the rest of the nail creates a cleaner curved boundary than freehand.
- Prep Importance: This design draws direct attention to the nail base, making cuticle condition more visible — groomed cuticles are essential before application.
Note: The lunula size varies from person to person. Work with your natural crescent shape rather than trying to expand or reshape it.
25. Soap Nails (Ultra-Clean Look)

Soap nails replicate the appearance of a freshly washed, bare nail, sheer, glossy, and slightly translucent, as if the nail has a natural wet sheen.
The style is named for its resemblance to the surface of a wet bar of soap and prioritizes a clean, unadorned finish above all else.
- Formula Approach: A single coat of sheer milky polish or a clear base tinted with one drop of white achieves the right level of translucency; the nail bed should remain partially visible through the product.
- Coat Limit: More than one coat begins to build opacity and kills the effect; the transparency is the defining quality of the style and cannot be recovered once lost.
Note: This look works best on nails with an even, healthy nail bed; visible discoloration or ridges show more clearly through a sheer finish than under full coverage.
How to Choose the Right Natural Nail Design for You
Your nail look should work for your life, not against it. These four factors narrow down the right choice fast.
- Skin Tone: Warm undertones suit peachy nudes, beiges, and blush pinks. Cool undertones look sharper in greige, soft lavender, or sheer whites.
- Nail Length: Short nails benefit from sheer or nude shades that create length. Longer nails carry negative space, swirls, and double French tips better.
- Lifestyle: Low-maintenance routines call for clear gloss or cuticle-oil finishes. Styled preferences work well with matte nudes, foil details, or micro French tips.
- Occasion: Workplaces suit clean nudes and classic French. Daily wear allows more flexibility. Events are the right time for soft sparkle or soap nail finishes.
Best Nail Shapes for Natural Nail Looks
Choosing the right nail shape can upgrade your natural look. Here’s a quick guide to the best nail shapes for a natural, chic appearance, based on nail length, lifestyle, and maintenance needs.
| Nail Shape | Best For | Natural Look Rating | Key Consideration |
|---|---|---|---|
| Square | Short nails, wide nail beds | 4/5 | Keep edges filed smooth to avoid snags |
| Squoval | All lengths, beginners | 5/5 | Most versatile, softened square corners reduce breakage |
| Oval | Medium to long nails | 5/5 | Creates an illusion of length; suits slim and wide fingers |
| Almond | Medium to long nails | 4/5 | Elongates fingers; requires regular upkeep to hold shape |
| Round | Short nails, active lifestyles | 4/5 | Most practical for daily wear; least likely to break |
| Coffin | Long nails only | 3/5 | Sleek on nudes but high maintenance as it grows out |
Quickest natural-looking choice: Squoval or oval, both complement minimal polish, suit most finger shapes, and hold up well between salon visits.
Nail Colors That Look the Most Natural
Choosing the right natural nail color makes your hands look clean, polished, and effortless without drawing too much attention or looking overdone.
Core neutral shades: Beige, blush pink, and peach suit most skin tones, shifting slightly with undertones while staying close to natural nail color overall look
Sheer vs opaque: Sheer formulas let natural nail show through, making growth lines and chips less noticeable, while opaque nudes need application for even coverage
Undertone matching tips: Check inner wrist veins, blue or purple signal cool undertones; green signals warm, guiding you toward flattering nude shade choices that fit the best.
Simple Nail Care Tips for a Natural Look
Here’s a cleaner, easy-to-read version with only the key details:
| Care Step | Method | Frequency | Purpose |
|---|---|---|---|
| Cuticle Oil | Apply at the nail base and massage | Daily | Keeps cuticles soft, prevents dryness |
| Push Back Cuticles | Gently push after soaking in warm water | Weekly | Keeps nail base neat without damage |
| Buffing | Use a buffer from rough to smooth | Once a week | Smooths ridges, adds natural shine |
| Filing | File in one direction with a fine-grit file | Every 4–5 days | Maintains shape, reduces splitting |
| Hand Cream | Massage into nails after washing hands | After each wash | Prevents dryness and breakage |
| Strengthening Base | Apply a clear coat on bare nails | Every 5–7 days | Adds protection and light shine |
DIY Natural Nail Ideas You Can Try at Home
To try DIY natural nail ideas at home the tools you must have ready are, Sheer polish, nude polish, white nail art pen, clear topcoat, matte topcoat, dotting tool or bobby pin, nail tape, and 4-way buffer.
1. Sheer Pink Jelly Nails
A single-coat look that gives nails a healthy, glass-like finish with zero effort.
- Step 1: Buff nails with the smoothing side of a 4-way buffer, then wipe clean with a dry cloth to remove any dust before starting.
- Step 2: Paint one thin coat of sheer pink polish across each nail. A single coat keeps the jelly, translucent finish intact and avoids streaking.
- Step 3: Seal with a high-gloss topcoat once the polish is fully dry. This creates the glass-like, healthy shine that defines this clean look.
2. DIY Micro French Tips
A modern, refined take on the classic French manicure using just a nail art pen.
- Step 1: File nails into a square or oval shape first. The tip line looks cleanest on a well-shaped nail with an even free edge.
- Step 2: Use a white nail art pen along the free edge. Keep the line under 2mm, thinner lines read more natural and modern than classic French.
- Step 3: Apply a clear, glossy topcoat over the entire nail immediately. This locks the tip line and blends it into the base seamlessly.
3. Minimal Dot Accent Nails
A barely-there detail that adds just enough interest without stepping away from a clean look.
- Step 1: Apply two coats of your chosen nude polish and let it dry completely. A fully dry base prevents the dot from sinking or smudging.
- Step 2: Dip a bobby pin tip into white or black polish. Press once near the cuticle on one or two nails only, not all ten.
- Step 3: Seal with a clear gloss topcoat to flatten the dot and give it a smooth, finished look rather than a raised, textured feel
4. Soap Nails (At-Home Version)
A dewy, freshly-washed finish that works on every nail length and skin tone.
- Step 1: Apply one coat of sheer white or barely-pink polish. This tints the nail very slightly without adding real color exactly the right base.
- Step 2: Add a second thin coat once dry. Keeping both coats thin maintains that semi-transparent, clean finish rather than a flat opaque result.
- Step 3: Finish with a wet-look or ultra-glossy topcoat. This final step is what creates the signature dewy, freshly-washed appearance of soap nails.
Stay Polished
Getting your nails to look clean and put-together does not have to be complicated.
I hope these natural nail ideas showed you that small choices, like the right nude shade, a sheer topcoat, or a micro French tip, make a real difference in how polished your hands look every day.
Matching your finish to your skin tone and keeping up with simple care steps like daily cuticle oil are the two things that matter most.
These are not big-effort changes; they are small habits that add up fast. The right look is already within reach, no salon visit required.
Try one style this week and see how it feels. If you found this helpful, share it with a friend or drop your favourite look in the comments below.