
Kitchen drawers get messy faster than almost any other storage space in the home. One day you can find your peeler in ten seconds.
A month later you’re digging past six duplicate spatulas to reach it. I’ve been there, and I’ve fixed it more than once.
Knowing how to organize kitchen drawers properly isn’t complicated, but there is a specific order that makes it stick. Empty first, then sort by function, then put back only what you actually use.
Everything else either goes to another room or to the bin. The rest of this guide covers each step in detail, the storage solutions worth having, the maintenance habits that prevent backsliding, and the mistakes I see come up over and over again.
Why Kitchen Drawer Organization Actually Matters
A disorganized kitchen drawer doesn’t just look bad. It adds friction to cooking. When you can’t locate your kitchen tools quickly, you slow down during prep, you get frustrated, and you’re more likely to leave things on the counter instead of putting them away.
That’s how clutter spreads outward from drawers onto surfaces.
Research on workspace organization consistently links physical clutter to elevated cortisol levels, and your kitchen is no exception.
When every utensil and tool has a fixed home, you stop making micro-decisions about where things are or where to put them back. Meal prep becomes faster and the kitchen stays calmer during busy weeknight cooking.
The goal isn’t a magazine-perfect drawer. It’s a drawer that works every day without thought.
How to Organize Kitchen Drawers Step by Step
I always do this one drawer at a time rather than emptying everything at once.
Pulling out the entire kitchen in one go tends to lead to an overwhelmed pile on the counter and nothing actually finished.
One drawer, start to finish, then move to the next.
Step 1: Empty the Drawer Completely and Declutter
Take everything out and put it on the counter. Every single item. This is the most important step because you cannot organize what you haven’t looked at.
Once the drawer is empty, you’ll almost always find at least two or three things that don’t belong in there at all.
Sort what comes out into three piles: keep, relocate, and remove. Keep is anything you use at least once a week in that area of the kitchen.
Relocate is anything that belongs in a different drawer or cabinet. Remove is anything broken, duplicated beyond reason, or genuinely not needed anymore.
Be ruthless about duplicates. Most home cooks do not need four wooden spoons. Two is usually plenty. If you have multiples of something, keep the best one and let the rest go.
Put a bin bag right next to you before you start. Having it there makes the decision to actually remove things much easier. If you have to walk to find a bag, you’ll talk yourself into keeping things you shouldn’t.
Step 2: Clean the Drawer Interior
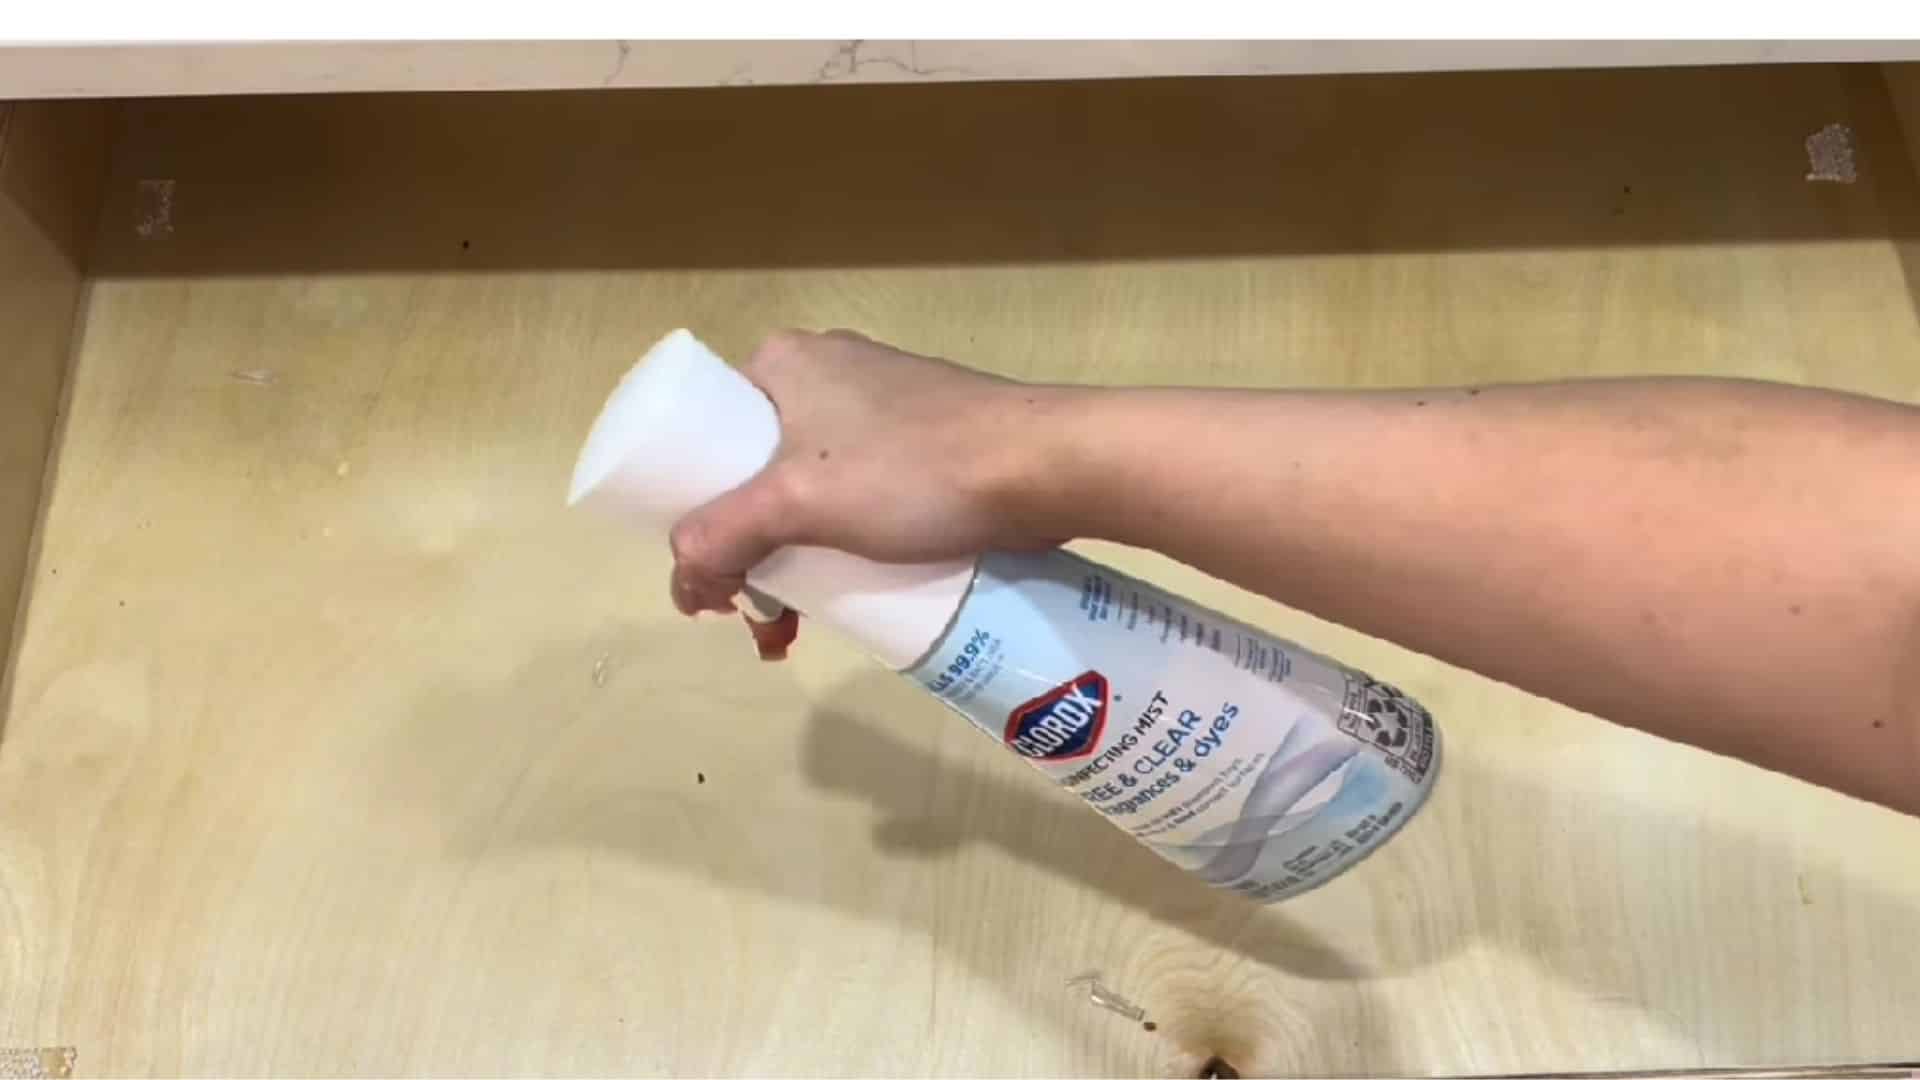
With the drawer empty, wipe down the whole interior before anything goes back in. Crumbs, grease residue, and dust build up along the edges and corners.
A damp cloth followed by a quick dry is usually enough. For drawers near the hob, a spray with diluted white vinegar cuts through grease without leaving any residue near food items.
Let it dry fully before replacing anything. If you’re putting a liner in, this is when you do it. Liner goes in once, stays for months, and makes wiping down the drawer a two-second job in future. Cut it to fit snugly. A liner that slides around defeats the purpose.
This is also a good point to tackle any stickiness on the drawer runners.
A dry cloth on the runners usually sorts minor stiffness. If you want a deeper clean across the kitchen at the same time, I keep a few DIY cleaning sprays on hand that work well on cabinet surfaces without any harsh chemicals.
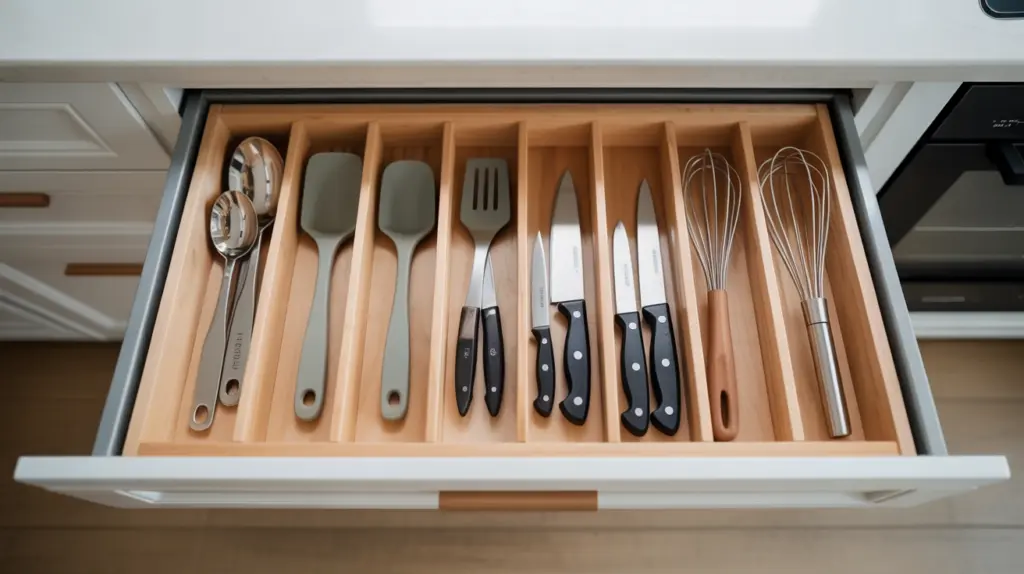
Step 3: Organize Kitchen Drawers by Function
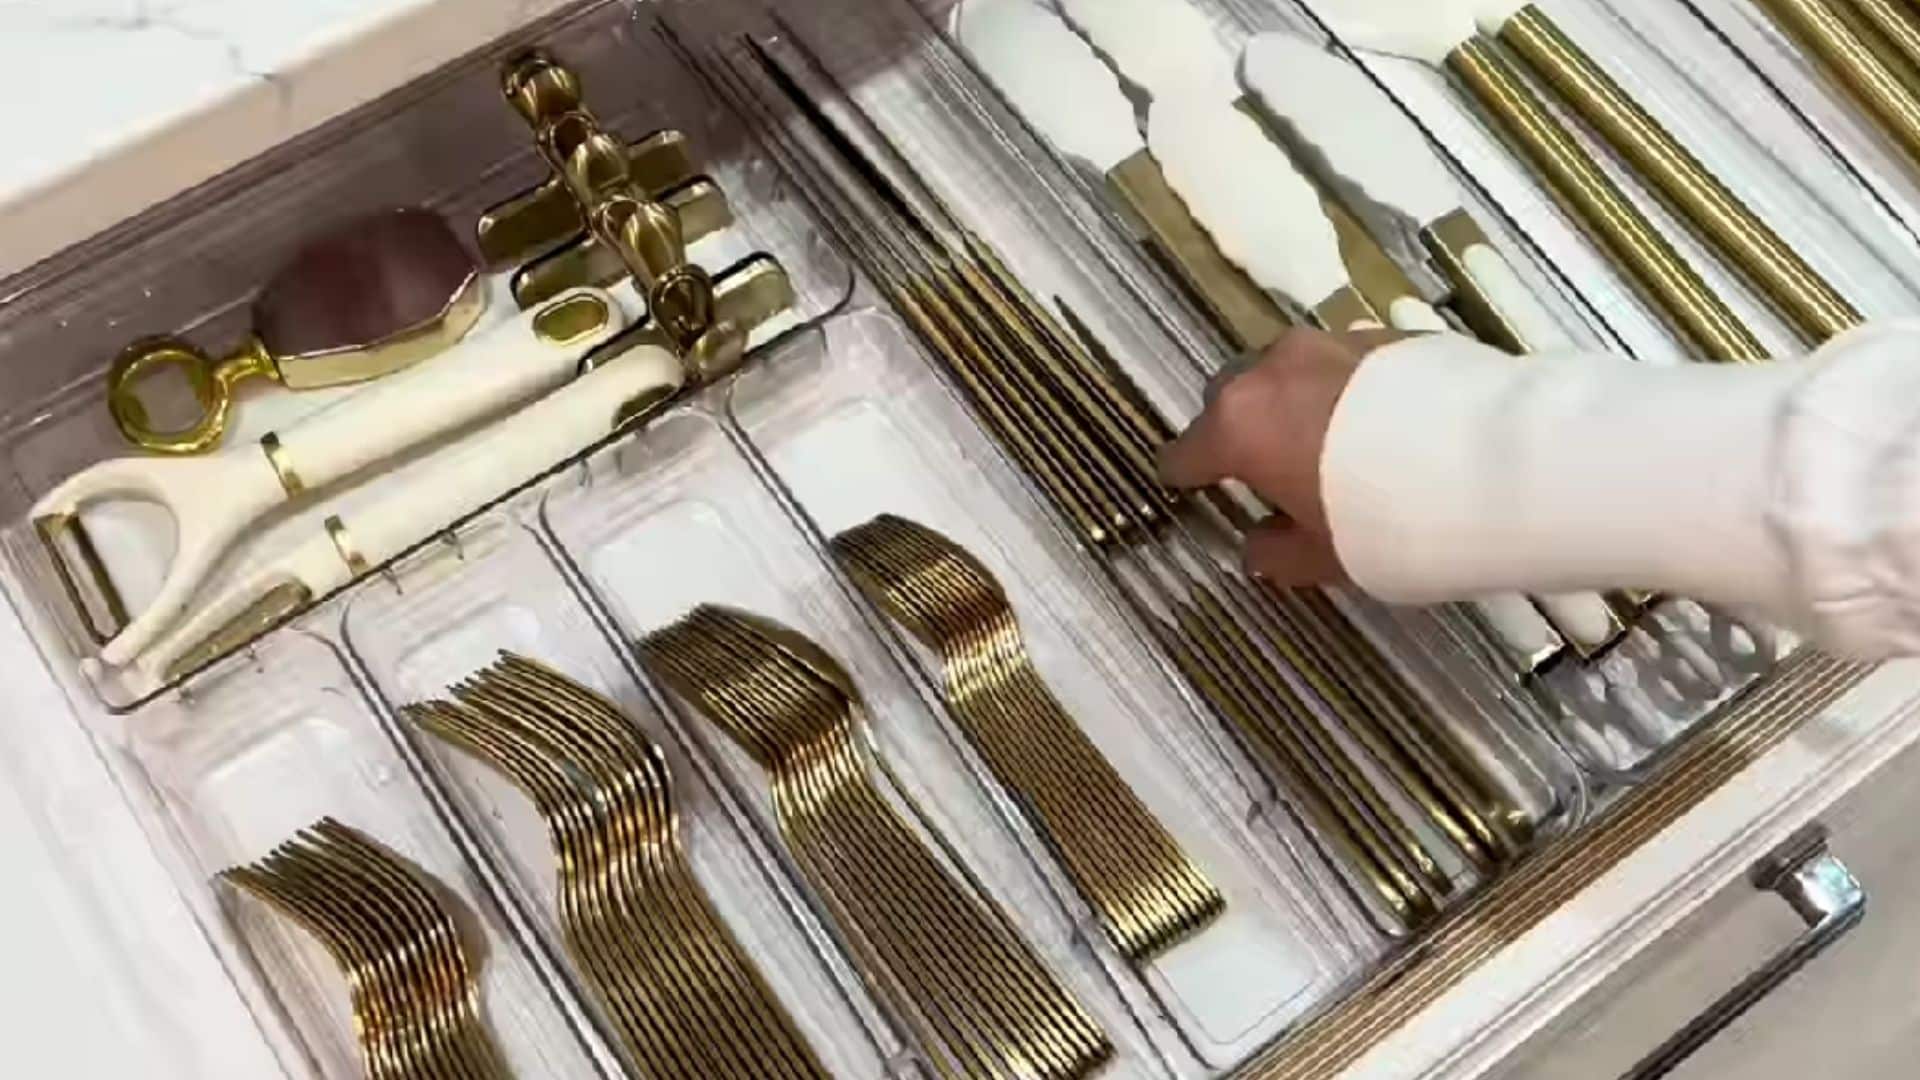
This is the step that makes the biggest difference. Group tools by how and when they’re used, not by what they look like.
A good basic system for most kitchens looks like this. The drawer closest to the hob holds cooking utensils: spatulas, tongs, wooden spoons, ladles.
The drawer nearest the prep area holds prep tools: peeler, garlic press, grater, measuring spoons. A third drawer handles cutlery. Anything you use less than once a week goes further away or out of the kitchen entirely.
The key principle is that your hand should be able to reach the thing you need without looking down or hunting. If you consistently reach for a spatula during cooking, it needs to be in the first drawer you open, not the third.
Drawer dividers make this system hold. Without them, everything migrates and the zones collapse within a week. Bamboo expandable dividers work in most standard drawer widths and hold their position without screws or adhesive. Set the dividers first, then fill each section. Don’t fill first and try to fit dividers around the contents.
The zone that matters most is within 18 inches of the hob. Whatever you reach for while something is on the heat belongs there. Everything else can live further away.
Step 4: Handle Deep Kitchen Drawers Differently
Deep drawers need a different approach than standard ones. If you just fill a deep drawer the way you’d fill a shallow one, things get buried and you lose half the storage. The solution is vertical stacking with clear containers.
For a pot and pan drawer: stack lids vertically in a lid organizer at the back. Pots nest inside each other in size order at the front. For a pantry-style deep drawer: use clear rectangular bins grouped by category so you can see what’s inside without lifting anything out. I find the Ikea Variera bins work well here and cost almost nothing.
Label the bins if multiple people use the kitchen. It takes five minutes and removes the “where does this go?” problem entirely.
Step 5: Replace Tools That Are Past Their Best
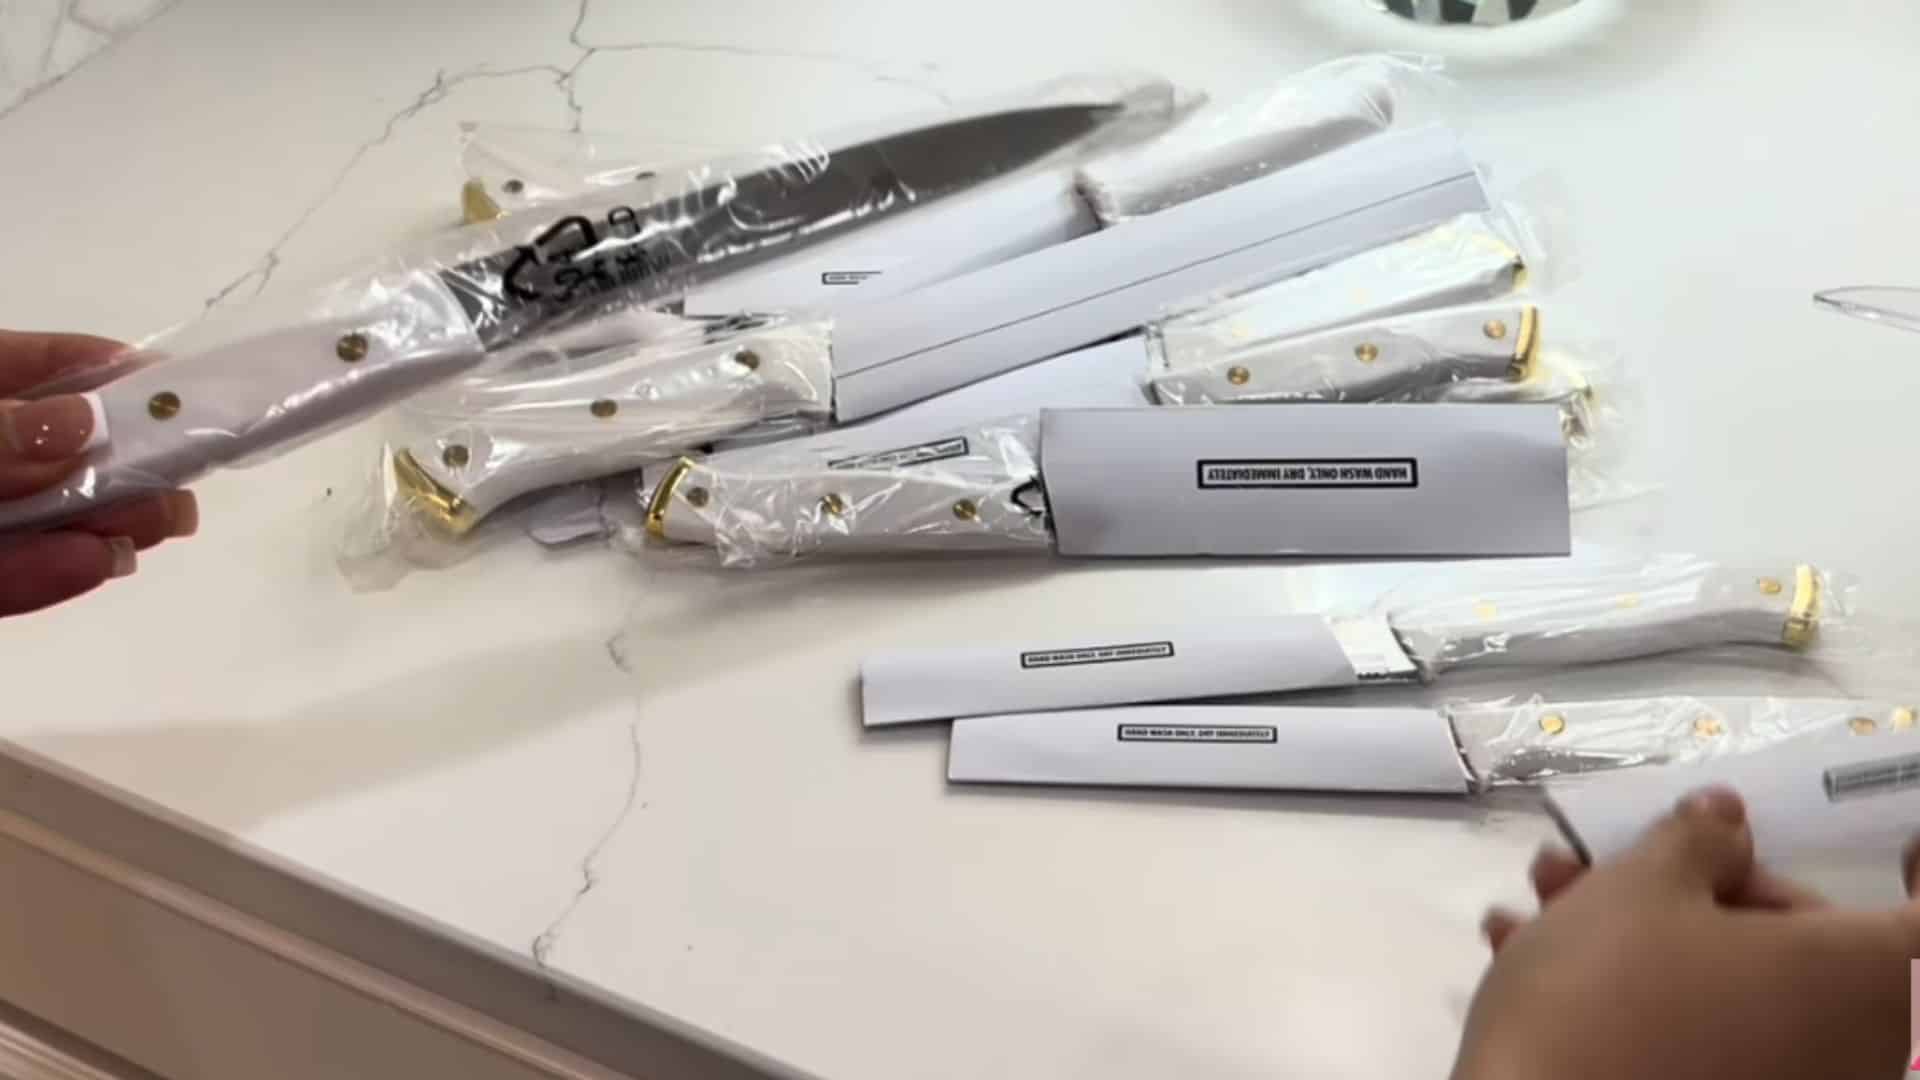
While you have everything out is the right time to assess condition. Silicone spatulas that are cracked or pulling away from the handle collect bacteria and should go. Wooden utensils that have split, gone rough, or developed a persistent smell need replacing too.
Stainless steel and high-grade silicone are the two materials worth spending more on. Stainless doesn’t absorb odors or bacteria and lasts for years. BPA-free silicone is heat-safe up to around 230°C and won’t scratch non-stick surfaces. Both clean easily and don’t need replacing frequently once you have good versions.
Multi-purpose tools help with drawer space. A fish spatula works for eggs, meat, and fish. A good flexible silicone spatula covers scraping, folding, and stirring. Every tool that does two jobs is one fewer item in the drawer.
Step 6: Add Practical Storage Where Needed

Some items genuinely don’t belong in drawers and work better stored differently. If you’re running out of drawer space after decluttering, that’s often the real issue rather than not having enough drawers.
A countertop utensil crock next to the hob handles the handful of tools you reach for every single day, freeing the drawer for things used slightly less frequently. A magnetic knife strip on the wall takes knives out of drawers entirely, which is both safer and better for blade longevity than jostling around with other metal tools.
For the junk drawer that every kitchen has: accept it, but contain it. One dedicated small container for batteries, one for tape and scissors, one for random small items. The junk stays, but it stays organized inside those containers rather than loose in the drawer.
How to Keep Kitchen Drawers Organized Long Term
The reason most kitchen organization efforts fail isn’t the initial setup. It’s that nothing prevents things from drifting back. These are the habits that actually hold.
Set a monthly check-in of about ten minutes. Go through each drawer and remove anything that’s crept in from elsewhere, any duplicates that appeared, and anything that’s broken or no longer needed. Monthly is often enough. Weekly is too frequent to feel sustainable.
Follow the one-in, one-out rule with kitchen tools. Before a new utensil goes into a drawer, something comes out. This keeps drawer space from filling back up over time without any active decision ever being made.
Keep drawer liners in place and replace them annually. A liner that’s clean and flat makes wiping down a drawer genuinely fast, which means it actually gets done. A grimy liner that’s lifting at the corners is a reason not to bother cleaning, and that’s how grease builds up again.
Adjust the zone layout when your cooking habits change. If you’ve started batch cooking every Sunday, your prep tools probably need to move closer. If you stopped baking, the rolling pin can go further away. The system works best when it reflects how the kitchen is actually being used now.
The same principle applies across the rest of the home. If you’re doing a wider room-by-room reset at the same time, my guide on how to clean and organize a room from scratch uses the same zone-based logic throughout.
Common Kitchen Drawer Organization Mistakes to Avoid
These are the things I see trip people up most often, including myself early on.
| Mistake | Why It’s a Problem | The Fix |
|---|---|---|
| Overcrowding drawers | Nothing stays in its zone; tools shift and mix | Remove duplicates before adding any dividers |
| Organizing without decluttering first | You’re just neatening clutter, not solving it | Always empty and sort before organizing |
| Wrong organizer size | Gaps let things slide; tight ones jam | Measure drawer width and depth before buying |
| Ignoring rarely used items | They take space from tools you actually use daily | Move seasonal items to higher cabinets |
| No maintenance system | Drawers revert to pre-organization state | Monthly ten-minute check-in is all it takes |
The biggest one in my experience is skipping the declutter and going straight to buying organizers. If the drawer is overfull, a divider set won’t help. You’ll just have neatly divided overcrowding. The bin bag comes before the bamboo dividers every time.
What Goes Where: Kitchen Drawer Zones Explained
A common question is which specific items belong in which drawers. This depends on your kitchen layout, but the logic is consistent.
The zone nearest the hob holds cooking tools that need to be grabbed quickly: tongs, fish spatula, main wooden spoon, ladle, and a silicone spatula.
The zone nearest the sink or prep area holds prep tools: vegetable peeler, small paring knife if you don’t have a magnetic strip, grater, garlic press, and measuring spoons.
The cutlery drawer holds cutlery only. Cutlery organizers with separate slots for forks, knives, dessertspoons, and teaspoons stop things from tangling and make laying the table faster.
Sharp knives in a loose drawer are both a safety issue and bad for the blade. Either a wooden knife block, a wall-mounted magnetic strip, or a dedicated in-drawer knife organizer with individual slots is worth the small investment.
This also frees up meaningful space in the main utensil drawer.
The same thinking about zones and traffic flow applies when laying out a whole room. If you’re also rethinking furniture placement in your living areas, my guide on small living room layout ideas covers exactly this kind of spatial problem-solving.
Frequently Asked Questions
These are the questions I get most often about how to organize kitchen drawers.
How do you organize deep kitchen drawers?
Use vertical storage and clear containers. Lids go upright in a lid organizer at the back. Pots nest by size at the front. For pantry-style deep drawers, group items into clear labeled bins so nothing gets buried. The goal is to avoid flat stacking so everything is accessible without lifting anything out first.
How do you organize kitchen drawers on a budget?
Bamboo expandable dividers cost under $15 for a set and fit most standard drawers. Non-slip liner from a hardware store runs a few dollars per roll. You don’t need a matching container set. Repurposed food storage containers work fine for grouping loose items inside a larger drawer.
What is the best kitchen drawer organizer?
Expandable bamboo dividers are the most versatile for most kitchens because they adjust to different drawer widths without any installation. For cutlery specifically, a fitted plastic or bamboo cutlery tray with separate slots works better than open dividers. Always measure your drawer first before buying anything.
How often should you reorganize kitchen drawers?
A full reorganization once every six to twelve months is usually enough. A monthly ten-minute check-in to remove anything that’s drifted in and return items to their zones prevents a full reorganization from being needed often. Most drawer drift is gradual and a quick monthly reset stops it before it compounds.
How do you organize kitchen utensils without drawers?
A countertop utensil crock handles the tools you reach for daily. A wall-mounted magnetic knife strip takes care of knives. S-hooks on a rail mounted to the wall or cabinet front hold larger utensils like ladles and tongs. If counter space is limited, a pegboard on a blank wall can hold a wide range of tools cleanly.
How do you organize a kitchen drawer with limited space?
Declutter first so you’re only working with items you actually use. Then use a tiered or stacking organizer to use the full drawer depth. Anything used less than weekly should move to higher cabinets or a pantry area. The first fix for a small drawer is always fewer items, not a better organizer.
Final Verdict
There isn’t a single layout that works for every kitchen. But the method is consistent: empty everything out, sort by function, use drawer dividers to hold the zones, and do a ten-minute check monthly.
What I’d tell someone standing in front of their worst kitchen drawer right now is to start with just that one. Pull everything out, put back only what you actively use near that spot, add a bamboo divider set, and line the base.
That single drawer will make a noticeable difference the next time you cook. Work through the rest of the kitchen the same way over a weekend and the whole system comes together faster than you’d expect.