
I still remember the first time I attempted a Brazilian wax at home. I was nervous, a little sweaty, and holding the wax stick far too tightly. With preparation and the right technique, though, it became much easier than I expected. But guess what? I survived. And so can you.
A Brazilian wax removes all the hair down there, front, back, and everything in between. It sounds scary, but with the right prep, the right wax, and a little courage, you can get smooth, long-lasting results without leaving your bathroom.
No salon appointment. No awkward small talk. Just you, some hard wax, and a deep breath. Ready to do this? Let’s walk through every step together in the beginner-friendly way.
Understanding Brazilian Wax
A Brazilian wax removes hair from the front (mons pubis), the labia area, and the butt strip. Some people choose to leave a small strip or triangle of hair on top, often called a landing strip, but many prefer full removal.
The wax grips the hair at the root and pulls it out clean. Hard wax is usually recommended for sensitive areas because it hardens around the hair as it cools. This allows the wax to grip the hair rather than pulling strongly on the skin. That means results last 3 to 6 weeks, which is way longer than shaving.
I used to shave every few days and deal with constant razor bumps. After switching to waxing, my skin felt smoother, and bumps became rare.
It takes practice, but once you get the hang of it, it feels like a total game-changer for your routine. No blades. No daily upkeep. Just smooth skin that lasts.
How to Do a Brazilian Wax Step by Step
Doing a Brazilian wax at home is all about following the right steps in the right order. When I first started trying it myself, I learned quickly that preparation and patience make a huge difference.
Follow this simple guide, and you can get clean, smooth results without the salon visit.
Tools and Material Needed
Grab these essentials before you start. Skipping even one item can slow the process or affect your results:
- Gentle Cleanser
- Soft Towel
- Baby Powder or Cornstarch
- Hard Wax Beads or Blocks
- Wax Warmer
- Wooden Applicator Sticks (Small & Medium)
- Handheld Mirror + Large Mirror
- Tweezers
- Soothing Oil or Aloe Gel
Having everything laid out beforehand helps prevent mid-session stress and keeps the process more controlled.
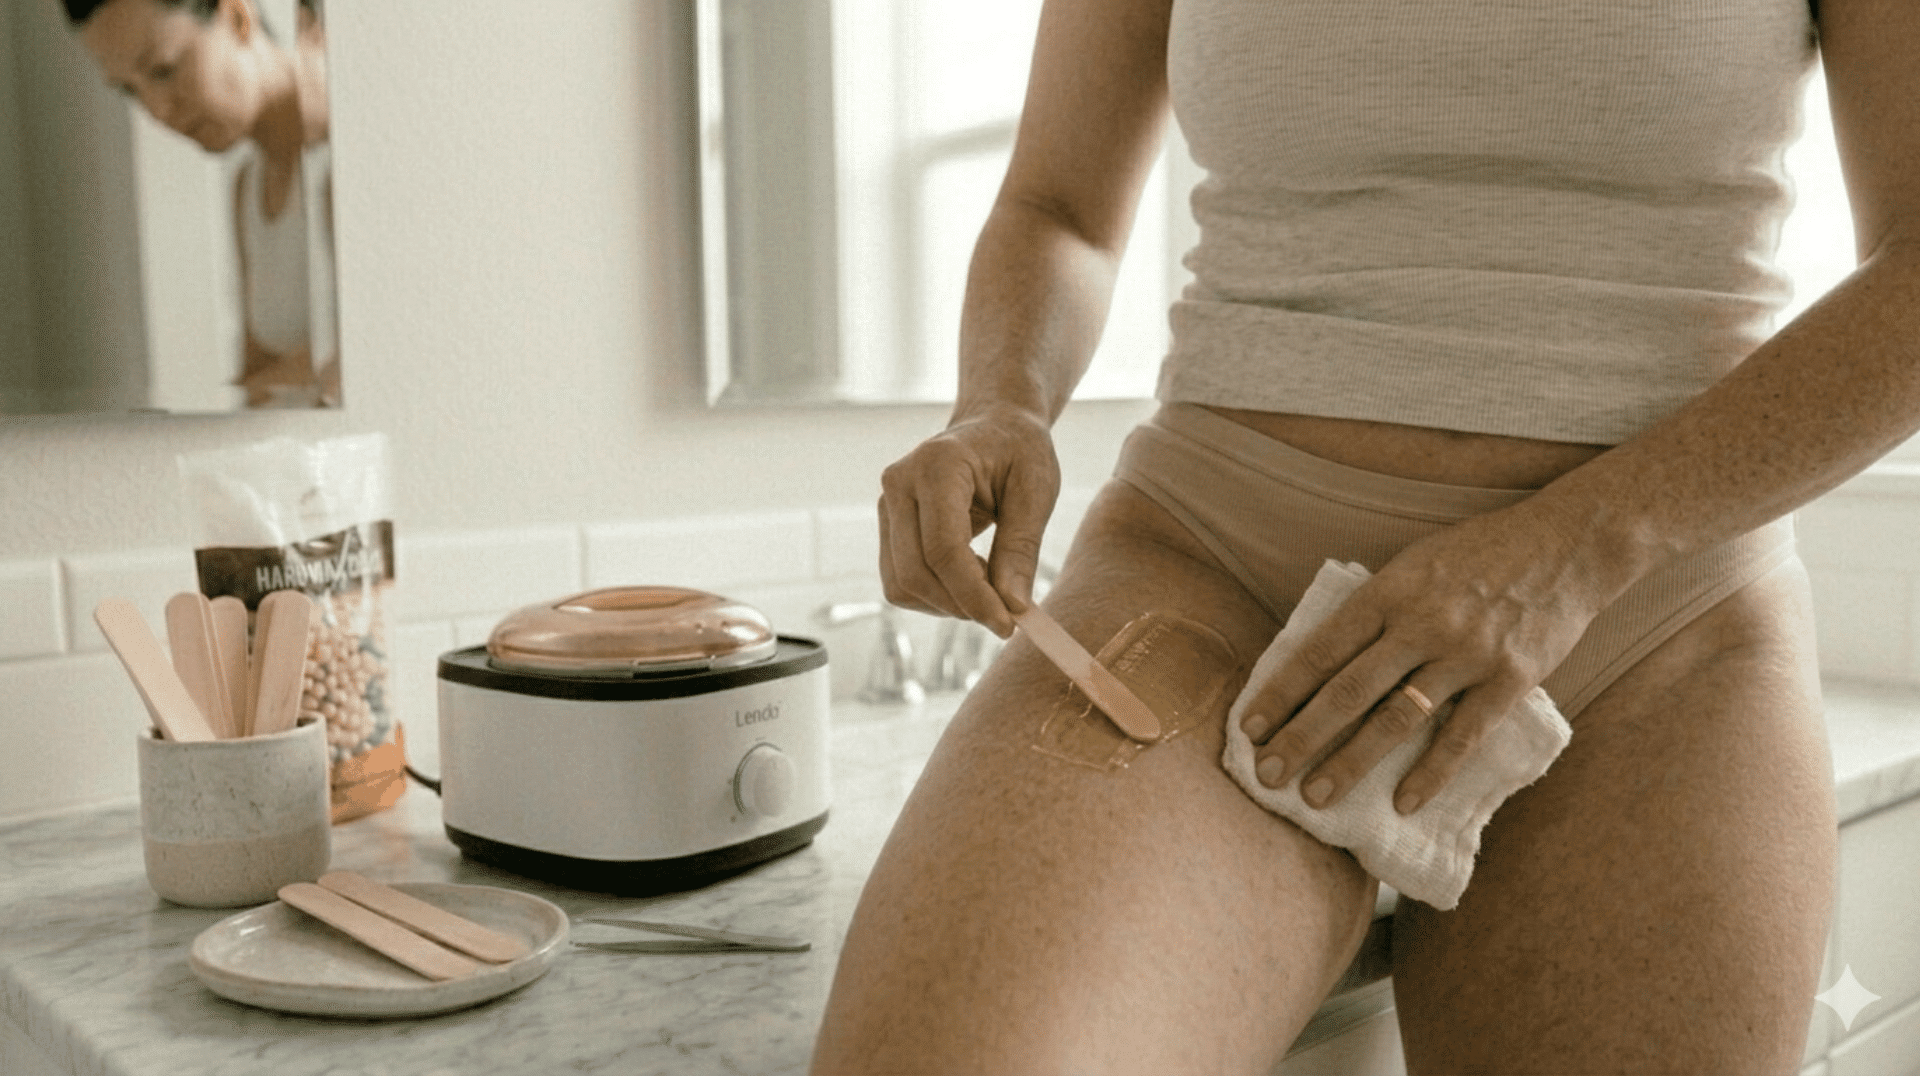
Step 1: Heat the Wax Properly
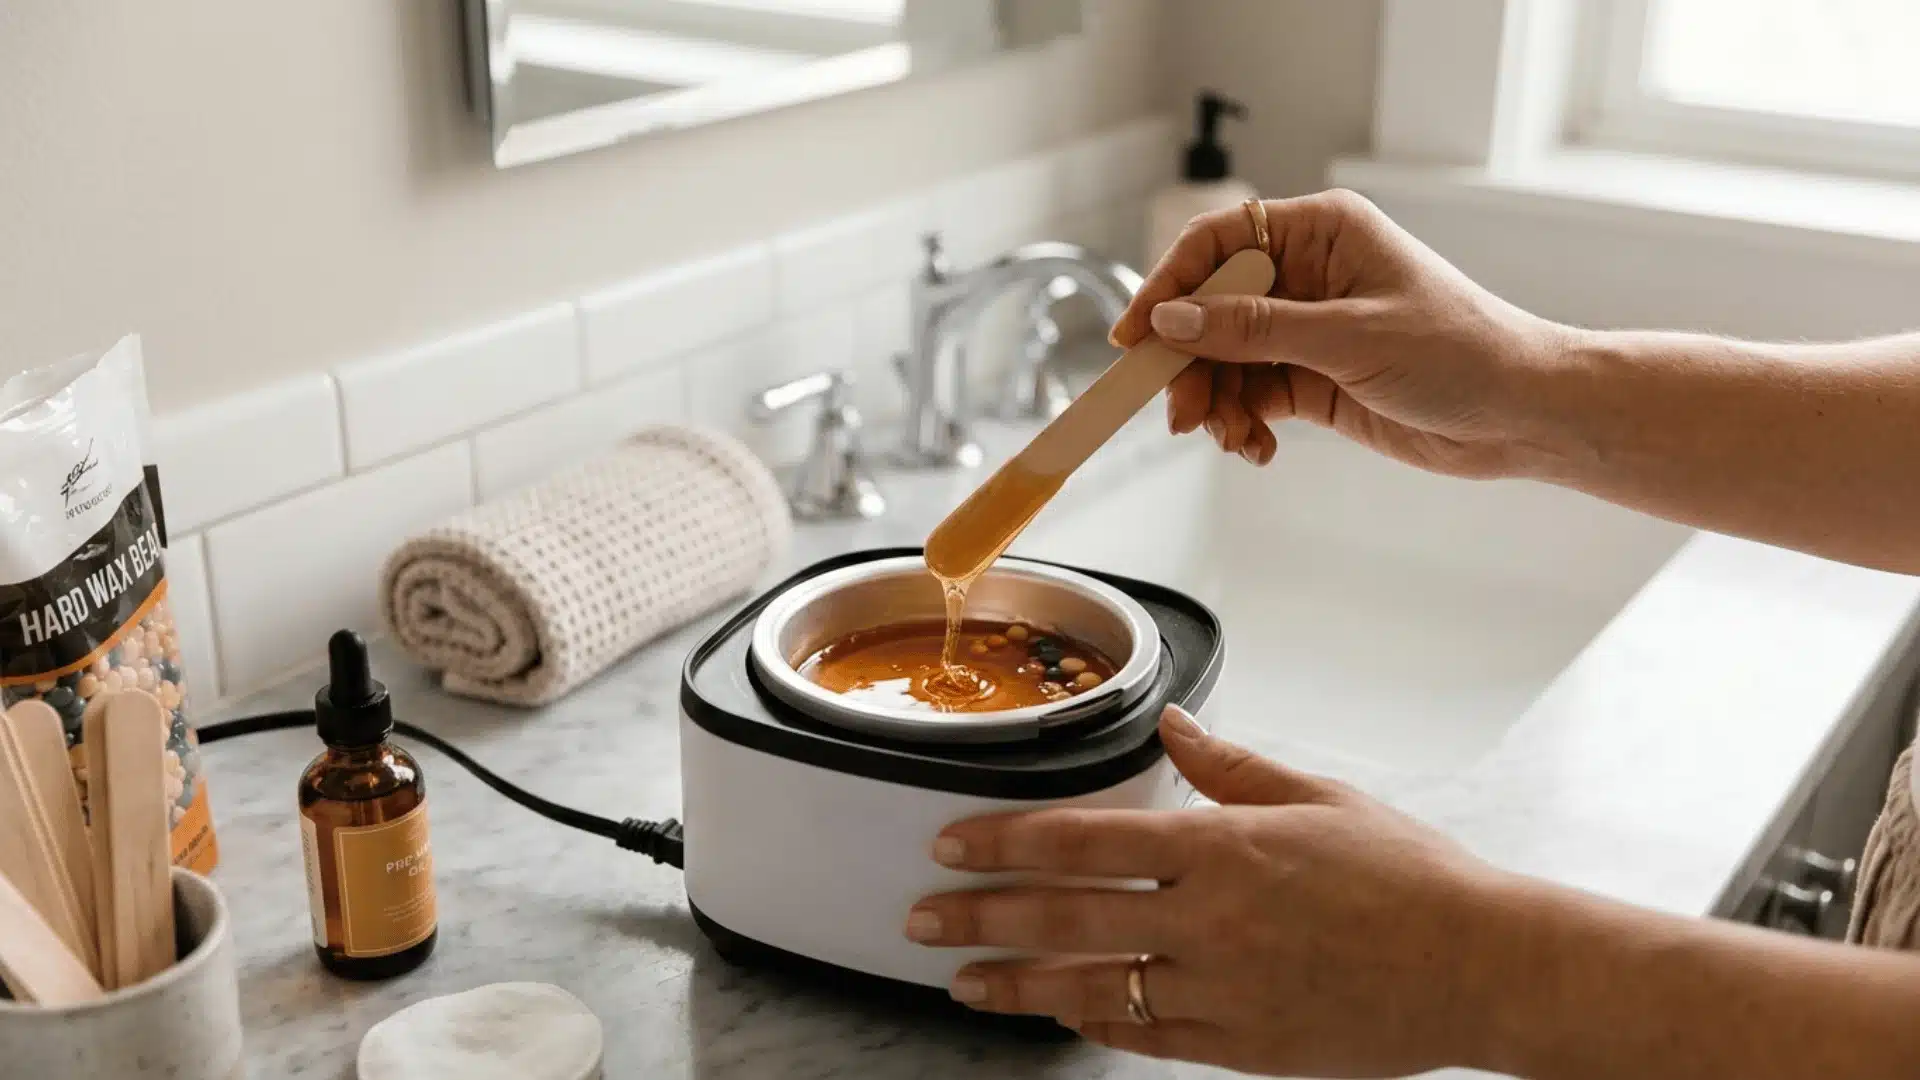
Start by melting hard wax beads in a wax warmer until the wax reaches a thick, honey-like consistency. The wax should flow slowly from the stick rather than dripping. Always test a small amount on the inside of your wrist before applying it to sensitive skin.
If the wax feels too hot on your wrist, allow it to cool for a minute and test again. Proper wax temperature helps it grip hair effectively while protecting delicate skin from irritation or burns.
Step 2: Position Yourself
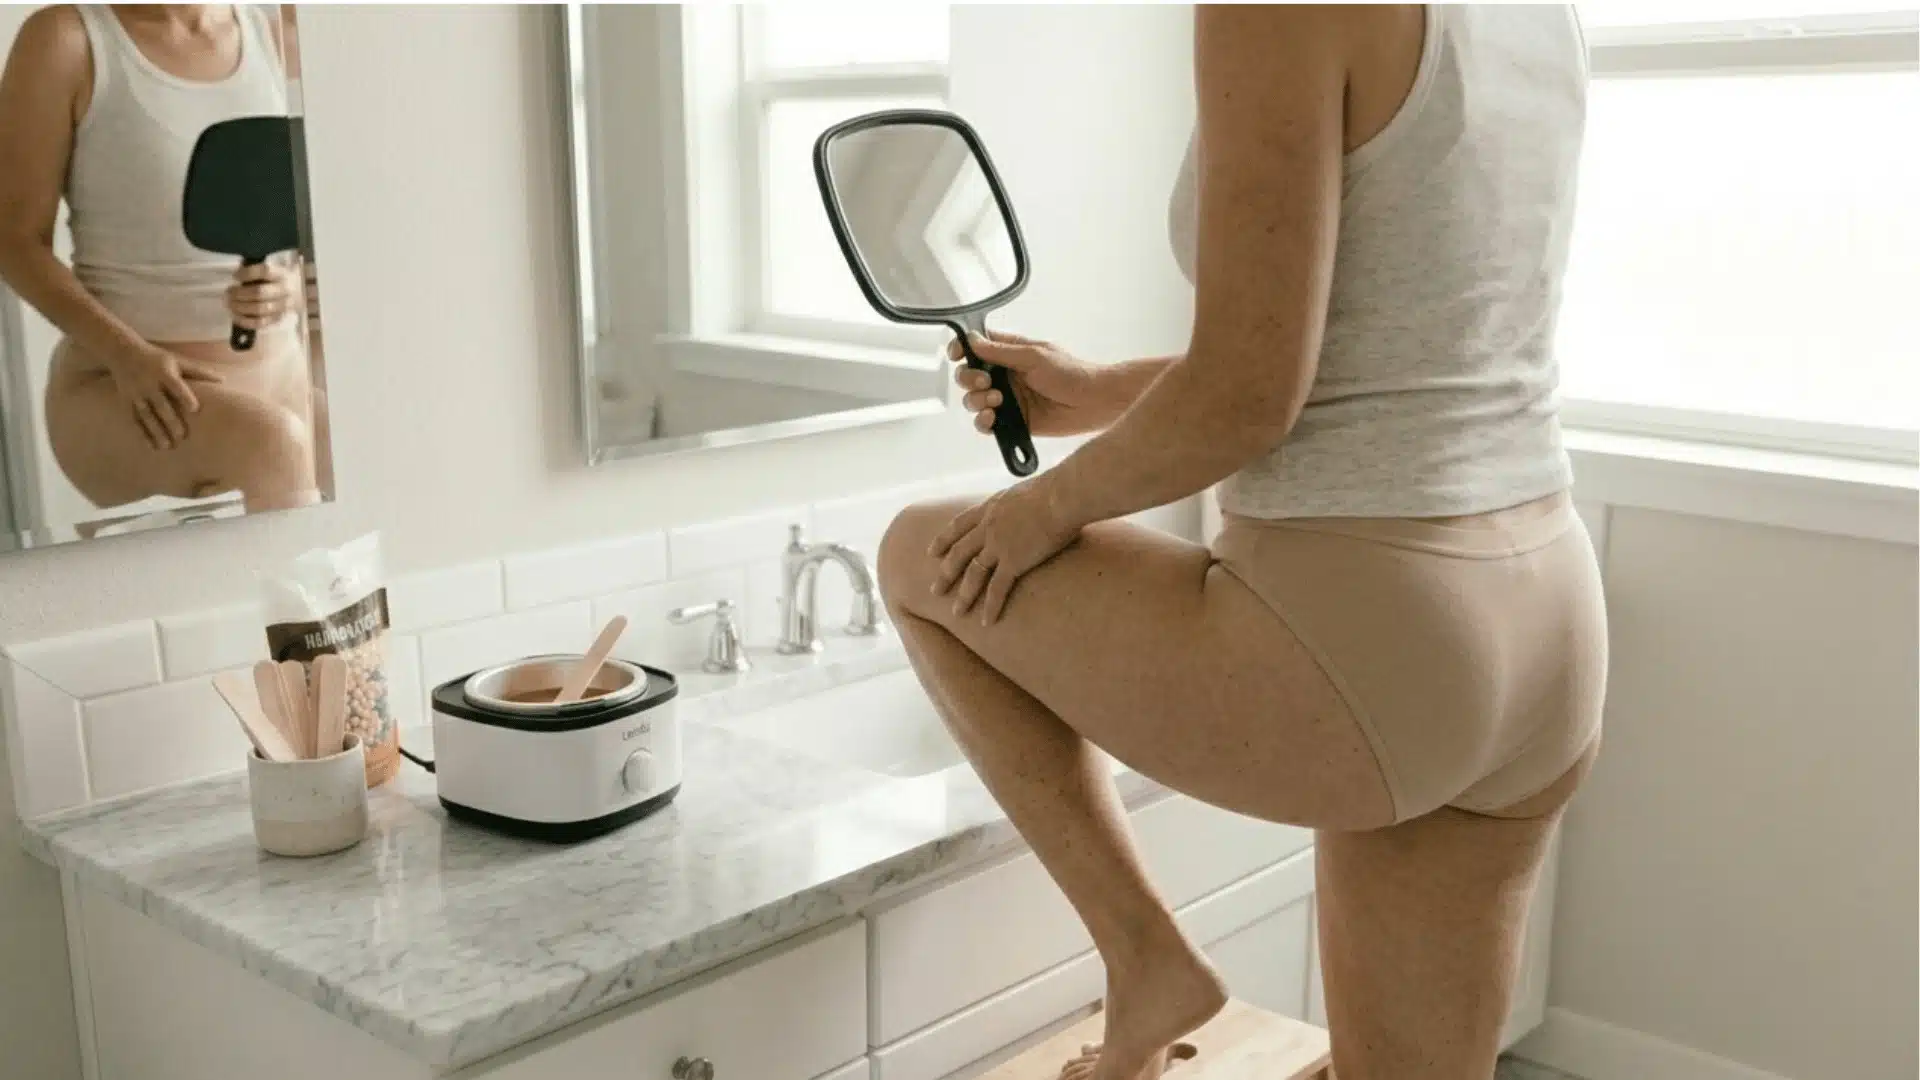
Before applying wax, make sure you are positioned comfortably where you can clearly see the area you’re working on. Most people find it easiest to stand with one leg raised on a stool or sit slightly reclined.
Use a handheld mirror along with a larger mirror so you can see both the front and back areas clearly. Good visibility makes it easier to apply wax in the right direction and avoid missing spots.
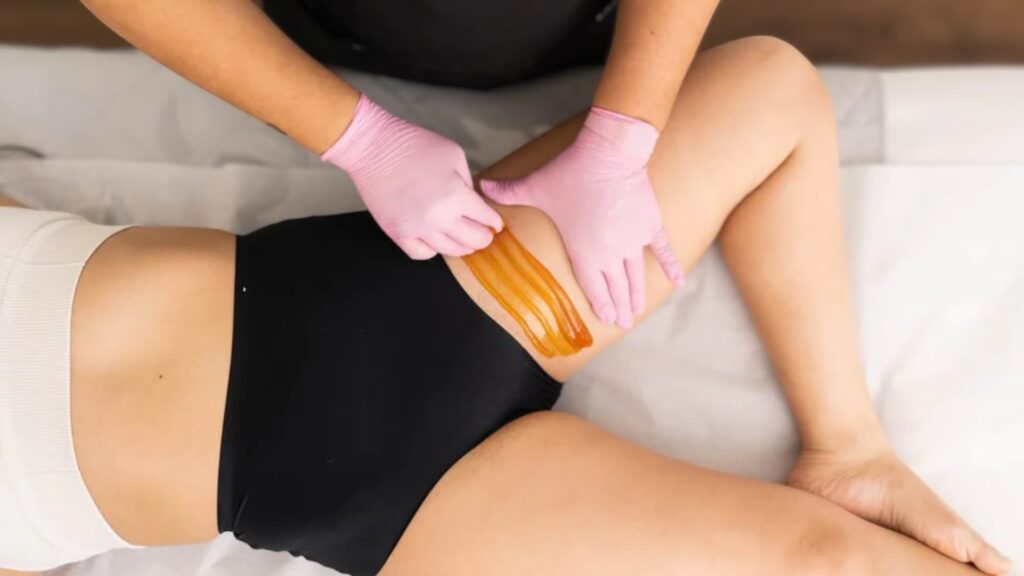
Step 3: Apply Wax Correctly
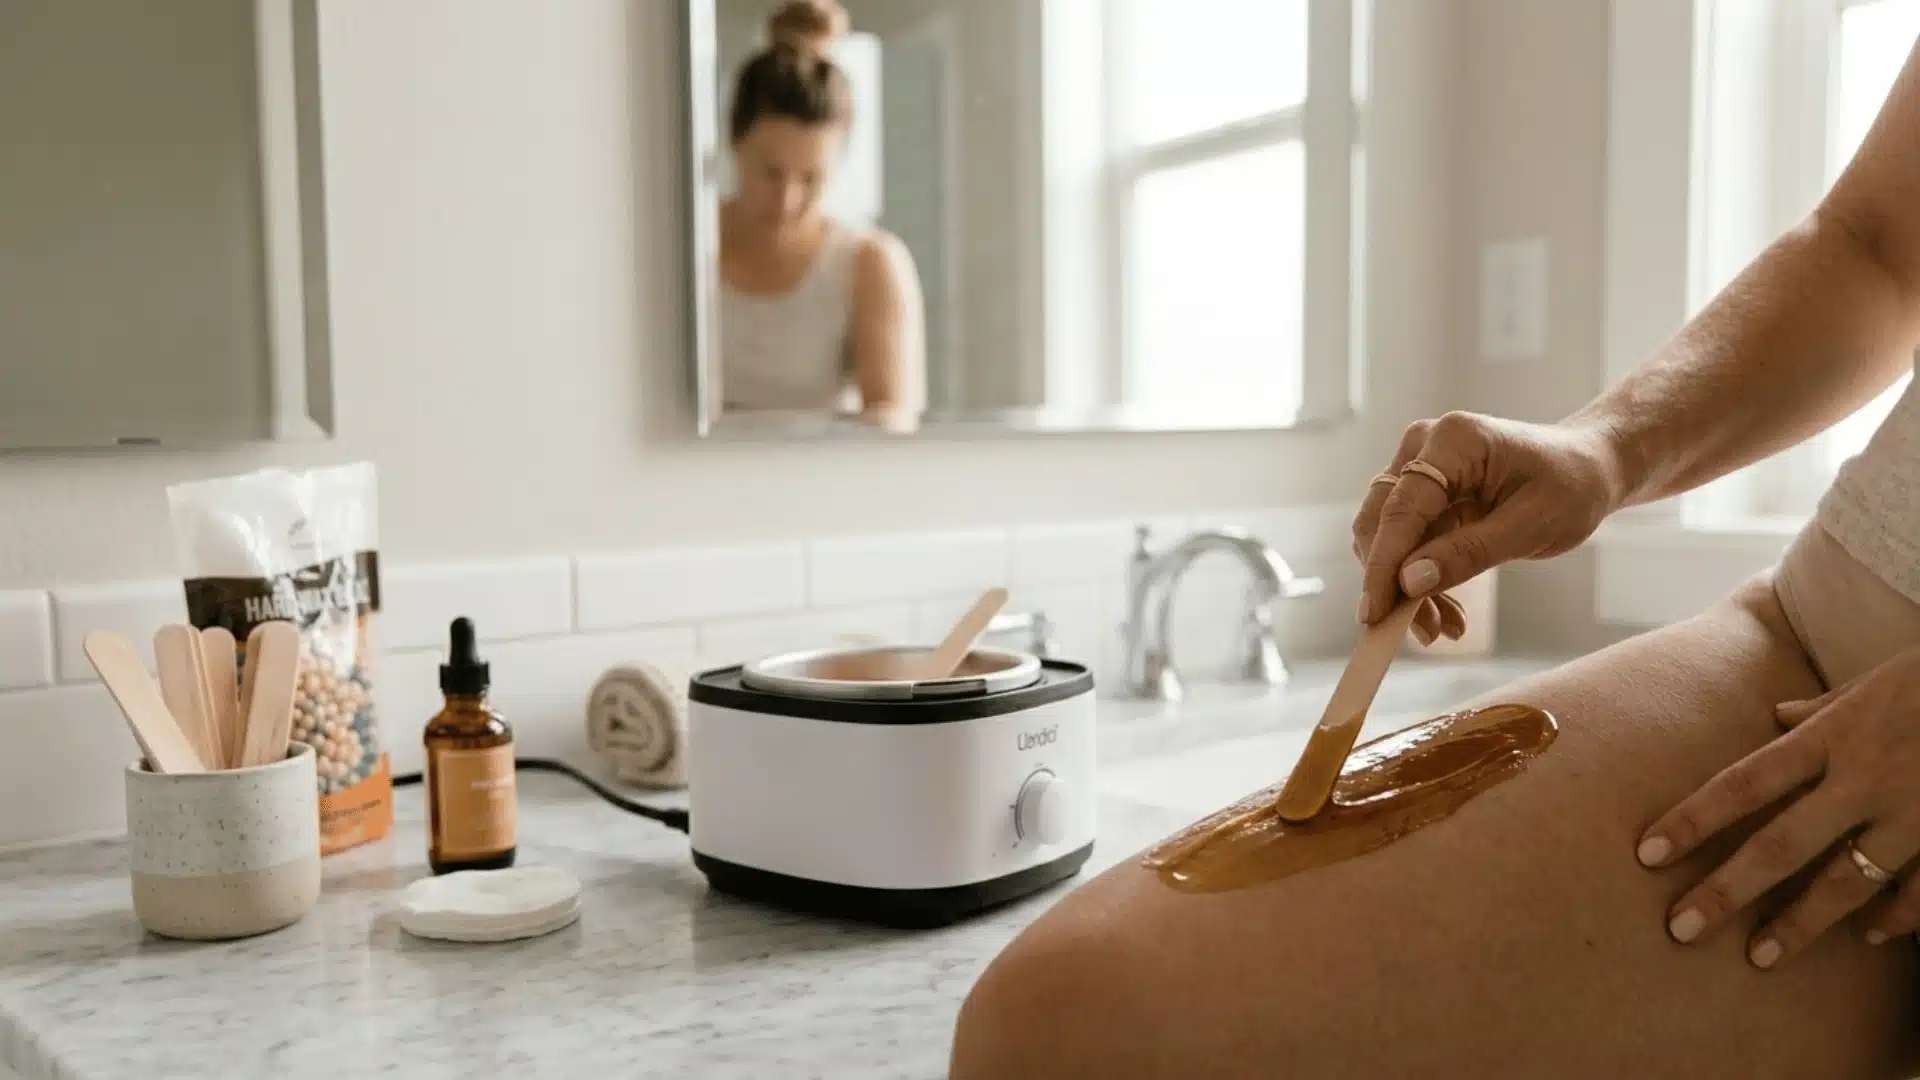
Using a wooden applicator stick, spread a thick layer of wax in the same direction that the hair grows. Working in small sections helps the wax grip the hair more effectively and keeps the process manageable.
Start with the outer bikini line since this area is usually less sensitive. Once you get comfortable with the technique, gradually move toward more sensitive areas, such as the labia.
Step 4: Let the Wax Set
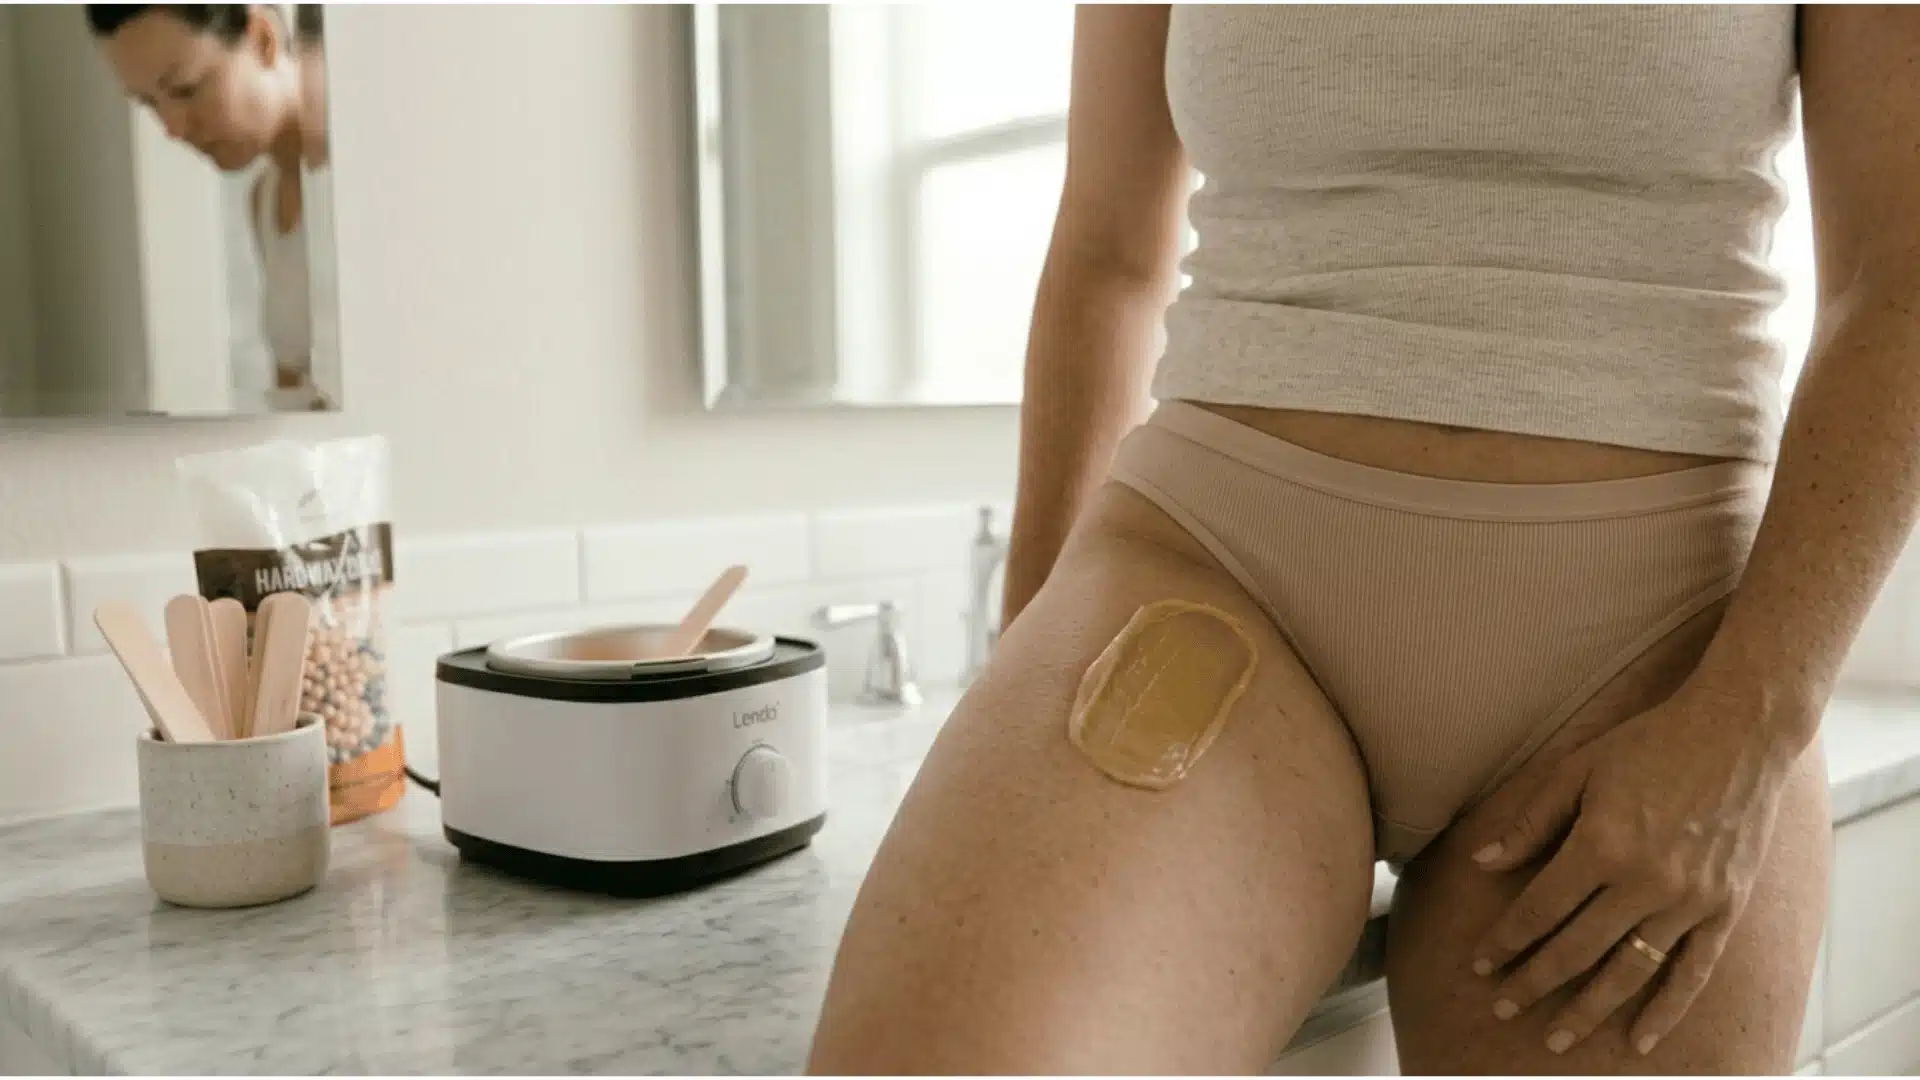
After applying the wax, let it cool and firm slightly before removing it. The wax should feel solid but still flexible when you touch it lightly.
If the wax is still sticky, it has not set enough and may not remove cleanly. Waiting a few extra seconds allows the wax to harden around the hair, helping pull the hair from the root rather than breaking it.
Step 5: Remove the Wax
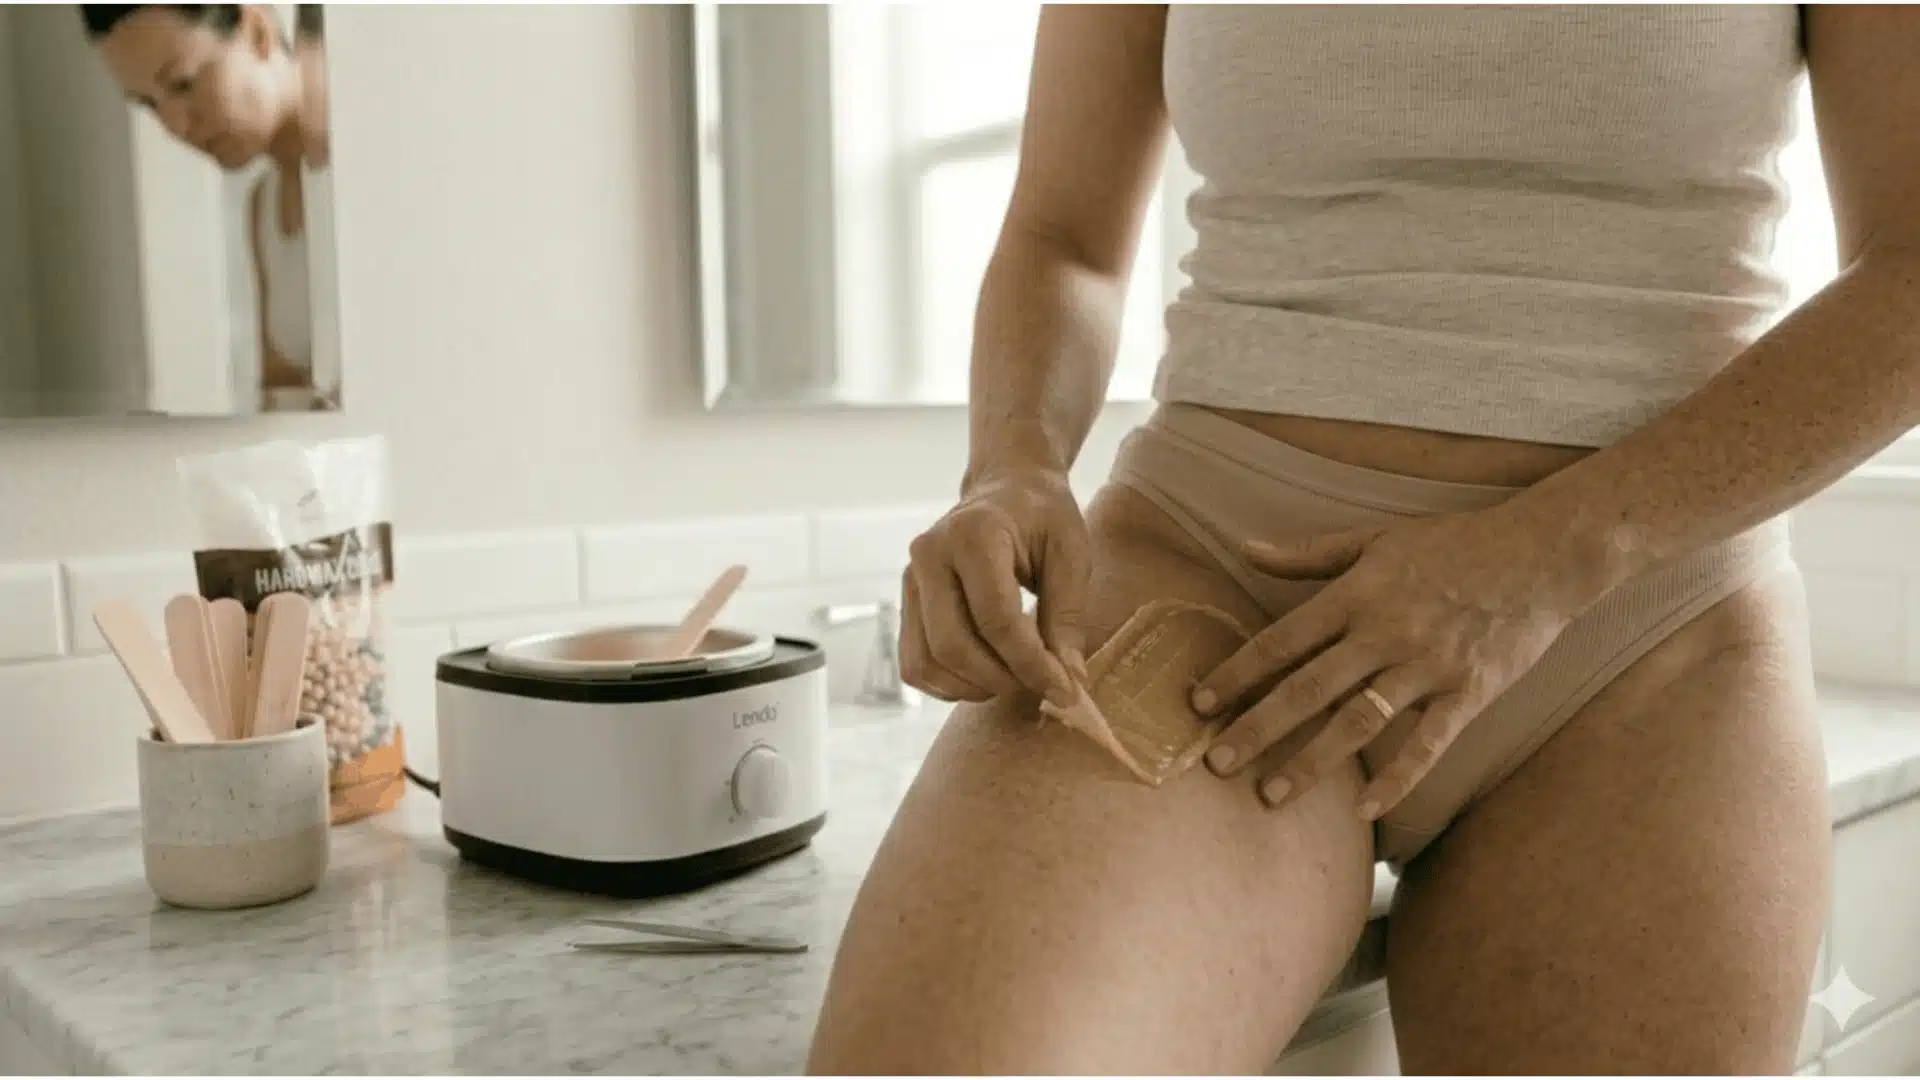
Hold the skin tightly with one hand to keep the area flat. With the other hand, grab the edge of the wax strip and pull it quickly in the opposite direction of hair growth.
Always pull the wax close to the skin rather than upward. This technique reduces discomfort and helps remove the hair more effectively while lowering the chance of bruising.
Step 6: Continue in Small Sections
Work gradually through the area using small, controlled sections of wax. Avoid covering too large an area at once because this makes removal harder and increases irritation.
After each pull, gently press your hand to the skin for a few seconds. This simple step helps calm the sting and allows the skin to recover before applying wax to the next section.
Step 7: Clean Up Remaining Wax
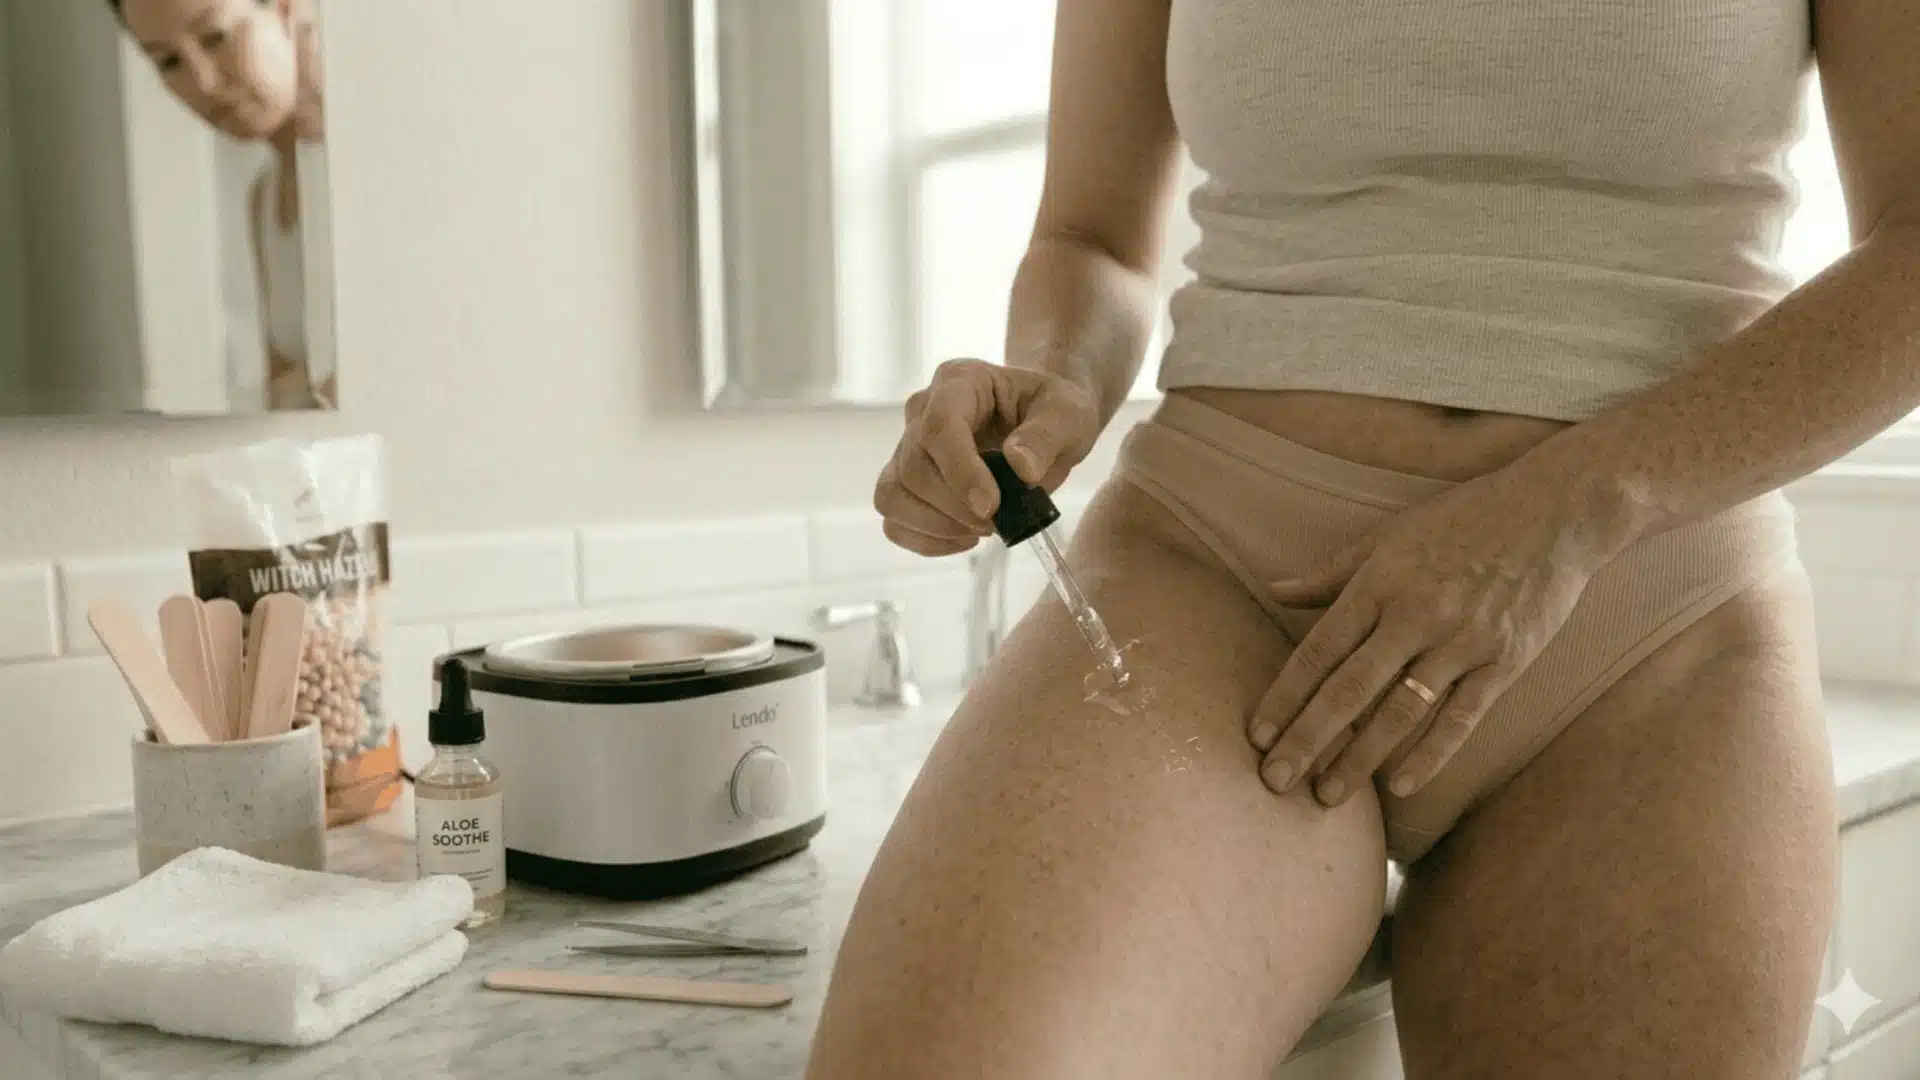
Once all the hair has been removed, check for any leftover wax or stray hairs. Use a wax remover oil or a gentle cleansing oil to dissolve any remaining wax on the skin.
Finish by applying aloe gel or a soothing cream to calm redness and support skin recovery. Proper aftercare helps prevent bumps, irritation, and ingrown hairs after waxing.
Common DIY Brazilian Wax Mistakes
When I first tried waxing at home, I assumed it was just about being brave enough to pull it off. I quickly learned that most problems don’t come from bad luck. They come from small mistakes that are easy to fix once you know what to watch for.
- Wax too hot: Test a small amount on your wrist first. Wax that’s too hot burns and damages delicate skin fast.
- Pulling upward: Keep your pull flat and parallel to the skin; lifting up causes bruising and breaks the hair instead of removing it.
- Not stretching skin: Hold the skin taut before each pull. Loose skin makes removal hurt more and leaves patchy results.
- Applying wax too thin: A thin layer won’t grip the hair properly. Always spread a thick, even coat so it sets and removes cleanly.
- Re-waxing too many times: Going over the same spot more than twice irritates and damages skin. Tweeze leftovers instead of re-waxing.
When you avoid these common mistakes, your results look smoother and feel less painful. From my experience, it really comes down to patience, proper prep, and pulling in the right direction.
Aftercare: Preventing Bumps and Irritation
What you do right after waxing matters just as much as the wax itself. Immediately afterward, Aloe and calming oils help reduce inflammation and support the skin barrier after hair removal.
Skip tight underwear and go for loose, breathable cotton instead. Your skin needs air, not friction. For the next 48 hours, avoid hot baths or long showers since heat opens pores and invites bacteria in.
Skip the gym, too, as sweat irritates freshly waxed skin fast. Avoid sex during this window, as friction and bacteria can cause breakouts or infection.
Tight clothing is also best avoided; it rubs, traps heat, and triggers bumps. Treat your skin gently, and it will heal smooth, clean, and bump-free. The same level of attention you give your skin after waxing is worth applying to your hair care too, and knowing your natural hair texture helps you choose the right products for a complete and considered grooming routine.
Dermatologists often recommend avoiding heat, friction, and sweat after waxing because hair follicles remain temporarily open.
What is Included in a Brazilian Wax?
Here’s a simple breakdown of everything a Brazilian wax covers and how it stacks up against a regular bikini wax: the difference is bigger than most people think, so let’s look at it side by side.
| Area | Brazilian Wax | Bikini Wax |
|---|---|---|
| Front (mons pubis) | Full removal | Edges only |
| Labia (inner lips) | Yes | Not included |
| Butt strip | Yes | Not included |
| Hair-free finish | Completely bare | Partial only |
| Landing strip option | Optional | N/A |
A bikini wax only cleans up what peeks out of your underwear. A Brazilian wax goes all the way, giving you full, clean coverage that lasts weeks longer and removes more hair overall.
Can You Safely Do a Brazilian Wax on Yourself?
You can do a Brazilian wax on yourself at home, but it’s not for everyone, and being honest about that matters. If you have varicose veins, active breakouts, sunburned skin, open cuts, or eczema in the bikini area, please skip this and see a professional instead.
People taking retinoids, blood thinners, or Accutane should also avoid waxing because these meds make the skin super sensitive and prone to tearing, and because they thin the skin and make it more prone to tearing.
If you’re pregnant, especially in the third trimester, waxing can feel more painful than usual due to increased sensitivity, so check with your doctor first.
Now, let’s talk pain. Yes, it hurts. The first time, especially. But it feels like a quick snap, not a long burn. After the first few sessions, your skin adjusts, and it honestly gets so much easier. Go slow, breathe, and you’ve got this.
Final Thoughts
Doing a Brazilian wax at home can save money and give you more privacy, but preparation and patience matter. My first attempt was far from perfect, yet each session became easier as I learned what worked best for my skin.
Simple steps like proper cleansing, testing the wax temperature, and working in small sections make the process safer and more comfortable. Aftercare is just as important. Using soothing products and avoiding friction helps the skin recover and prevents bumps or irritation.
Still, at-home waxing isn’t right for everyone. If you have sensitive skin, certain medical conditions, or feel unsure, seeing a professional is the safer choice.
If this guide helped you, share it with someone who might need it and let me know your experience in the comments.