

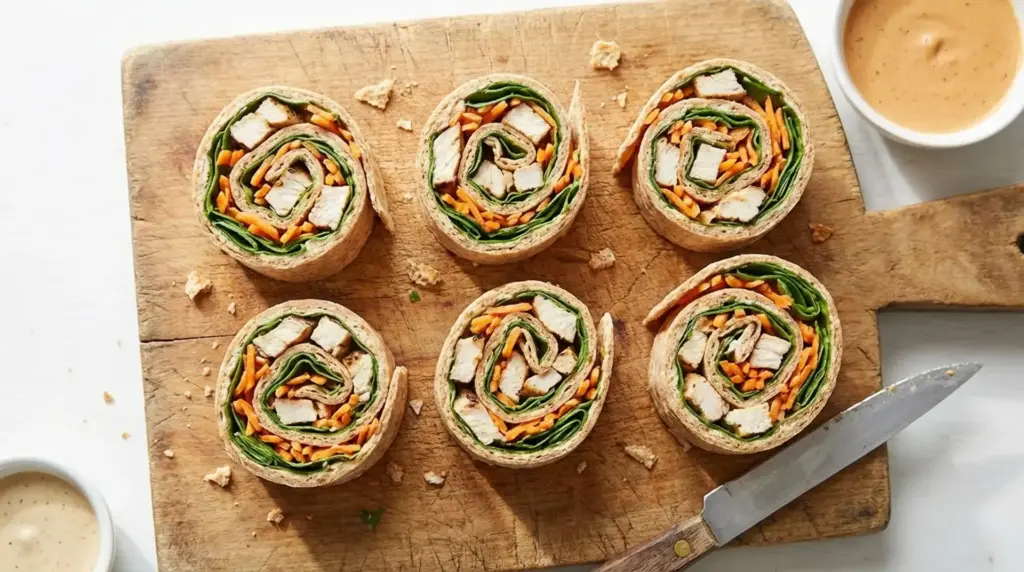
There are days when my afternoon hunger hits hard, especially between work tasks when I still have hours left. Building a reliable set of nutritious work snack ideas into my weekly prep makes mid-session slumps much easier to manage without reaching for processed snacks.
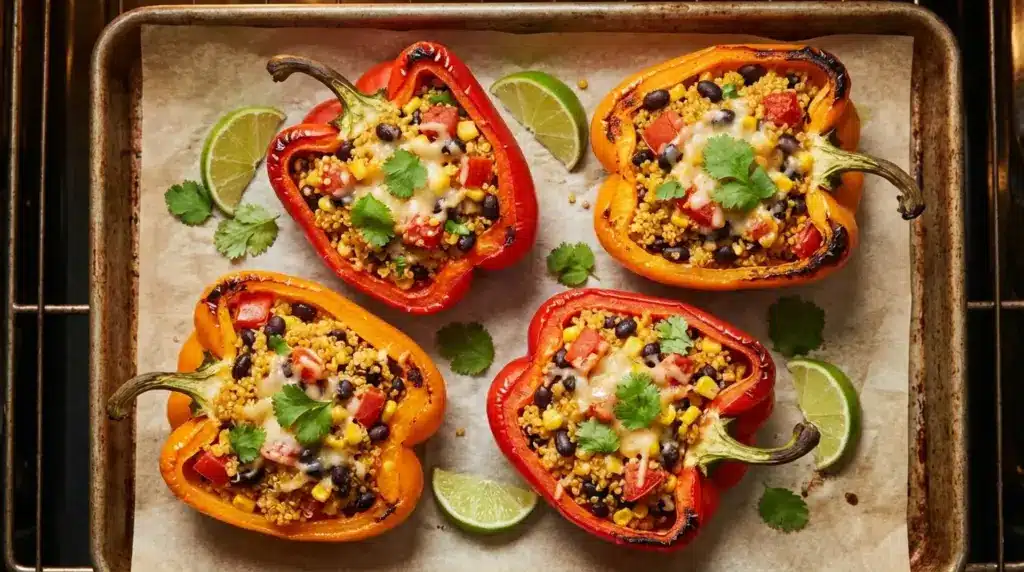
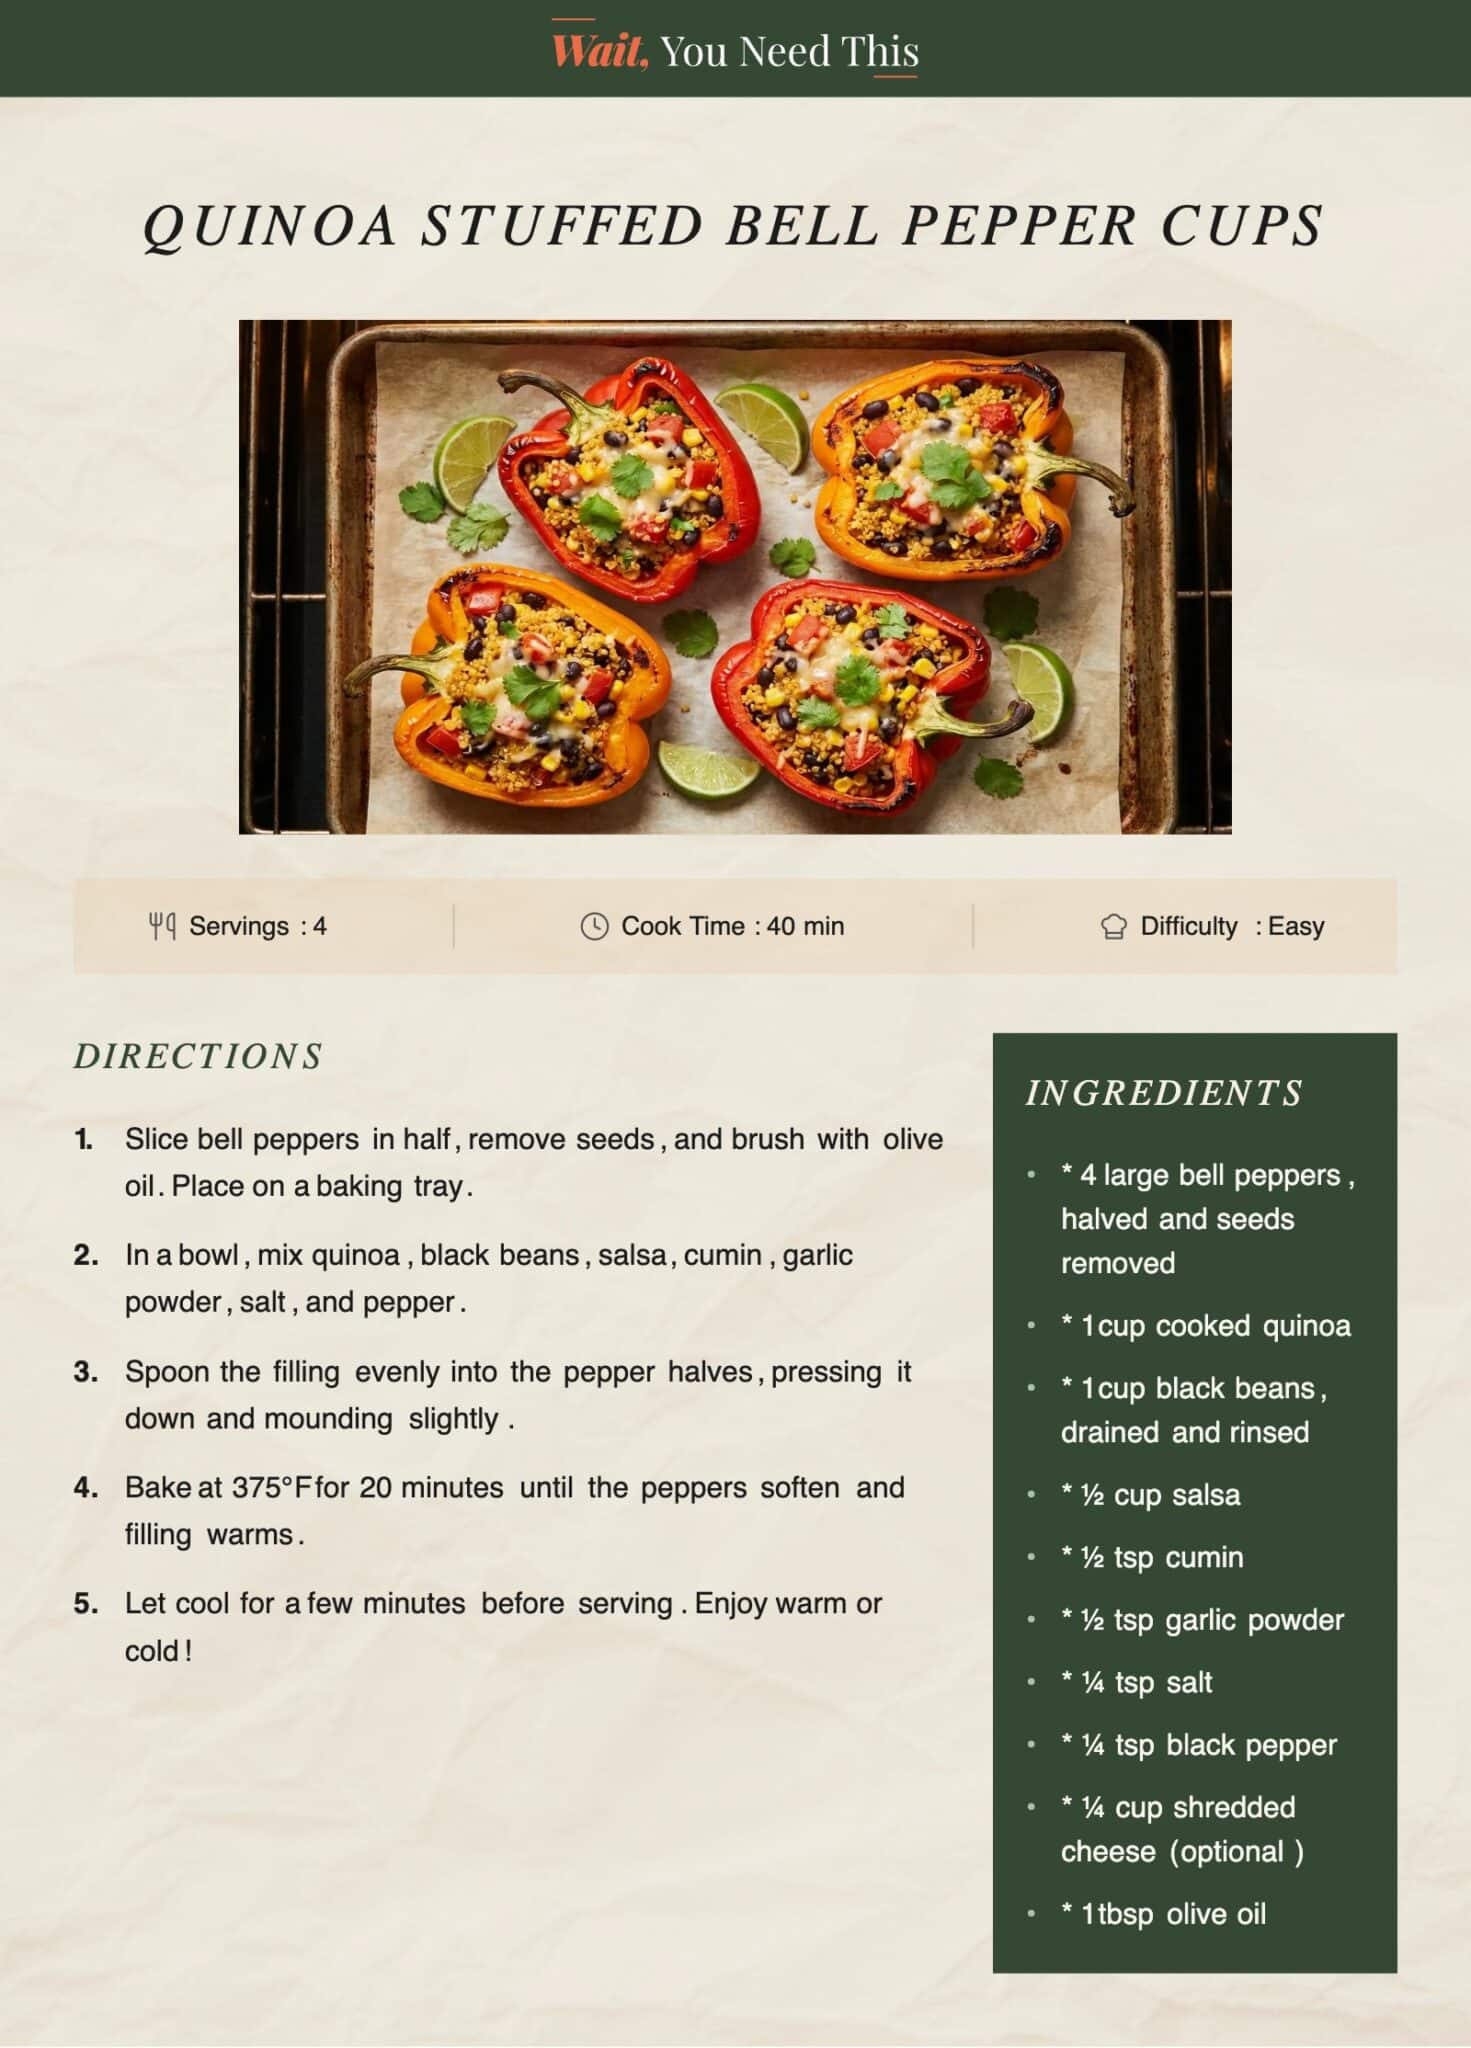
That’s when I reach for these quinoa-stuffed bell pepper cups. I started making them after wanting something filling that still felt light and balanced. The mix of quinoa, beans, and salsa cooks inside sweet bell peppers until everything turns warm and satisfying.
You get protein, fiber, and vitamins in every bite. If your snacks often leave you hungry again too quickly, these little pepper cups may quickly become one of your most reliable meal-prep options.
Ingredients
Serving Size: 2 pepper halves | Calories: ~260 kcal | Protein: 10g | Total Time: 40 minutes | Servings: 4
- 4 large bell peppers, halved and seeds removed
- 1 cup cooked quinoa
- 1 cup black beans, drained and rinsed
- ½ cup salsa
- ½ tsp cumin
- ½ tsp garlic powder
- ¼ tsp salt
- ¼ tsp black pepper
- ¼ cup shredded cheese (optional)
- 1 tbsp olive oil
Quinoa Stuffed Bell Pepper Cups: Steps to Make
These simple steps turn everyday pantry items into warm stuffed pepper cups that make a small meal or a satisfying snack. Prep is simple, and the oven does most of the work.
Step 1: Prepare the Peppers
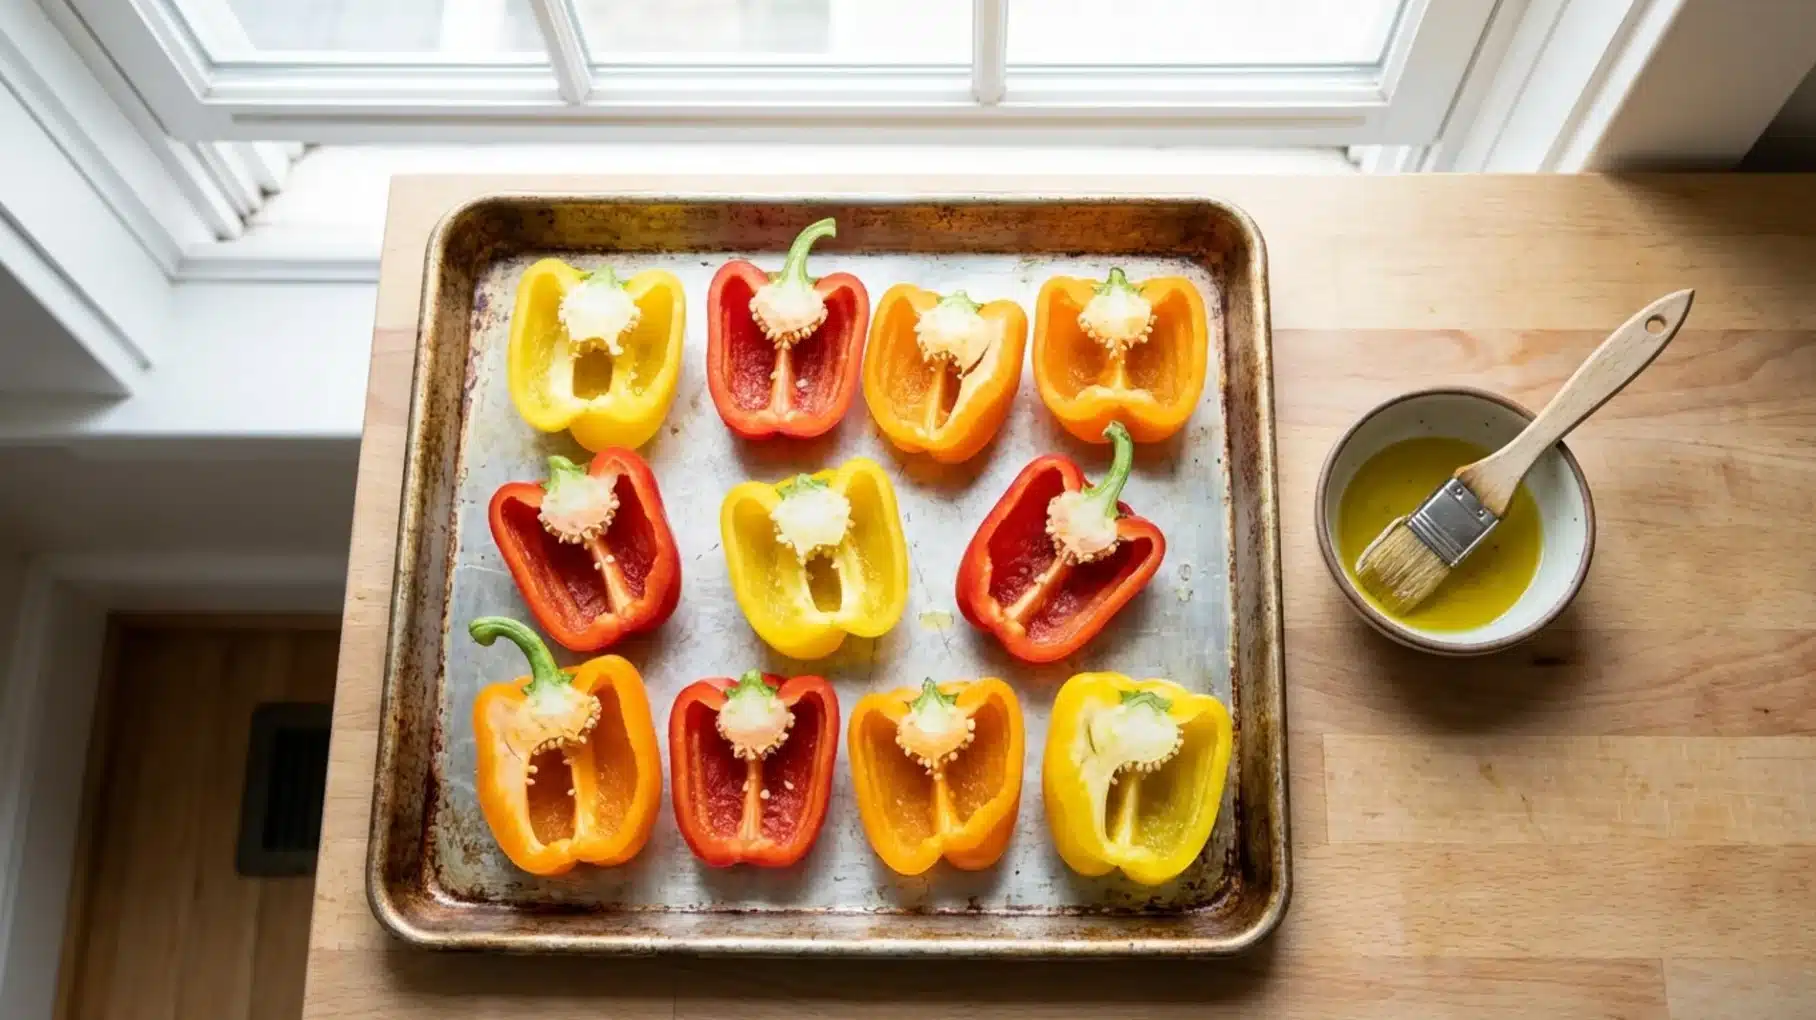
Slice each bell pepper in half lengthwise, then carefully remove the seeds and inner ribs. Lightly brush the halves with olive oil and place them cut-side up on a baking tray.
Step 2: Make the Filling
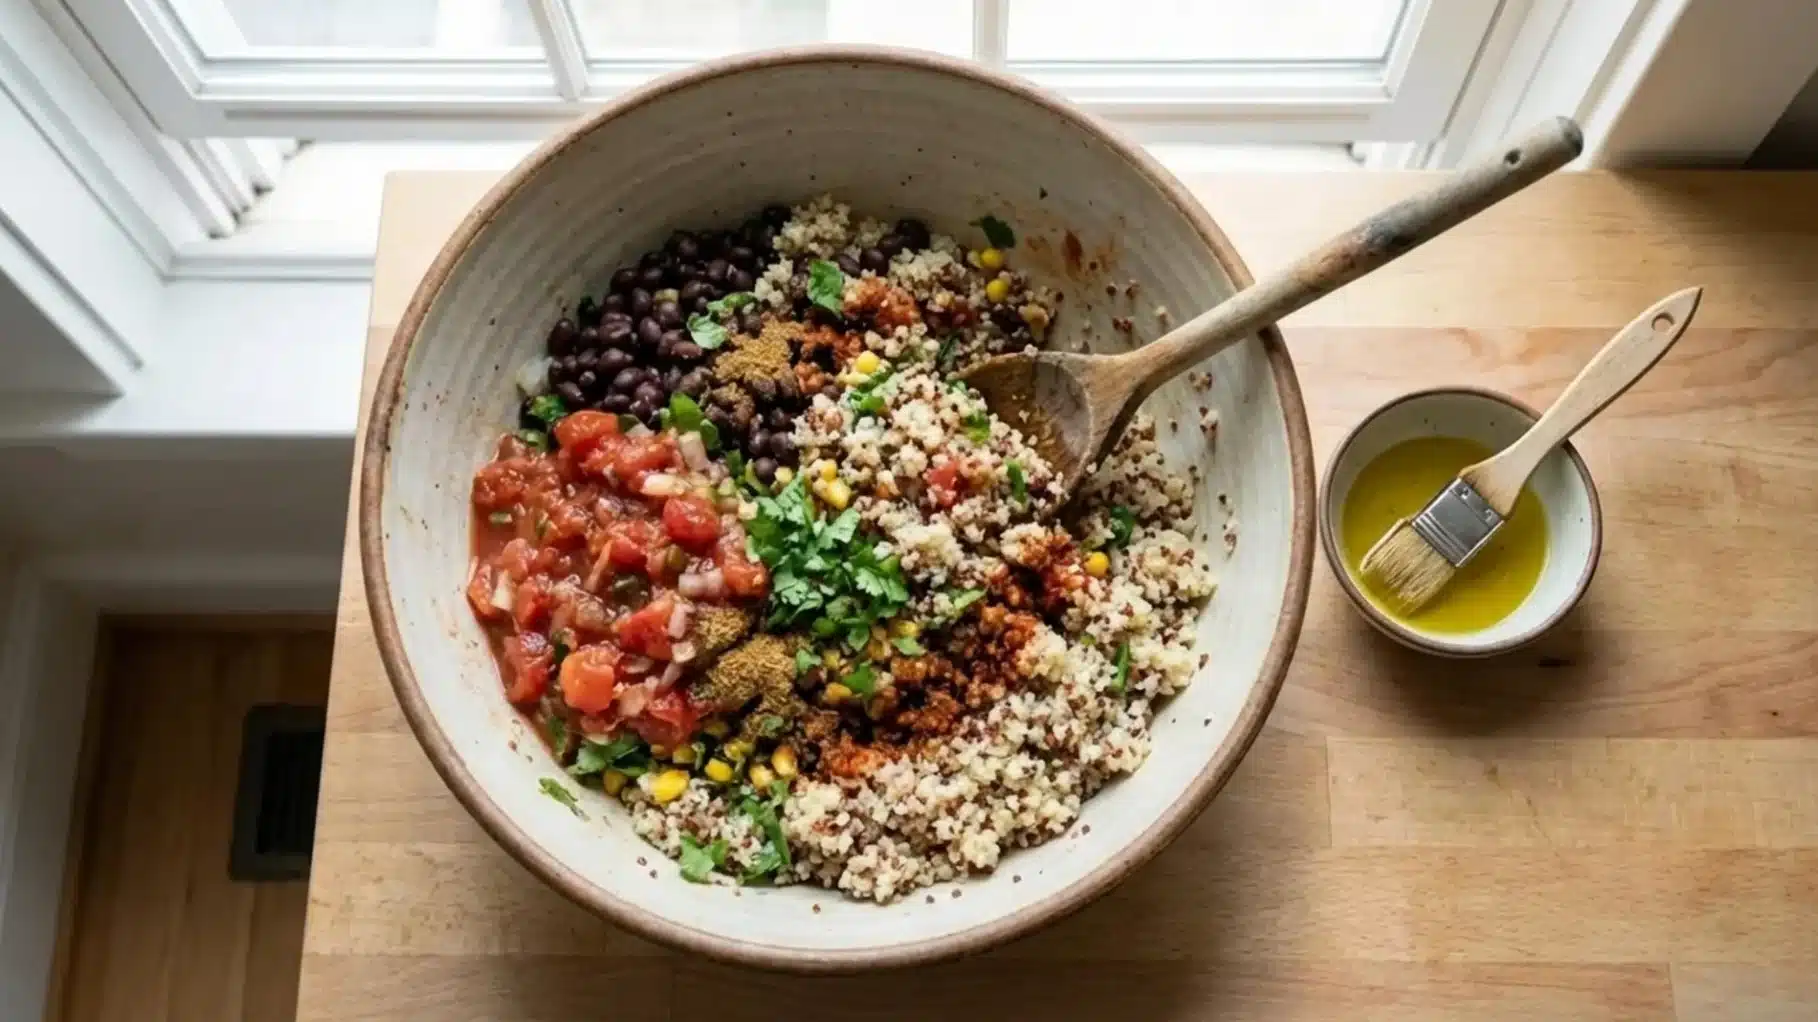
In a mixing bowl, combine cooked quinoa, black beans, salsa, cumin, garlic powder, salt, and pepper. Stir until everything mixes evenly and the quinoa coats the beans and spices thoroughly.
Step 3: Fill the Pepper Halves
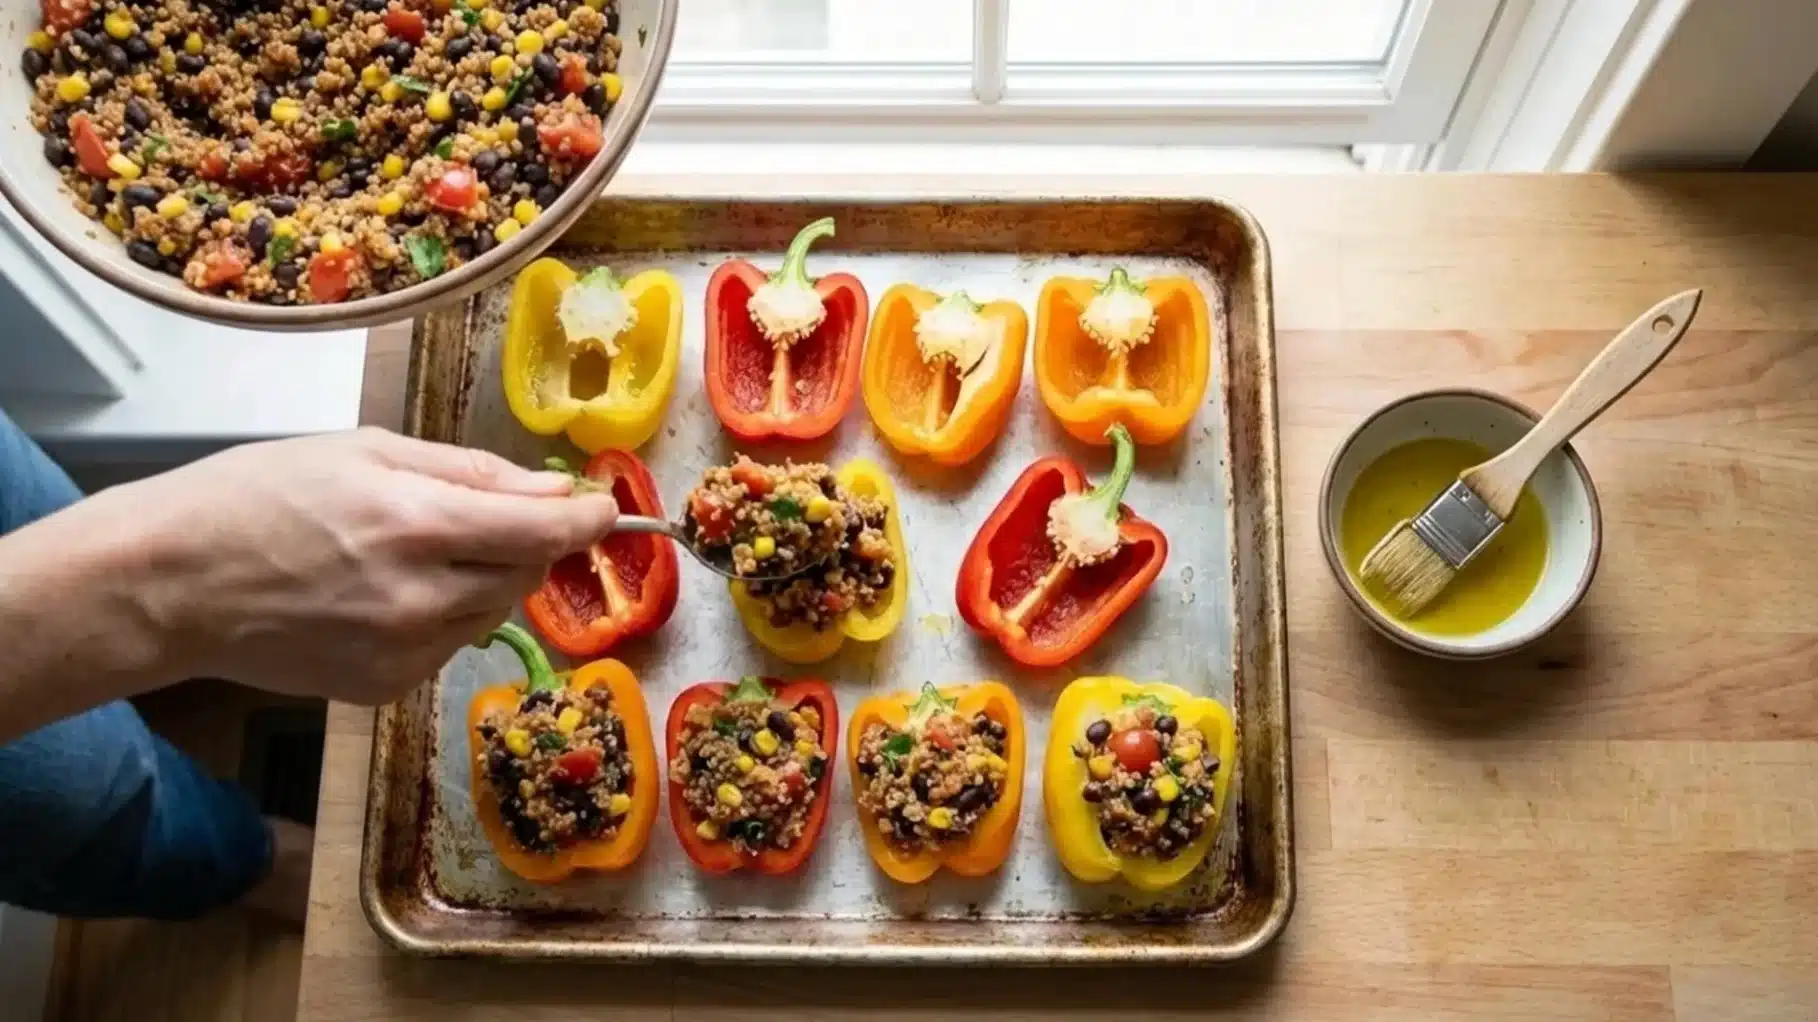
Spoon the quinoa mixture evenly into each bell pepper half, gently pressing the filling down so it holds together while baking and slightly mounding the top for a hearty portion.
Step 4: Bake the Peppers
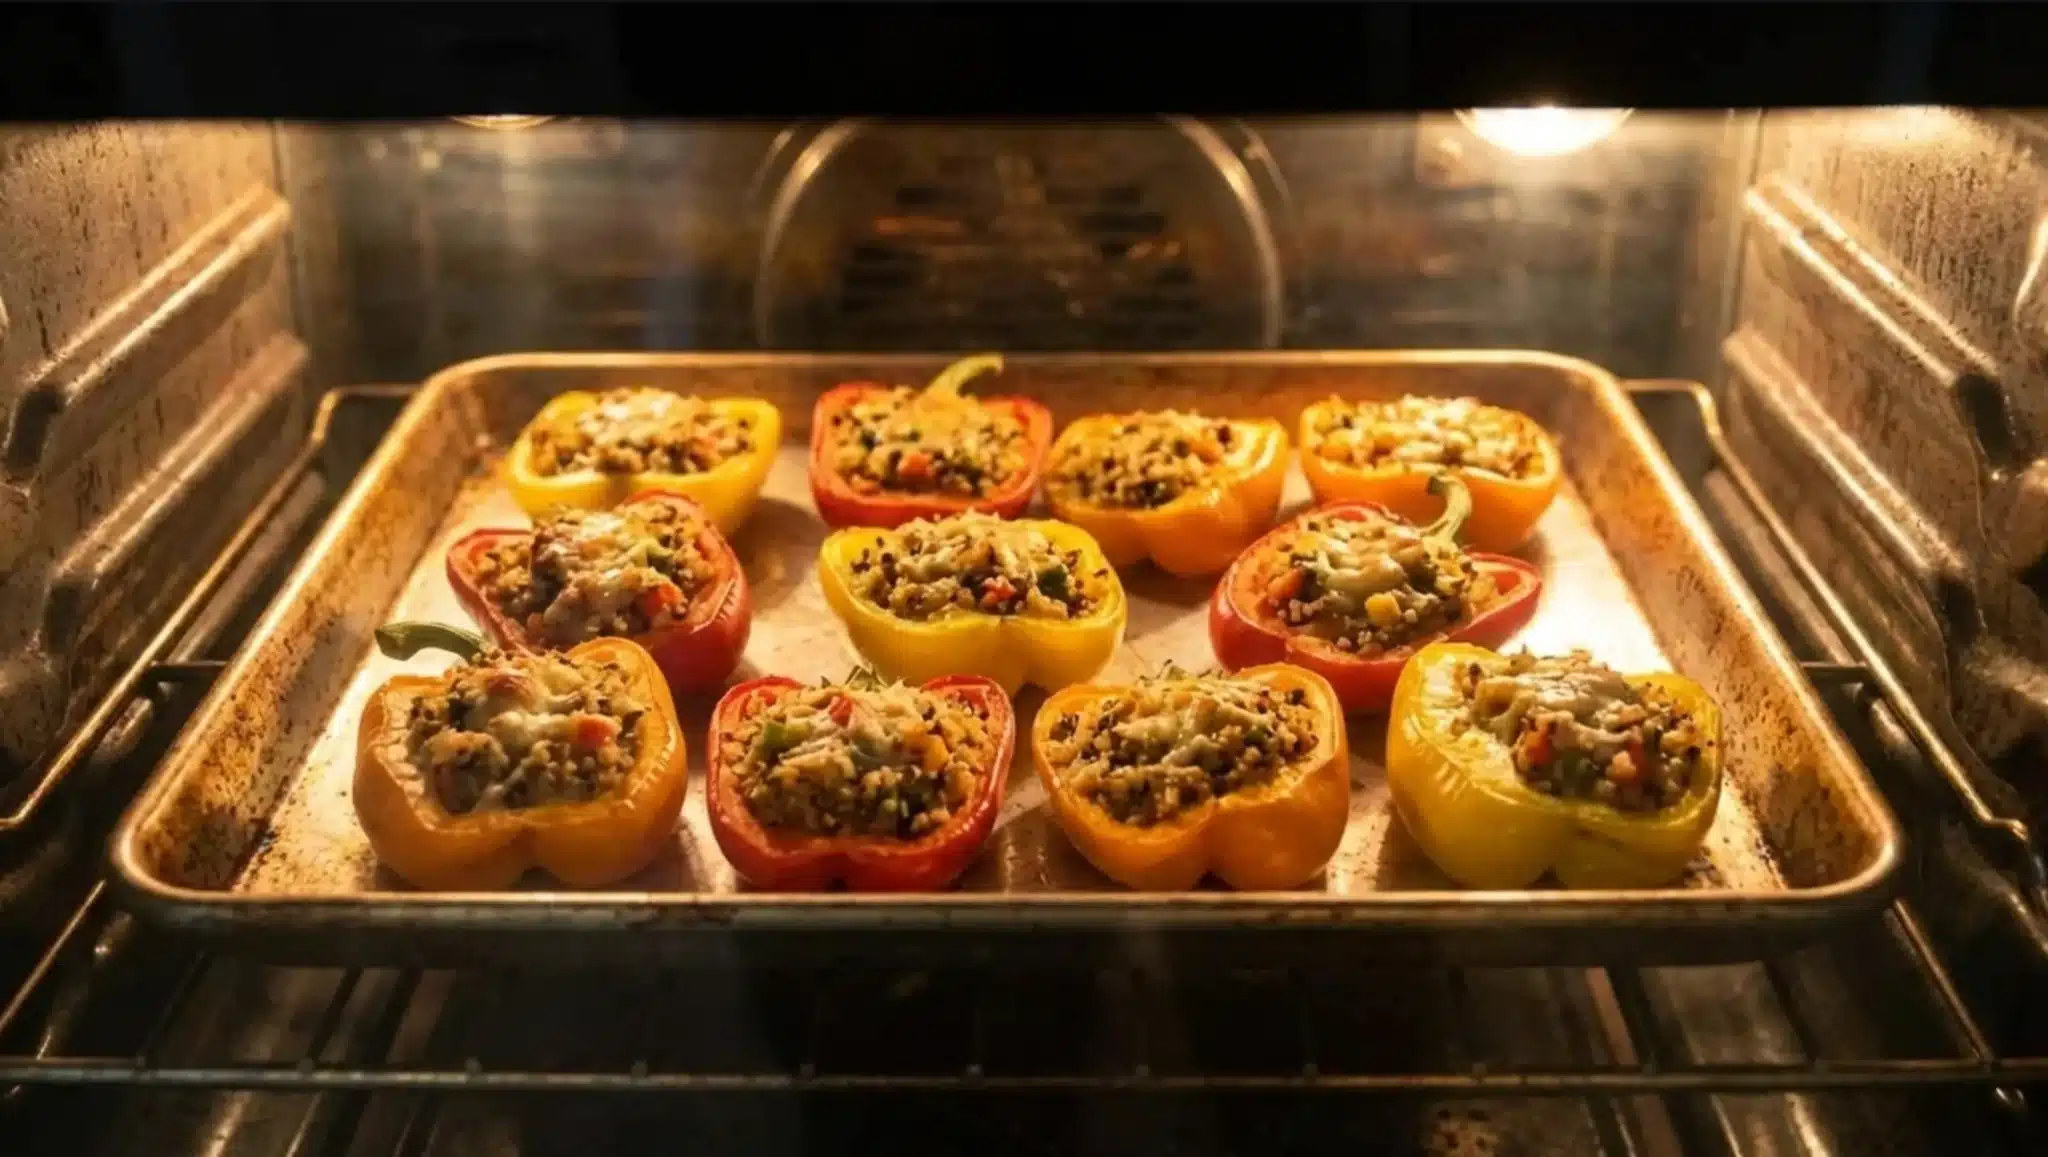
Place the stuffed peppers into a preheated oven at 375°F and bake for about twenty minutes. The peppers soften slightly while the filling warms through and develops light golden spots.
Step 5: Rest and Serve
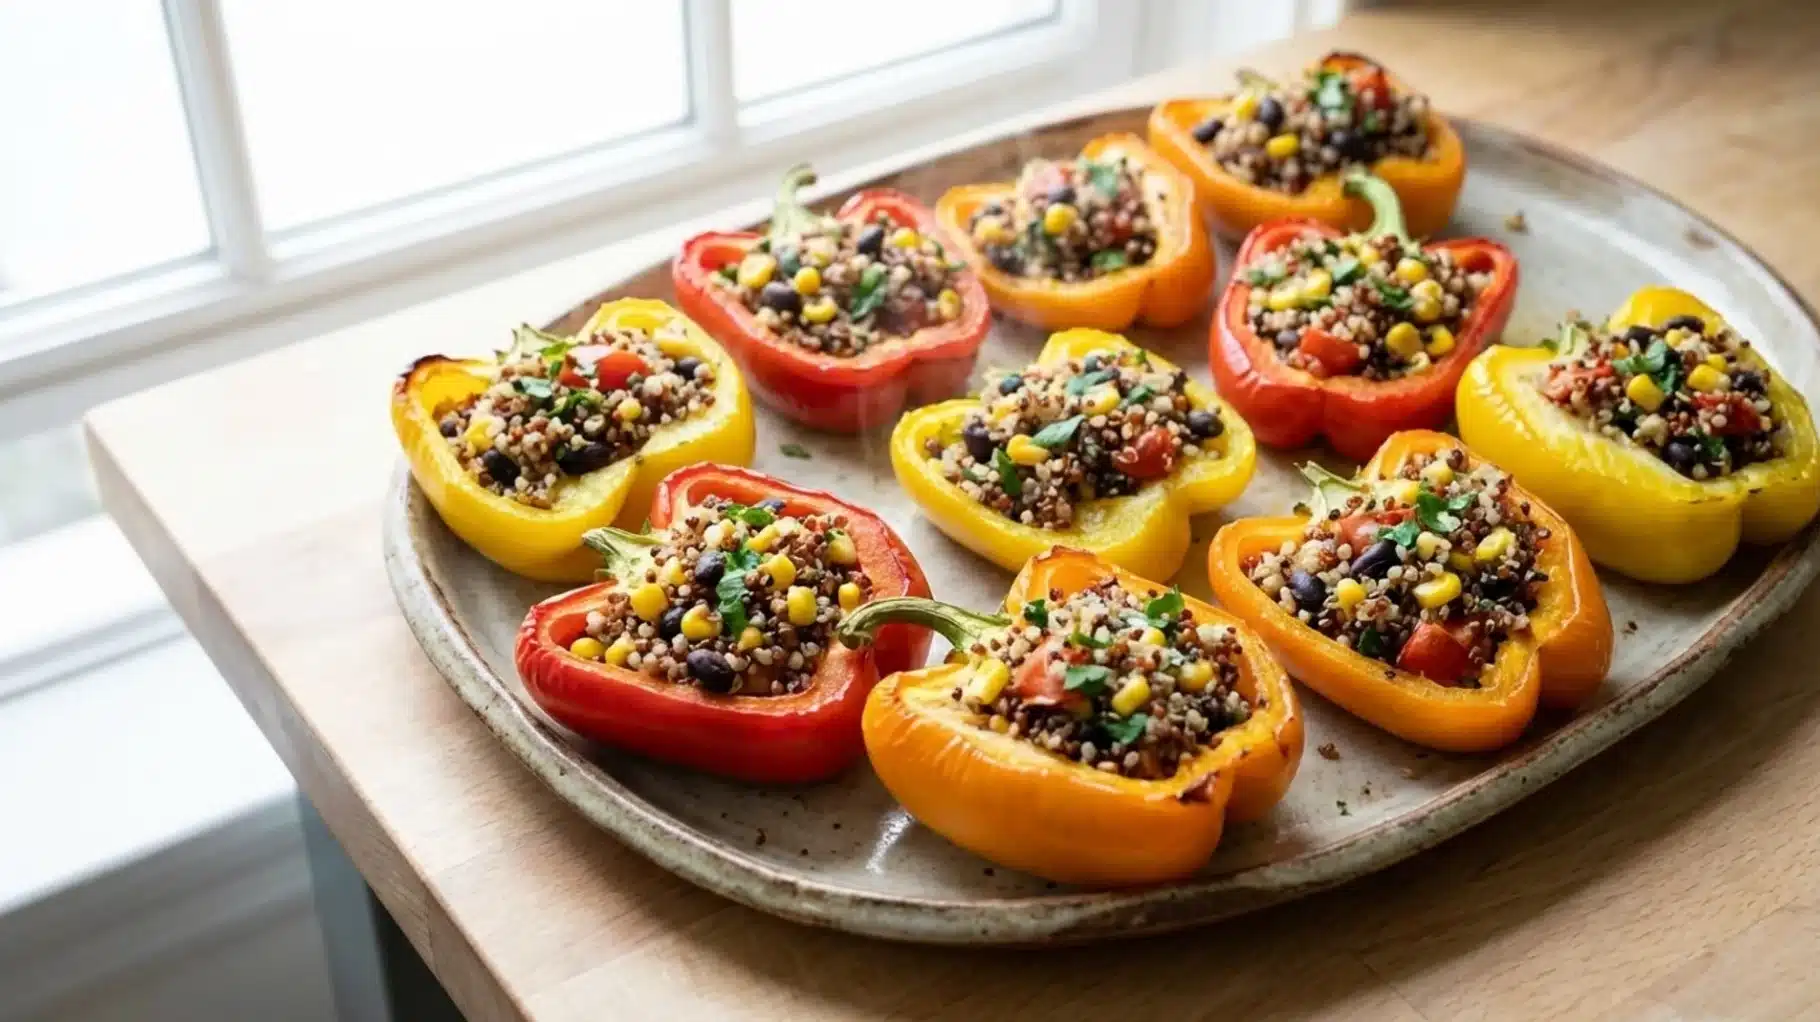
Remove the peppers from the oven and allow them to cool for a few minutes before serving. This short rest helps the filling firm slightly, so every bite stays neatly packed.
Final Thoughts
I often make these pepper cups when I want a snack that actually keeps me full instead of reaching for something else an hour later.
A batch sits nicely in my fridge for several days, so grabbing a quick bite becomes effortless during busy afternoons. You can warm them quickly in the microwave or enjoy them cold straight from the container.
Once you try them, your snack routine may feel much easier. Simple ingredients, solid nutrition, and real staying power make these little pepper cups worth keeping ready all week. Drop a comment below and share your thoughts.
